Installation & connections – Red Lion MDC User Manual
Page 33
-31-
INSTALLATION & CONNECTIONS
Installation Environment
Before installing the MDC into the panel, the user should first become
familiar with the unit. Also, it may be desirable to program the unit and set the
appropriate DIP switches for the application. When programming is
complete, all parameters are saved in non-volatile memory. The Program
Disable DIP switch used with an external User Input, set for the program
disable function, provides various levels of security to prevent accidental or
unauthorized programming changes. The MDC should be installed in a
location that does NOT exceed the maximum operating temperature and
provides good air circulation. Placing the unit near devices that generate
excessive heat should be avoided.
The bezel should be cleaned only with a soft cloth and neutral soap
product. Do NOT use solvents. Continuous exposure to direct sunlight may
accelerate the aging process of the bezel.
Do not use tools of any kind (screwdrivers, pens, pencils, etc.) to operate
the keypad of the unit.
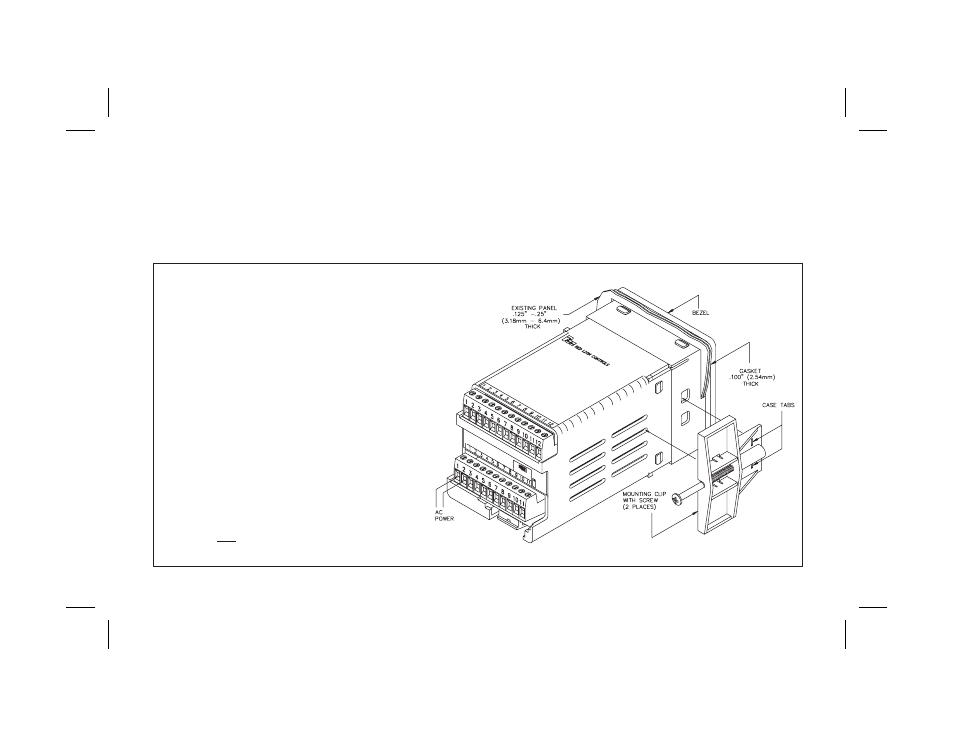
Installation
The unit meets NEMA 4X/IP65 requirements for indoor use
when properly installed. The units are intended to be mounted into
an enclosed panel with a gasket to provide a watertight seal. Two
mounting clips and screws are provided for easy installation.
Consideration should be given to the thickness of the panel. A
panel that is too thin may distort and not provide a watertight seal.
(Recommended minimum panel thickness is 1/8² [3.2 mm]). The
recommended clearance behind the panel for mounting clip
installation is 3.0² (6.45 cm) H x 4.0² (10.16 cm) W.
After the panel cut-out is completed and deburred, carefully
apply the gasket to the panel.
DO NOT APPLY THE ADHESIVE SIDE OF THE
GASKET TO THE BEZEL.
Insert the unit into the panel as depicted in the drawing.
Thread the screws into the clips until the pointed end just
protrudes through the other side. Install each mounting clip by
inserting the case tabs of the clip into the holes located on either
side of the bezel.
Then snap the rear end of the clip into the case and slide the
clip towards the rear of the unit, locking it in place. Tighten the
screws evenly to apply uniform compression, thus providing a
watertight seal.
Caution: Only minimum pressure is required to seal the
panel. Do NOT overtighten mounting screws.