Creating a font character pattern, Basic font creator operations, Step 2 creating a font character pattern – Brother PE-DESIGN 8 User Manual
Page 222
220
Basic Font Creator Operations
Step 2
Creating a font character
pattern
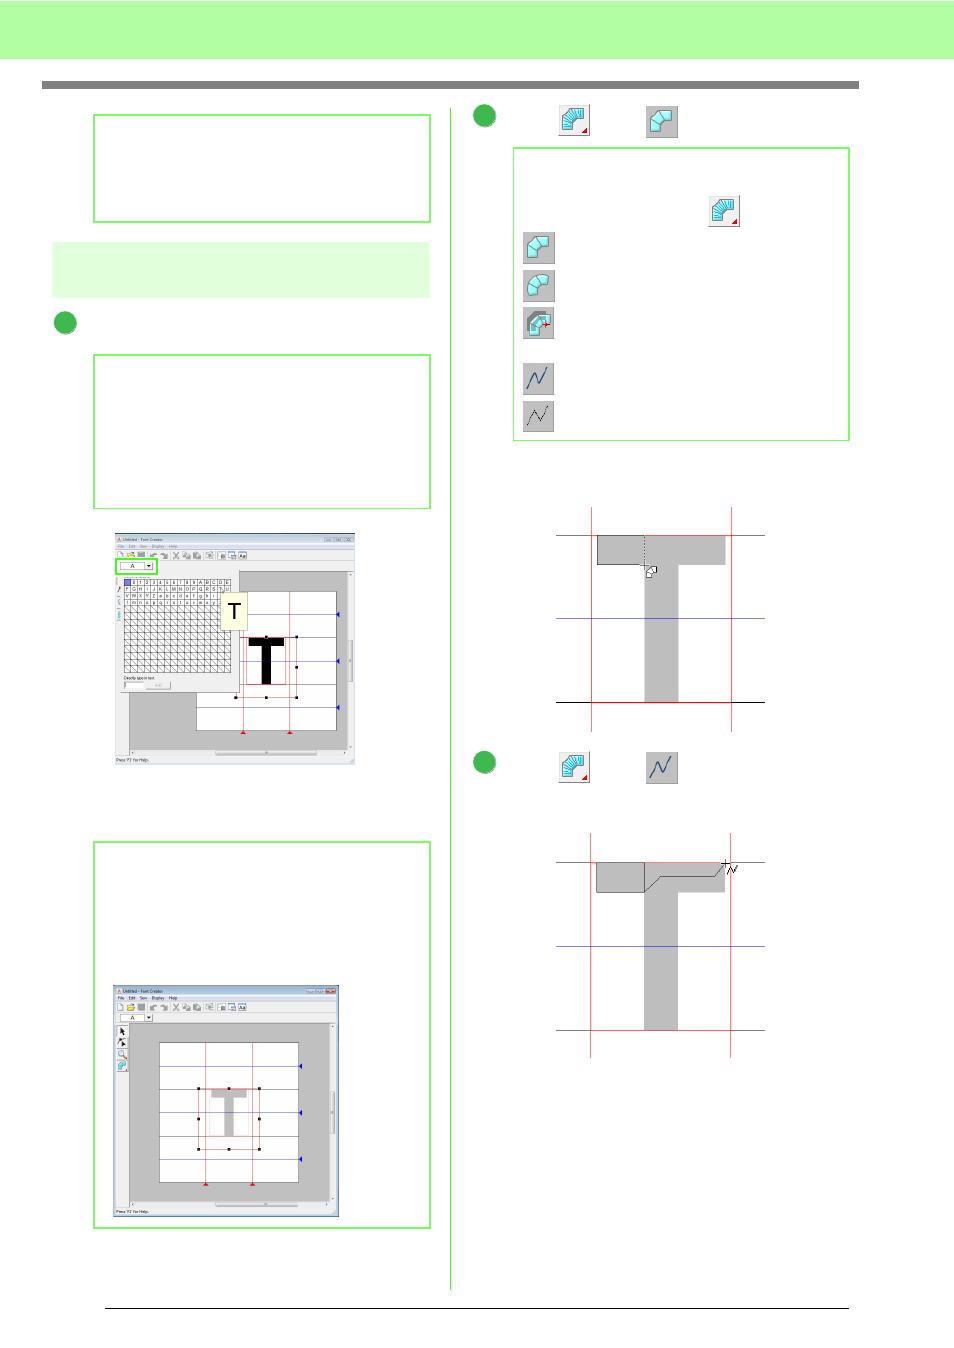
Select the character to be created.
Click the Select character button, and then
select the character to be created. For this
example, select “T”.
Click ,
then .
Click in the Design Page to specify points 1
(start point) through 4.
Click ,
then .
And then click point 5 through 7.
b
Memo:
If the handles have disappeared, right-click
the image, and then click Modify Template in
the menu that appeared.
b
Memo:
The character must be registered in the
Select Character table in order for the
created font to be used in Layout & Editing.
c
“Entering text/Small text” on
page 80.
b
Memo:
The template image that remains in the work
area can be displayed or hidden, or a faded
copy of the image can be displayed. For this
example, click Display-Display Template,
then select 25%.
1
b
Memo:
Five buttons appear when
is clicked.
: Straight block-type pattern
: Curved block-type pattern
: Semi-automatically created straight
block-type pattern
: Running-type pattern
: Feed-type pattern
2
2
4
3
1
3
6
7
5