Setting programming functions – Hired-Hand Evolution Series 1200 User Manual
Page 25
Part No. 4801-5331 Rev 2-08
Evolution 1200
25 of 64
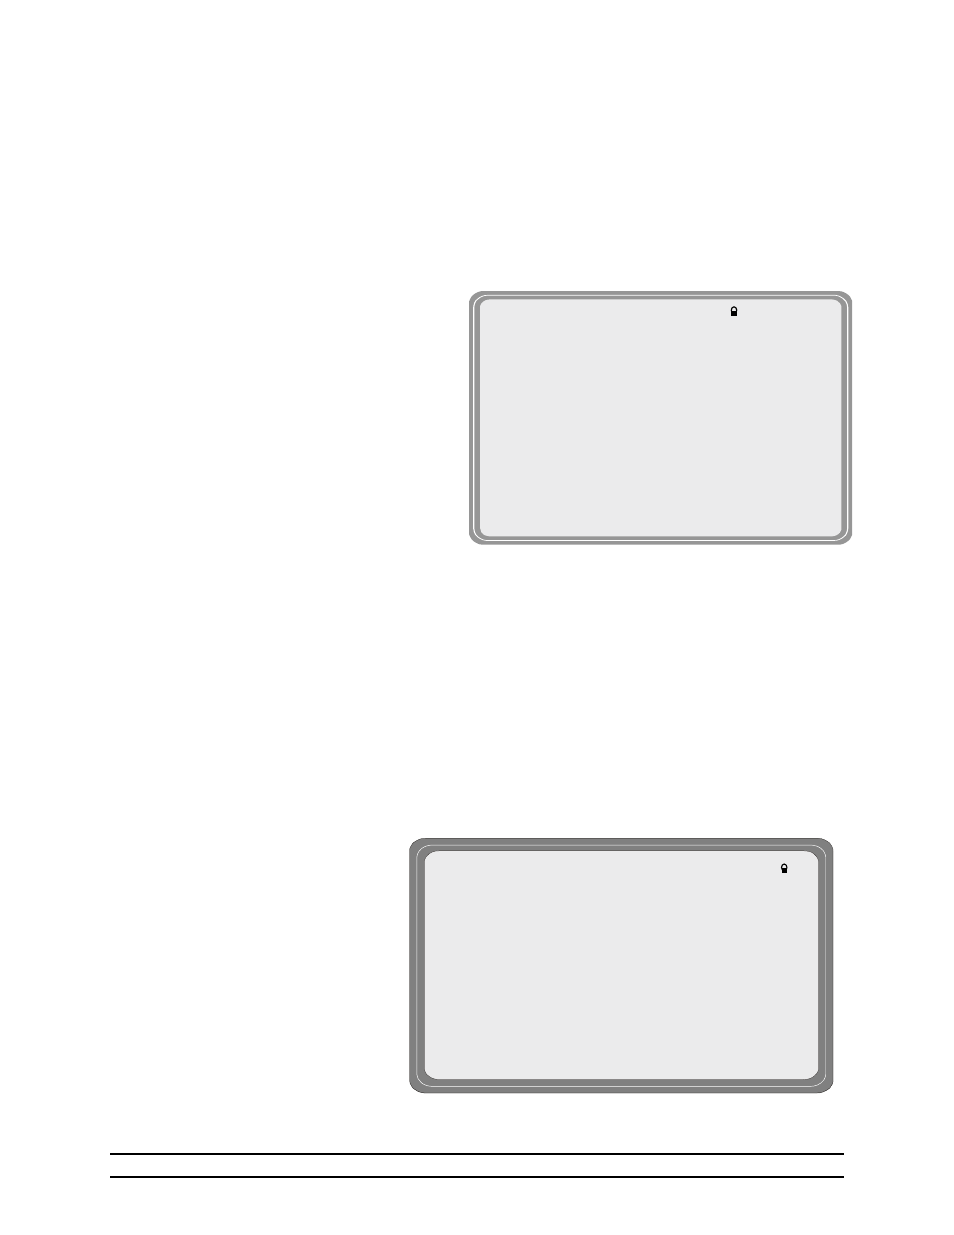
**SENSOR
SETUP**
(1)Room Temperature Sensors = --6-4-2-
(2)ALARM on Outside Sensor Error = Off
(3)SENSOR (4)ENABLED (5)VALUE (6)ADJUSTED
1 ON 77.0 + 3.0°
2 ON 77.0° + 1.0°
3 ON 77.0° +00.0°
4 OFF 77.0° +00.0°
5 OFF 77.0° +00.0°
6 OFF 77.0° +00.0°
7 OFF 77.0° +00.0°
8 OFF 77.0° +00.0°
OUT ---- 77.0° +00.0°
** (1)EV1200 v0.32 **
(2)HHNet Address = 1
(3)Optimum Mode = Off
(3)Growout Start Date = 15 Jun 2003
(4)Preheat Mode = Off
(5)Date = 21 Feb 2007
(6)Day = Wed
(7)Time = 05:20p
(8)Units of Measure = English
(9)Pressure Units = Inches of wc
(10)Water Meter-Pulses Per Unit - 100
7. Setting Programming Functions
This section discusses the programming screens for the Evolution 1200.
7.1 General
Settings
The General Settings contains parameters that usually only need to be set once when the system is
installed. To change any of these parameters, use the EDITOR arrows to navigate through the list and the
plus (+) and minus (-) buttons to increase or decrease the values.
(1) Software Version – The software version currently in use.
(2) HHNET Address - HH.Net permits up to
32 controllers to be addressed on a single
communications port of a personal
computer (PC). In order for the computer
to recognize the communications from the
controllers, each controller must have a
unique network address. For example: If
you have an Evolution 1200, a Stage
Master, and two Power Vents you would
need to set the Evolution to address 1, the
Stage Master to address 2, the first Power
Vent to address 3, and the second Power
Vent to address 4. Valid settings are: 1 -
32. (You do not have to address the
controllers in any particular order.)
(3) Optimum Mode – On or Off. Refer to
Section 7.6.2
for a detailed description of
the Optimum Mode features and options
(4) Growout Start Date - Set the date desired
to start the grow-out. Evolution will use this
date to control the feed, light clock and
ramping functions. NOTE: This must be
set to the first day of grow-out. Your
historical data will start at this date and go
for 99 days or until the next grow-out date
has been set and then that date has been
passed.
(5) Preheat Mode – On or Off
(6) Date – The current date as Day/Month/Year.
(7) Day – The current day of the week.
(8) Time – The current time.
(9) Units of Measure - The units of measure can be
selected as English or Metric.
(10) Pressure Units - Pressure units can be selected
as inches of water column or Pascals.
(11) Water Meter-Pulses Per Unit – HH standard
water meter is one pulse per gallon. Select a
value from 1 to 100.
7.2 Temperature
Sensors
The Sensor Set-Up screen is used to set the temperature sensors that will be used to determine the internal
temperature of the building.
(1) Room Temperature Sensors -
Select any or all of the internal
sensors. Your alarm high and low
limits will use these sensors that are
displayed here.
For example: If you wanted to
display sensors 1,2,3,4,5 for your
room temperature it would look like
this: "---54321" If you turn all the
sensors off (by setting it to -) the
control would use the outside
temperature and it would look like
this: "Outside-".
(2) Alarm on Outside Sensor Error – On or Off.
(3) Sensor – Identifies up to eight inside and one outside sensor.
(4) Enabled – Yes or No.