Hired-Hand Electro Mechanical Controls (Relay-Switches): Photohelic Gauge User Manual
Directions for replacing the, Important! important! important! important, Important gauge wiring changes
Hired-Hand, Inc. • 1733 Co Rd 68 • Bremen, AL 35033 • Phone 256-287-1000 • Fax 256-287-2000
Sheet Part No. 4801-5203
Page 1 of 1
Reason for Wiring Changes
Dwyer, the manufacturer of the Photohelic Gauge, has upgraded the gauge in order to comply
with Underwriters Laboratory (UL) Approval Standards. This upgrade has caused changes in
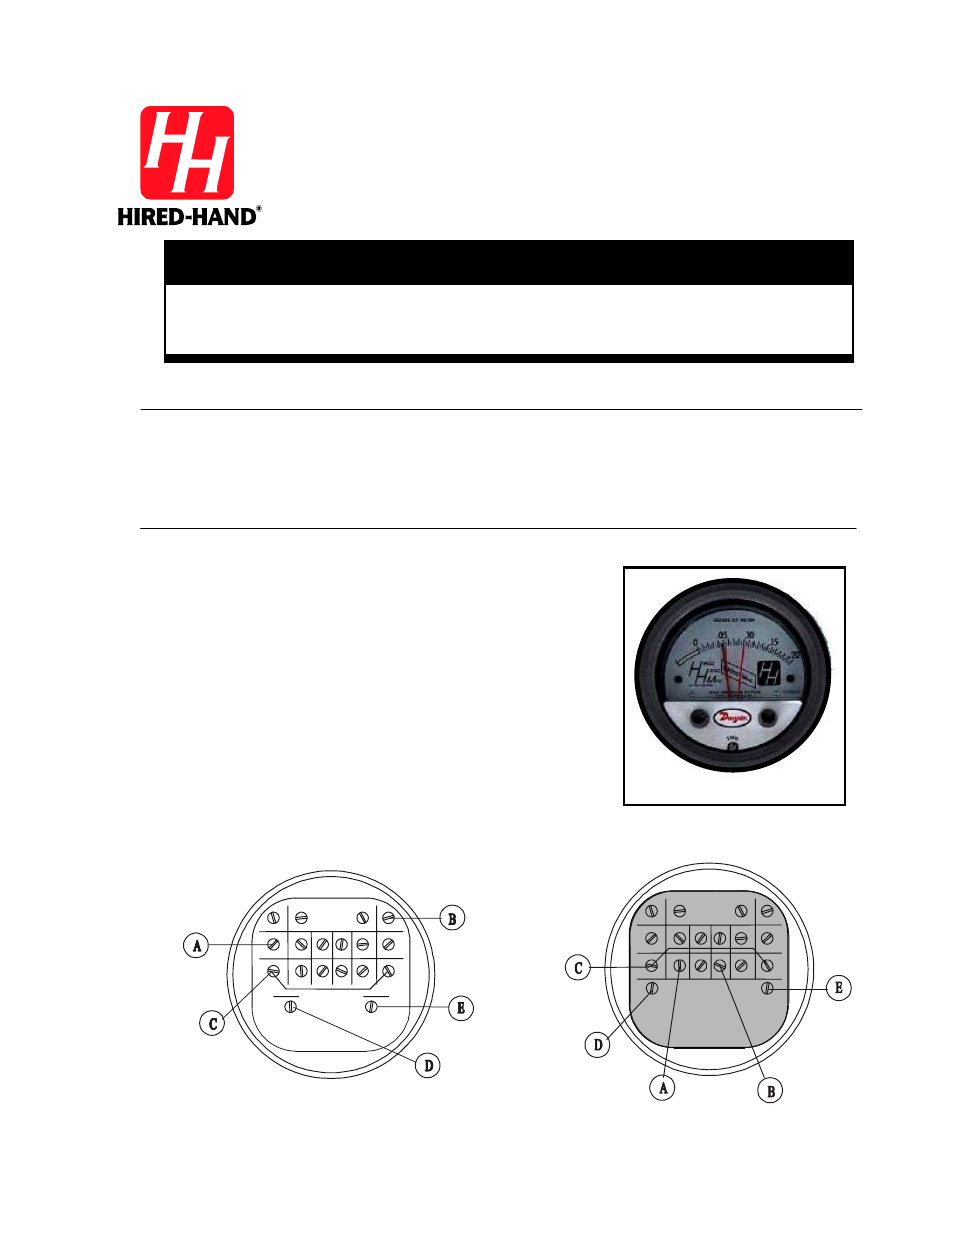
the wiring of the gauge. The old gauge has a gray wiring template and is shown in Figure 1.
The new version has a black wiring template and is shown in Figure 2 below.
Directions
Figure 2. New Model Gauge
(1) Disconnect all electrical power to the Photohelic
Power Vent.
(2) Open the case and note the type of gauge to be
replaced. The old version has a gray wiring template
and is shown in Figure 1. The new version has a
black wiring template and is shown in Figure 2.
(3) Before removing the existing gauge, label the existing
wires using the Labels A, B, C, D and E as shown for
the gauge to be replaced.
(4) Disconnect the wires from the old gauge and remove
the gauge.
(5) Install the new gauge and attach the wires using the
labeling from Step 3 and the wiring diagram from
Figure 2.
Directions for Replacing the
Directions for Replacing the
Directions for Replacing the
Directions for Replacing the
Photohelic Gauge
Photohelic Gauge
Photohelic Gauge
Photohelic Gauge
!
!
!
! Important!
Important!
Important!
Important!
IMPORTANT GAUGE WIRING CHANGES!
!
Figure 1. Old Model Gauge
Photohelic Gauge