IEI Integration PICOe-GM45A User Manual
Page 86
PICOe-GM45A Half-Size CPU Card
Page 86
paste between the CPU and the heat sink is important for optimum
heat dissipation.
To install the cooling kit, please follow the steps below.
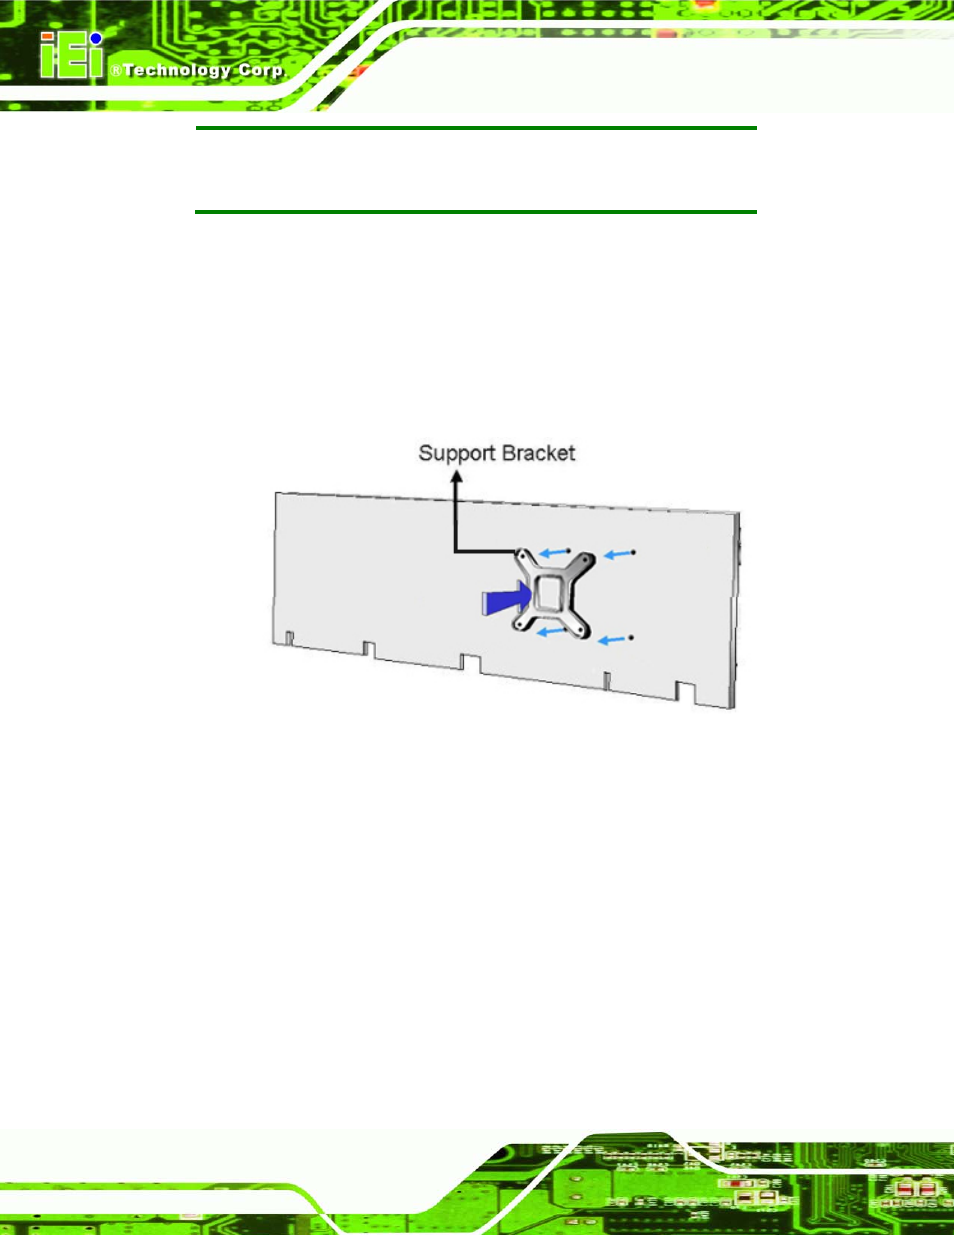
Step 1:
Install the cooling kit bracket. A cooling kit bracket is installed on the rear of
the CPU card. Align the bracket with the four retention holes at the back of the
CPU card. Once properly aligned, insert four retention screws from the front of
the CPU card.
Figure 5-3: Cooling Kit Support Bracket
Step 2:
Open the lever at the top of the heat sink. Lift the lever at the top of the
cooling kit to loosen the cooling kit clamps.
Step 3:
Secure the cooling kit. Gently place the heat sink and cooling kit onto the CPU.
Make sure the hooks are properly secured to the bracket. To secure the cooling
kit, close the top lever.
Step 4:
Connect the fan cable. Connect the cooling kit fan cable to the fan connector
on the PICOe-GM45A. Carefully route the cable and avoid heat generating chips
and fan blades.
Step 0: