IAI America RCA2-SD4N User Manual
Page 57
8. Installation
49
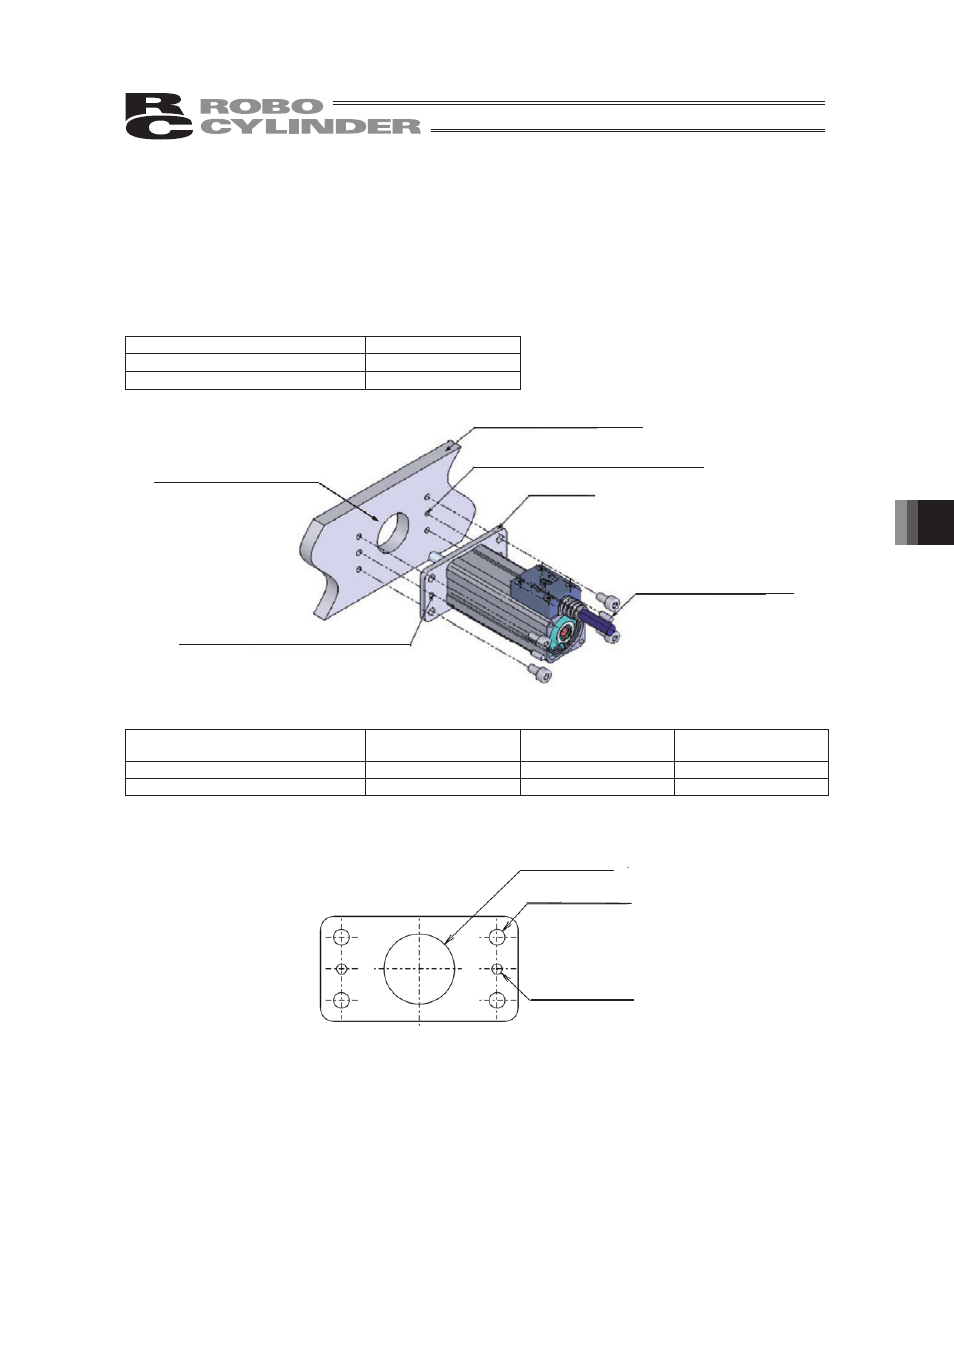
8.2.3 Installation of Flange
Provide a flange-shaped sheet and install the actuator onto this sheet from the back.
• Use the nut on the actuator rod to install the actuator onto the flange.
• Secure the flange with the actuator mounting plate using screws.
If positioning is required, insert positioning pins.
(Note) For the actuator mounting hole in the actuator mounting plate, provide a hole larger than
the dimension of the nut so as to provide a clearance for the nut.
Type
Nut diameter
RN3NA, RN3N (Lead screw, ball screw)
I
34
RN4NA, RN4N (Lead screw, ball screw)
I
30.8
Actuator mounting hole
Actuator mounting plate
Positioning pin hole (2 locations)
Positioning pin hole (2 locations)
Flange
Positioning pin (2 pcs)
Installation of actuator and flange
Type
M
Width across flats
Maximum tightening
torque
RN3NA, RN3N (Lead screw, ball screw)
M20 × 1.0
29
49.4N·m
RN4NA, RN4N (Lead screw, ball screw)
M24 × 1.0
32
76.8N·m
(Reference drawing of flange)
4-φ4.5 through
(M4)
2-reamed hole
φ
20 or 24HB