Wheel cleaning, Chuck cleaning, General maintenance – Darex XPS-16 Operating Instructions User Manual
Page 80
80
Wheel cleaning:
Always clean a brand new wheel be-
fore using. Wheels are packaged in
rust preventative oil and will load up
if not cleaned before grinding.
These wheels are maintenance free from truing
and dressing but will need cleaned periodically.
•
Remove the wheel from the unit.
•
Saturate the wheel with any type of oil-less
solvent, such as Automotive Brake Cleaner.
•
Use a soft bristle brush and lightly brush the
saturated wheel loosening the impacted grind-
ing particles.
•
Re-saturate the wheel to flush out any loos-
ened debris.
NOTE: If after cleaning the wheel,
(page 57)
the drills still discolor or burn, the wheel life
may be exhausted and the wheel will need
replaced.
Refer to page 57
for wheel change
instructions.
After a wheel change, verify and/or recali-
brate Material Take Off (MTO):
1. Use a 3/8 HSS standard twist drill, measure
the length of drill before sharpening.
2. Call up the Darex #1 file and sharpen a drill.
3.
After sharpening the drill, measure the drills
new length. MTO should be approxi-
mately .005-.007.
4.
If incorrect, adjust using Grinding
Wheel Adjustment Screen Selector
Refer to page 28 & 59
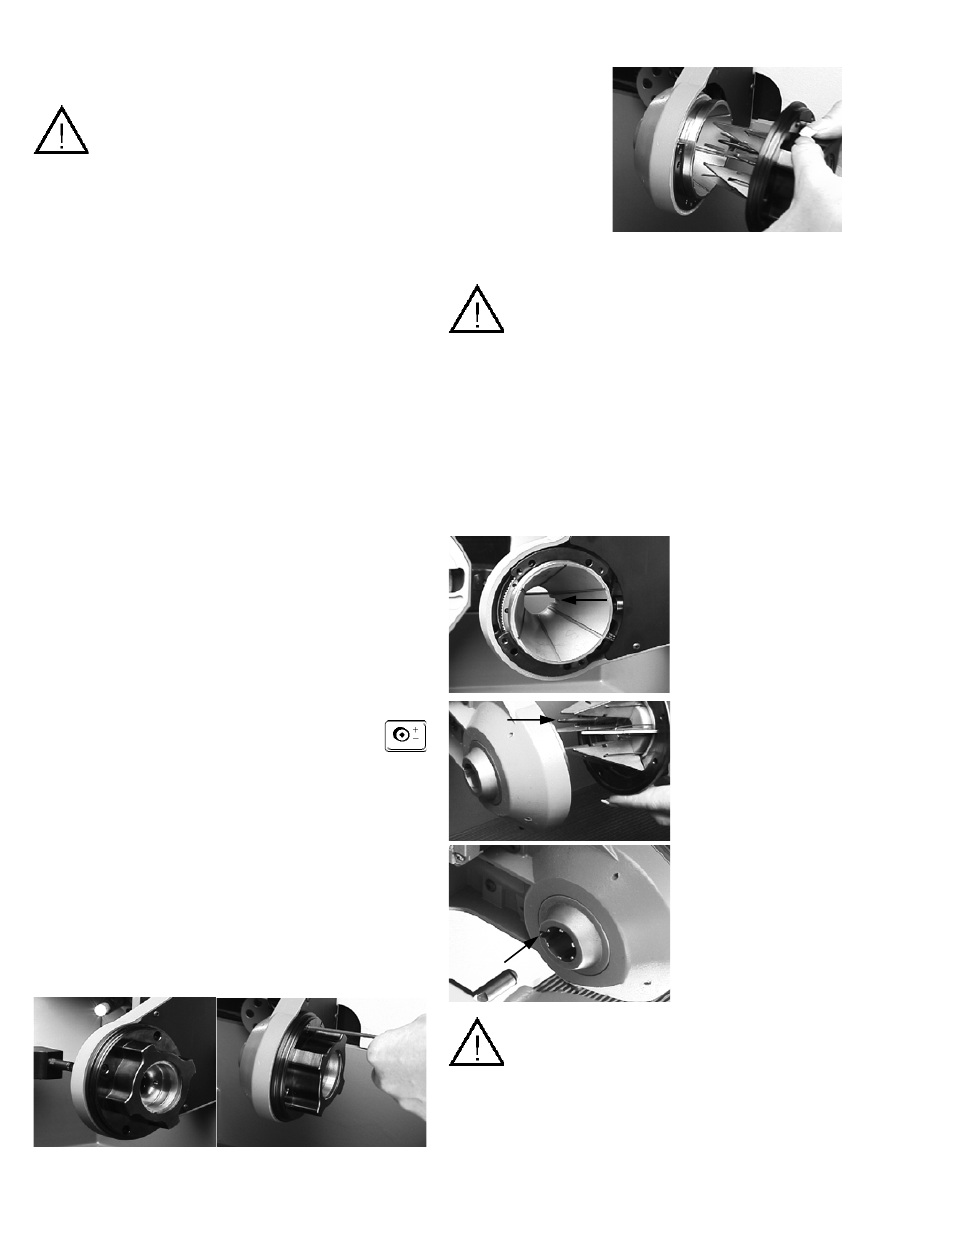
Chuck cleaning:
Push the emergency stop button, unplug unit from
power supply and use a “LOCK OUT” “TAG OUT”
procedure.
•
Open chuck jaw assembly to its largest capac-
ity range. Use a 3mm hex key wrench to re-
move the 4; 4mm Allen head cap screws from
the chuck knob.
•
The chuck jaw
assembly can
now be re-
moved through
the back of the
chuck spindle
assembly.
•
Brush away any grinding residue.
DO NOT REMOVE JAWS FROM
SPRINGS OR SPRINGS FROM SPIN-
DLE INSERT. JAWS ARE POSITIONED AND
THEN GROUND TO MATCH THE SPINDLE
CONE HOUSING. BY REMOVING, YOU MAY
COMPROMISE THE PRECISION OF THE
CHUCK!
TO REINSTALL:
•
Reinstall in reverse order, making sure the di-
ameter detect rod is oriented in spindle cor-
rectly.
If diameter detector rod is reinstalled im-
properly, damage to rod will occur.
•
After chuck jaw assembly is properly replaced
and before the 4mm bolts are in place, open
or close the chuck knob until the bolt hole pat-
General Maintenance