Chuck information, Xps-16 chuck, Caution – Darex XPS-16 Operating Instructions User Manual
Page 47: Morse taper drills, Step drills, End mill shank drills, Chuck jaw disassembly/ assembly & maintenance
47
XPS-16 CHUCK
The XPS-16 6-jaw chuck system was designed
with accuracy and simplicity in mind. As a result,
the XPS-16 chuck allows you to quickly change
from the largest drill diameter to the smallest in
seconds. The accuracy of the chuck will produce
drill concentricity exceeding ANSI, NAS 907 & ISO
10899 standards. The chuck holds drills from .118
to .629 (3mm to 16mm).
NOTE: Be careful when chucking up carbide
drills. Center the drill in the jaws as you tighten
the chuck. It is helpful to rotate the drill as you
close the chuck. Be careful not to over tighten
the chuck on small drills
.
Caution:
When sharpening a 5/8 drill
make sure the drill is secure after tightening
the chuck.
Morse Taper drills:
To secure a Morse Taper drill in the chuck, it is
necessary for the drill to have a minimum flute
length of 3.500 inches. The taper will then be free
from the grasp of the jaws, eliminating interfer-
ence with the larger tapered shank. The other op-
tion for holding these types of drills is a split bush-
ing. Bush the body of the drill up to, or larger
than, the interfering diameter. Any drill held in a
bushing will need to be sharpened on Manual
Mode in the “Diameter Selector” screen .
You must type in the actual body diameter
of the drill to be sharpened, regardless of
the shank or bushing size.
Step drills:
In the case of a Step drill, you can sharpen the
pilot of that drill but it must be sharpened on
Manual Mode in the “Diameter Selector”
screen. Type in the diameter of the pilot to
be sharpened, regardless of the shank size.
End Mill shank drills:
Typically, an End Mill shank drill has a shank di-
ameter larger than the body of the drill.
Many End Mill shank drills can be sharpened on
the XPS-16, depending on the length of the flute
verses the length of the shank. If holding these
types of drills on the shank they must be sharp-
ened on Manual Mode in the “Diameter
Selector” screen .
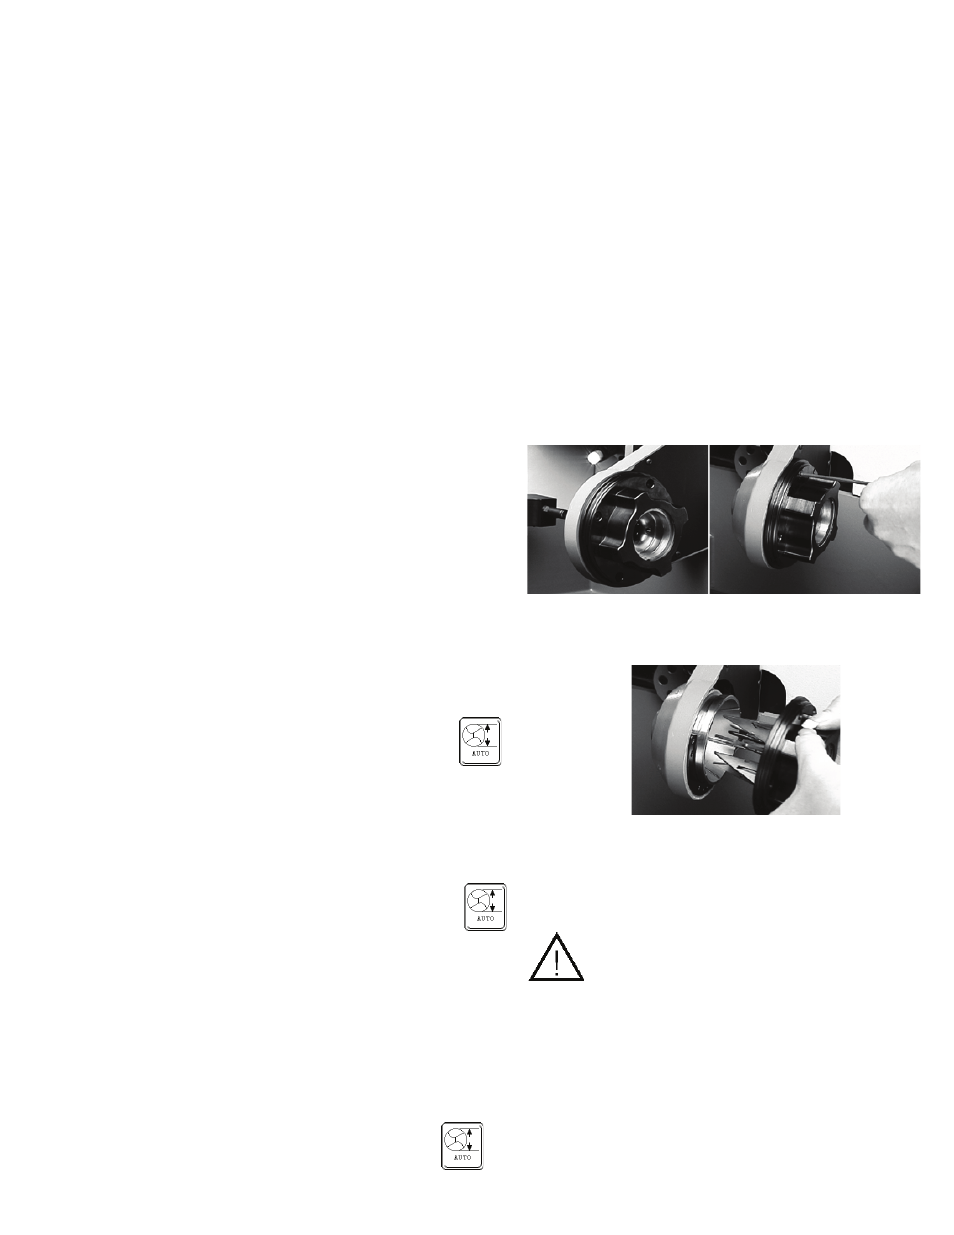
CHUCK JAW DISASSEMBLY/
ASSEMBLY & MAINTENANCE
The vacuum system that comes with your sharp-
ener will help reduce the amount of maintenance
necessary, however, periodically the Chuck Jaw
Spindle Insert assembly should be removed and
any grinding residue brushed away.
1. Push the emergency stop button, unplug unit
from power supply and use a “LOCK OUT”
“TAG OUT” procedure.
2. Using the chuck knob, open chuck jaw assem-
bly to its fully open capacity range.
3. Using a 3mm hex key, remove the four 4mm
Allen head cap screws from the chuck knob.
4. The chuck jaw assembly can now be removed
through the back of the chuck spindle assem-
bly.
5. Brush or blow away any grinding residue.
6. Unthread the brass, Jaw Spring Retainer as-
sembly from the chuck knob. Clean external
threads on brass and internal threads in chuck
knob thoroughly.
Make sure locating dots are in alignment,
after threading the jaw retainer back into
the chuck knob. If so, unthread brass re-
tainer and rotate 180°, rethread into chuck knob.
NOTE: Do not remove jaws from chuck jaw
spindle insert; the concentricity of the chuck
will be compromised.
CHUCK INFORMATION
Chuck Information