Spark science learning system – PASCO SPARKvue ver.2.0 User Manual
Page 15
n
"SPARK Science Learning System": 3
n
n
n
n
n
"Connecting a bluetooth device": 6
n
"Connecting multiple interfaces to your computer": 8
SPARK Science Learning System
The SPARK Science Learning System (SPARK) includes ports for two PASPORT
sensors, a temperature probe, and a voltage probe. When it is not connected to a com-
puter, the device records data and displays it on its own screen; however, when con-
nected to a computer, it passes data through to be recorded and displayed on the
computer. It is powered either by its AC adapter, or by its rechargeable battery.
n
"Connecting a SPARK Science Learning System to your computer": 3
n
"Connecting sensors to the SPARKvue": 4
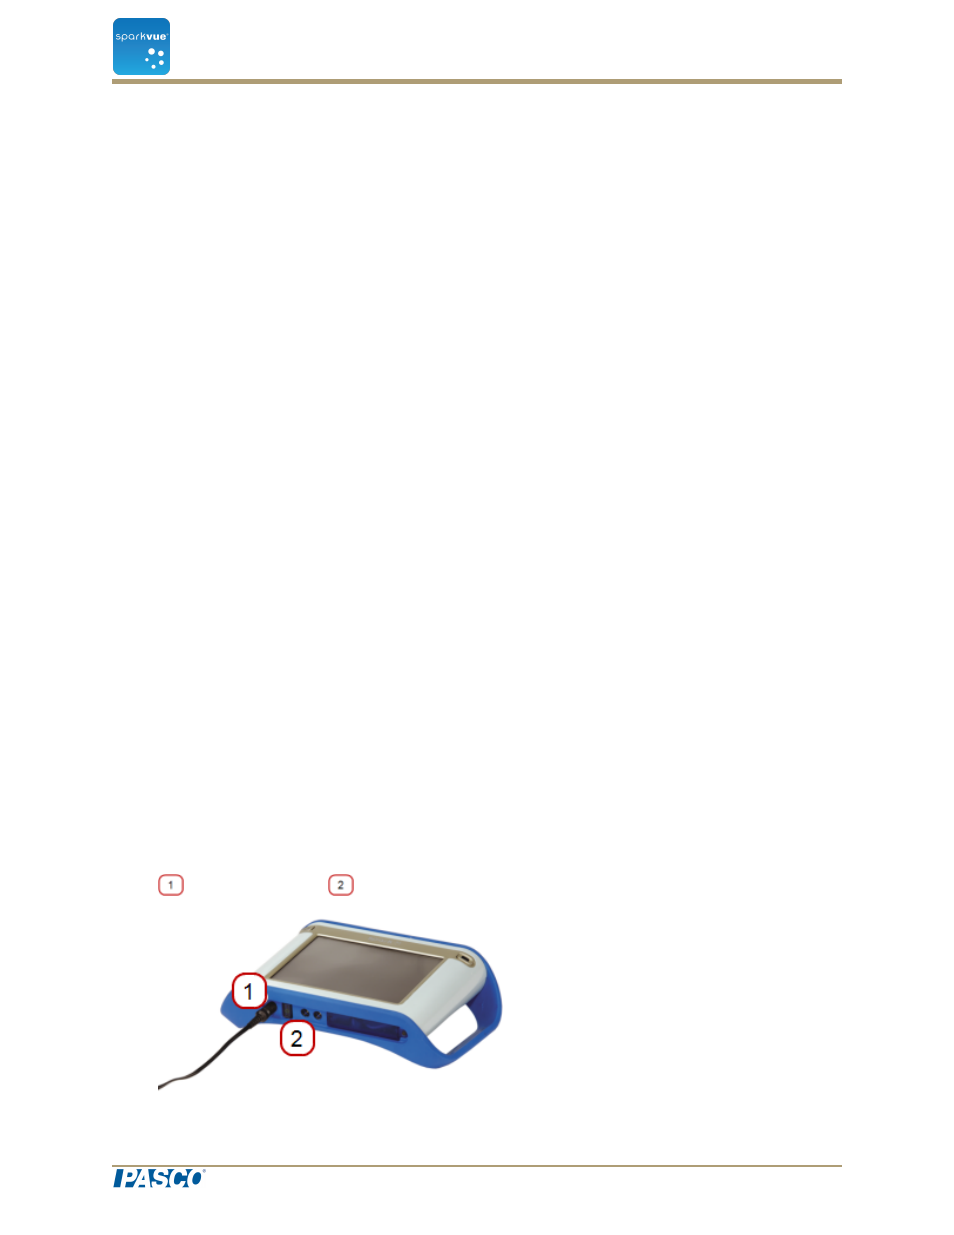
Connecting a SPARK Science Learning System to your computer
1. Use an A-to-mini-B USB cable (such as PASCO part PS-2528) to connect the
smaller USB port of the SPARK to a USB port on your computer (or a USB hub
connected to the computer).
2. Connect the AC adapter (included with the SPARK) to a wall outlet and to the AC
adapter port on the bottom of the SPARK.
You can skip this step if the SPARK battery is charged and you wish to let it run on
battery power.
3. Press and hold the power button.
The SPARK turns on and boots up.
AC adapter port.
Power button.
Document Number: 012-11074D
3
SPARKvue
®
2 Starting an experiment
Connecting an interface and sensors to your computer