Run a range of samples – Luminex 200 User Manual with LDS 1.7 Software User Manual
Page 84
Luminex 200 User Manual for LDS Version 1.7
x
MAP Technology
6 - 26
PN 89-00002-00-150 Rev. A
9. Remove the microtiter plate from the plate holder.
10. Click Retract from the toolbar to retract the plate holder.
Run a Range of Samples
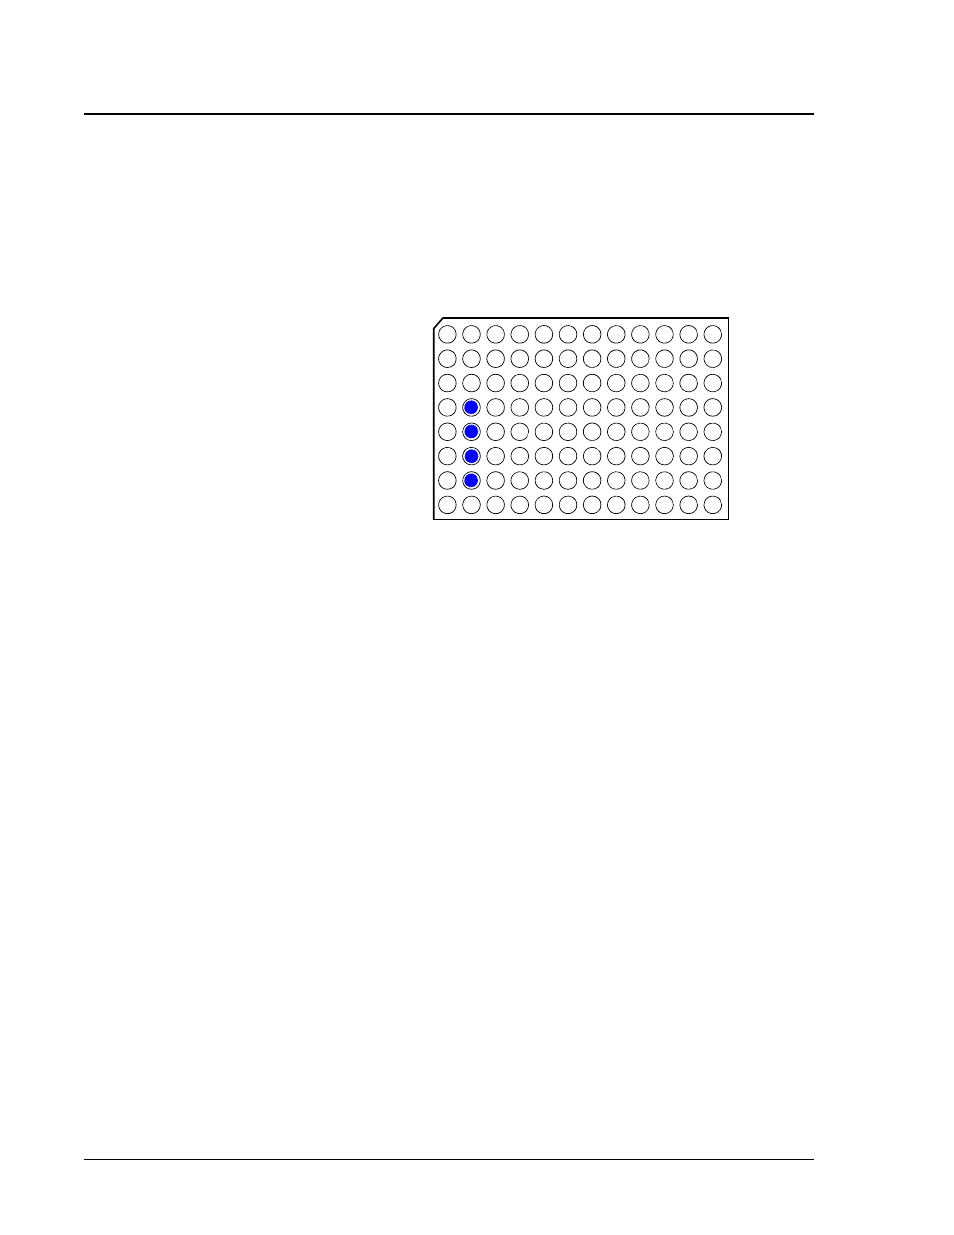
You can run a specific range of samples, as demonstrated in the
highlighted samples shown below.
Figure 6-31. Sample Plate with Row of Samples
To run a range of samples on a plate, follow these steps:
1. Create the session for this run.
2. Click Eject from the toolbar to eject the plate holder.
3. Place a 96-well microtiter plate on the plate holder.
4. Click Retract from the toolbar to retract the plate holder.
5. Click Settings and set the number of samples to the number of
the last sample that you want to read, then click OK.
To find the number of the last sample, start counting with well
A1, and count down an entire column. Then move to the next
column. For the example shown, you would set the number of
samples to 15.
6. On the results table part of the acquisition screen, select the sam-
ple where you want to begin collecting sample. For the example
shown, you would highlight well D2.
7. Click Start on the main control screen.
The Luminex analyzer automatically reads the range of samples
beginning with the selected sample.
8. After the samples have been read, click Eject from the toolbar to
eject the plate holder.
A
B
C
D
E
F
G
H
1
2 3
4 5 6 7 8
9
10 11 12