Run an entire plate of samples – Luminex 200 User Manual with LDS 1.7 Software User Manual
Page 83
x
MAP Technology
Data Acquisition
PN 89-00002-00-150 Rev. A
6 - 25
5. In the results table of the new session, highlight the sample
where you want to begin collecting data.
6. Click Start. You can see the progress of data collection on the
histogram and the bar graph. Make sure that the Single box
remains unchecked for continued sample acquisition.
7. After the analyzer finishes collecting data, select Save on the
File menu. The analyzer saves your data in the session folder
you selected when you created the session.
Run an Entire Plate of
Samples
To run an entire plate:
1. Create the session for this run.
2. Click Eject from the toolbar to eject the plate holder.
3. Place a 96-well microtiter plate on the plate holder.
4. Click Retract from the toolbar to retract the plate holder.
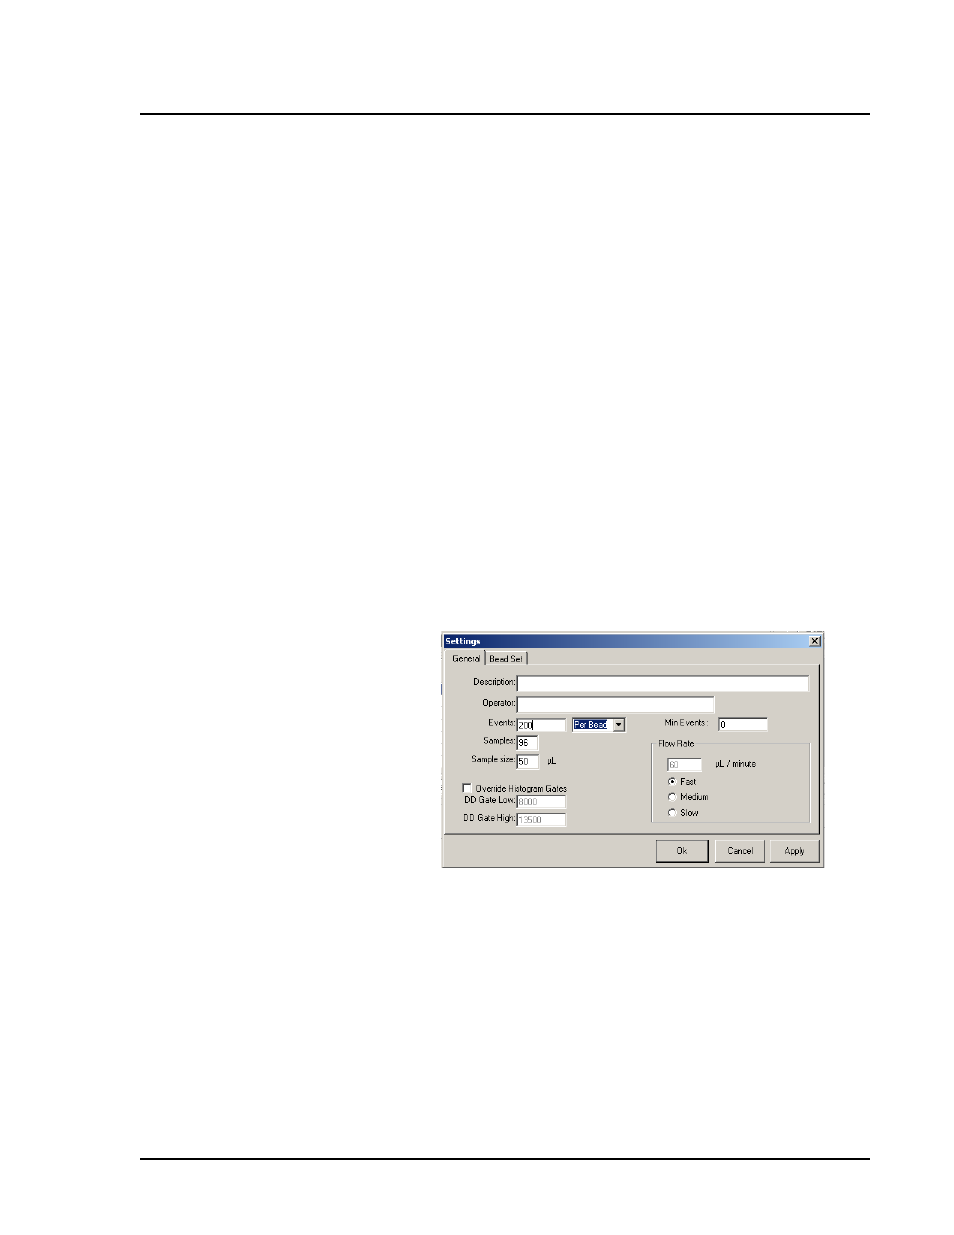
5. Click Settings and make sure the number of samples is set to 96,
then click OK.
Figure 6-30. Settings Dialog Box
6. On the results table in the acquisition screen, highlight the row
for the first sample.
7. Click Start on the main control screen. The Luminex 200 auto-
matically reads the entire plate of samples.
Note:
If the Single box is checked, the software pauses between
samples. Click OK to continue acquiring sample.
8. After all samples have been read, click Eject from the toolbar to
eject the plate holder.
Note:
Ensure that the sample
needle height is adjusted to the
96-well plate in use. See page 7-9