Installing the ise probes – YSI 600DW-B Sonde User Manual
Page 20
Sondes
Section
2
All optic probes, 6026 and 6136 turbidity, 6025
chlorophyll, and 6130 rhodamine WT are installed in the
same way. Install the probe into the center port, seating the
pins of the two connectors before you begin to tighten.
Tighten the probe nut to the bulkhead using the short
extended end of the tool supplied with the probe. Do not
over-tighten.
OPTIC
PROBE
INSTALLATION
TOOL
CAUTION: Be careful not to cross-thread the probe nut.
Note that the YSI 6920DW sondes can accept only a single
turbidity, chlorophyll, or rhodamine WT probe.
INSTALLING THE FREE CHLORINE PROBE, CONDUCTIVITY/TEMP AND pH/ORP PROBES
Insert the probe into the correct port and gently rotate the
probe until the two connectors align.
PROBE INSTALLATION
TOOL
CL2 PROBE
The probes have slip nuts that require a small probe
installation tool to tighten the probe. With the connectors
aligned, screw down the probe nut using the long extended
end of the probe installation tool. Do not over-tighten.
CAUTION: Do not cross thread the probe nut.
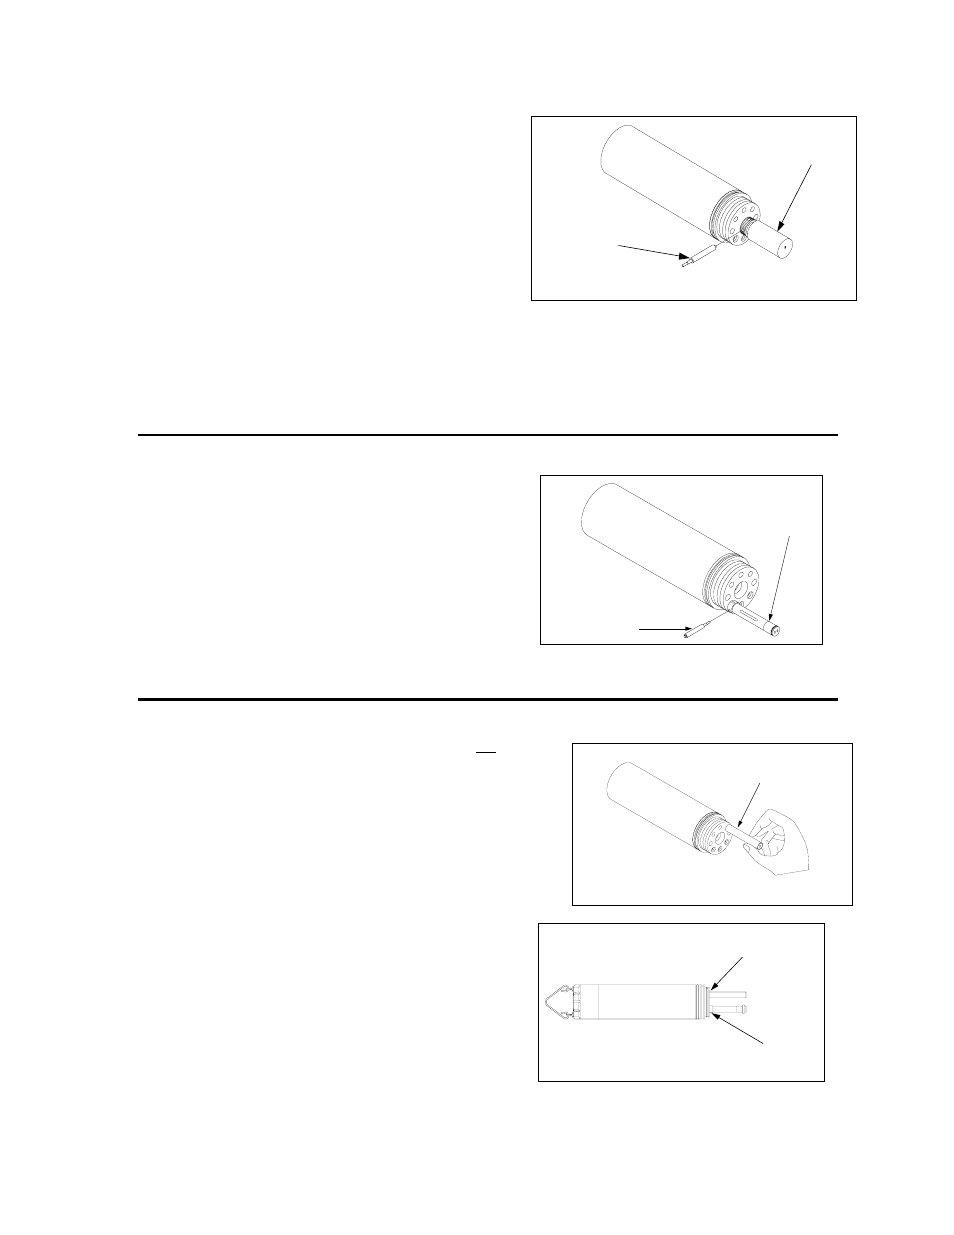
INSTALLING THE ISE PROBES
The Ammonium, Nitrate and Chloride ISE probes do not have slip
nuts and should be installed without tools. Use only your fingers
to tighten. Any ISE probe can be installed in any of the three
ports labeled “3”, “4”, and “5” on the sonde bulkhead. Be sure to
remember which sensor was installed in which port so that you
will later be able to set up the sonde software correctly.
ISE PROBE
NITRATE OR AMMONIUM
INSERT ISE PROBE,
SCREW IN AND TIGHTEN WITH FINGERS.
IMPORTANT: Make sure that the probe nut or probe body
of the ISE probes are seated directly on the Sonde Bulkhead.
This will ensure that connector seals will not allow leakage.
PROBE NUT TO SEAT
ON BULKHEAD
PROBE BODY TO SEAT
ON BULKHEAD
DO PROBE
ISE PROBE
YSI Incorporated
Drinking Water Monitoring Systems Operations Manual
2-13