Type approved balance sealing – Ohaus GT Series Electronic Balance User Manual
Page 74
35
MENUS
TYPE APPROVED BALANCE SEALING
TYPE APPROVED BALANCE SEALING
TYPE APPROVED BALANCE SEALING
TYPE APPROVED BALANCE SEALING
TYPE APPROVED BALANCE SEALING
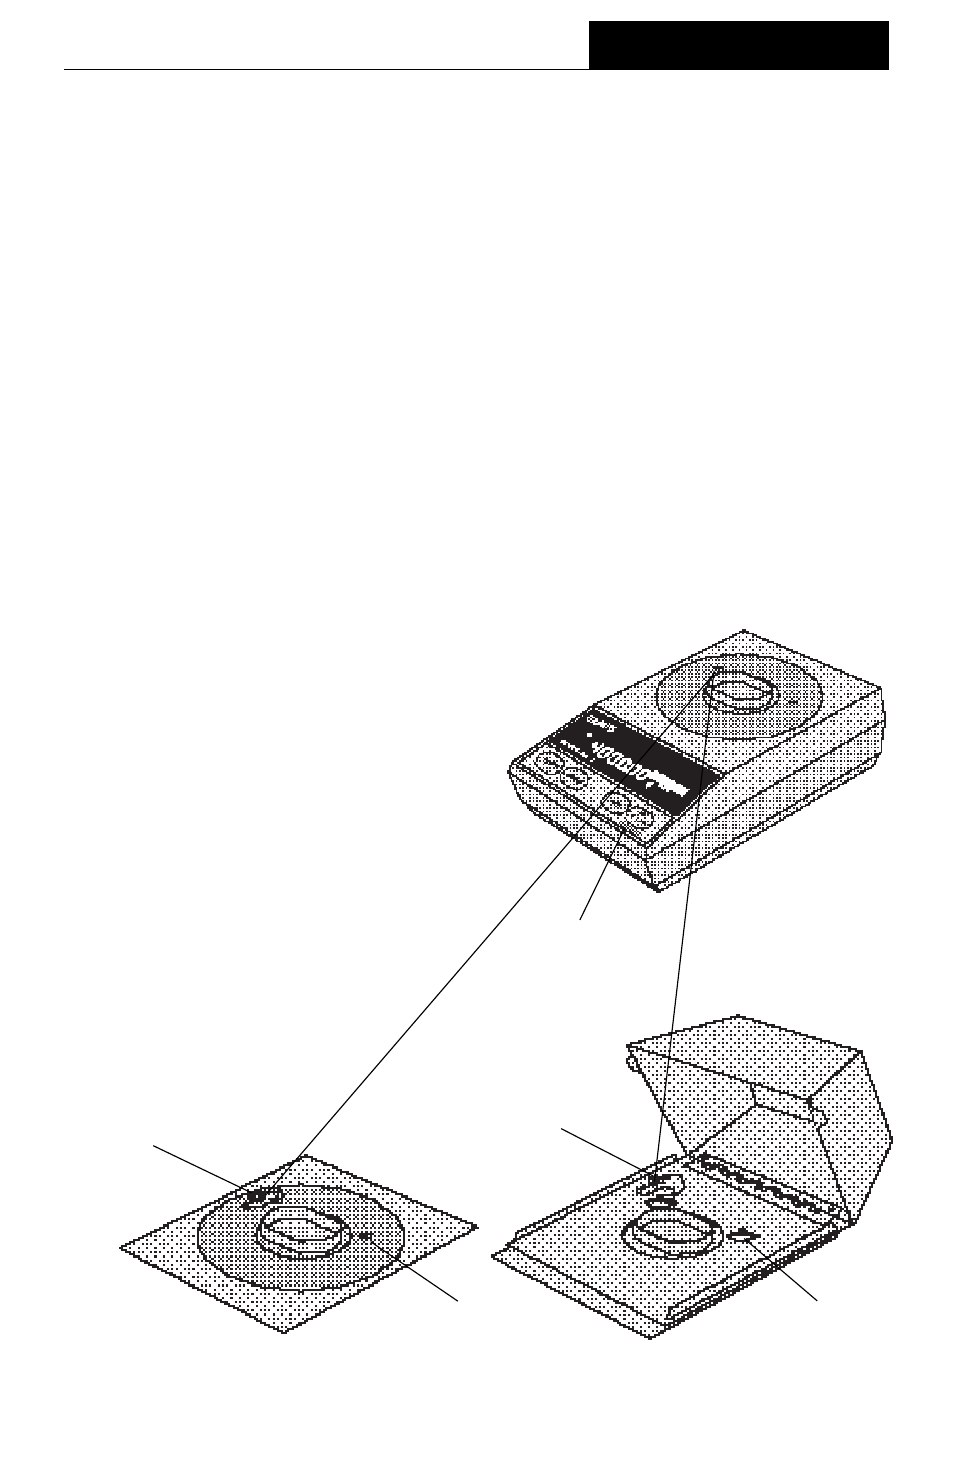
Precision Advanced Electronic Balances with an "E" suffix, may be sealed for type
approved applications. Type Approved balances include a lead seal with wire and
security screw as shown in the figures below. Non Draft Shield equipped models have
two fastening points (lances) and Draft Shield equipped balances have three
fastening points for sealing wire.
Type approved balances are Class II devices, consult local Weights and Measures
officials to determine sealing method requirements.
After the balance has been set up properly and the menus are locked out (see section
titled Type Approved/LFT), proceed as follows to seal the balance: Turn OFF and
unplug the balance. Remove Platform and Platform Support.
1.
Pass the wire through the Security Screw and the lances on the Plate as shown
in the illustration. NOTE
NOTE
NOTE
NOTE
NOTE: On balances with a draft shield, both sides of the wire
from the screw
must
must
must
must
must
pass through the first lance, otherwise the wire may interfere
with balance operation by touching the bottom of the platform.
2.
Crimp the lead seal tightly.
3.
Reinstall items removed.
1.
Apply Seal, see illustration for location.
2.
Seal is provided by Weights and Mea-
sures officials or authorized Ohaus
representatives.
3.
Reinstall items removed.
LEAD SEAL
LEAD SEAL
SEALING FOR BALANCES
WITH
WITH
WITH
WITH
WITH DRAFT SHIELDS
SEALING FOR BALANCES
WITHOUT
WITHOUT
WITHOUT
WITHOUT
WITHOUT DRAFT SHIELDS
SEALING STICKER
LOCATION
ALTERNATE
LABEL (LFT)
(See page 39)
SEALING STICKER
LOCATION
• LEAD SEAL METHOD
• LEAD SEAL METHOD
• LEAD SEAL METHOD
• LEAD SEAL METHOD
• LEAD SEAL METHOD
OR
• SEALING STICKER
SEALING STICKER
SEALING STICKER
SEALING STICKER
SEALING STICKER
METHOD
METHOD
METHOD
METHOD
METHOD