Leveling the balance, Power requirements, Voltage setting – Ohaus GT Series Electronic Balance User Manual
Page 48: Installation
9
INSTALLATION
Leveling the Balance
Leveling the Balance
Leveling the Balance
Leveling the Balance
Leveling the Balance
The balance is equipped with a level indicator
located at the rear of the balance and two
adjustable leveling feet. The leveling feet are
located under the front of the balance. Adjust
the leveling feet until the bubble appears in the
center circle of the indicator.
NOTE
NOTE
NOTE
NOTE
NOTE: A level indicator and leveling feet are
not included on Models GT400, GT4000 and
GT8000.
LEVEL INDICATOR
SLOT
WARNING
Power Requirements
Power Requirements
Power Requirements
Power Requirements
Power Requirements
•
To avoid shock hazards, always be
To avoid shock hazards, always be
To avoid shock hazards, always be
To avoid shock hazards, always be
To avoid shock hazards, always be
certain that the power cord is dis-
certain that the power cord is dis-
certain that the power cord is dis-
certain that the power cord is dis-
certain that the power cord is dis-
connected BEFORE removing the
connected BEFORE removing the
connected BEFORE removing the
connected BEFORE removing the
connected BEFORE removing the
balance cover.
balance cover.
balance cover.
balance cover.
balance cover.
•
Even though the balance may have
Even though the balance may have
Even though the balance may have
Even though the balance may have
Even though the balance may have
been switched OFF, high voltage is
been switched OFF, high voltage is
been switched OFF, high voltage is
been switched OFF, high voltage is
been switched OFF, high voltage is
present inside the balance as long
present inside the balance as long
present inside the balance as long
present inside the balance as long
present inside the balance as long
as the power cord is connected.
as the power cord is connected.
as the power cord is connected.
as the power cord is connected.
as the power cord is connected.
•
A power cord has been furnished
A power cord has been furnished
A power cord has been furnished
A power cord has been furnished
A power cord has been furnished
with the balance. DO NOT use any
with the balance. DO NOT use any
with the balance. DO NOT use any
with the balance. DO NOT use any
with the balance. DO NOT use any
other type of power cord other than
other type of power cord other than
other type of power cord other than
other type of power cord other than
other type of power cord other than
the one furnished.
the one furnished.
the one furnished.
the one furnished.
the one furnished.
DO NOT create a safety hazard by
DO NOT create a safety hazard by
DO NOT create a safety hazard by
DO NOT create a safety hazard by
DO NOT create a safety hazard by
defeating the grounding feature.
defeating the grounding feature.
defeating the grounding feature.
defeating the grounding feature.
defeating the grounding feature.
Voltage Setting
Voltage Setting
Voltage Setting
Voltage Setting
Voltage Setting
The balance can be damaged if operated
at an incorrect line voltage. If, for any
reason the balance HAS NOT
HAS NOT
HAS NOT
HAS NOT
HAS NOT been set to
operate at your particular line voltage, it
may be checked in the following manner:
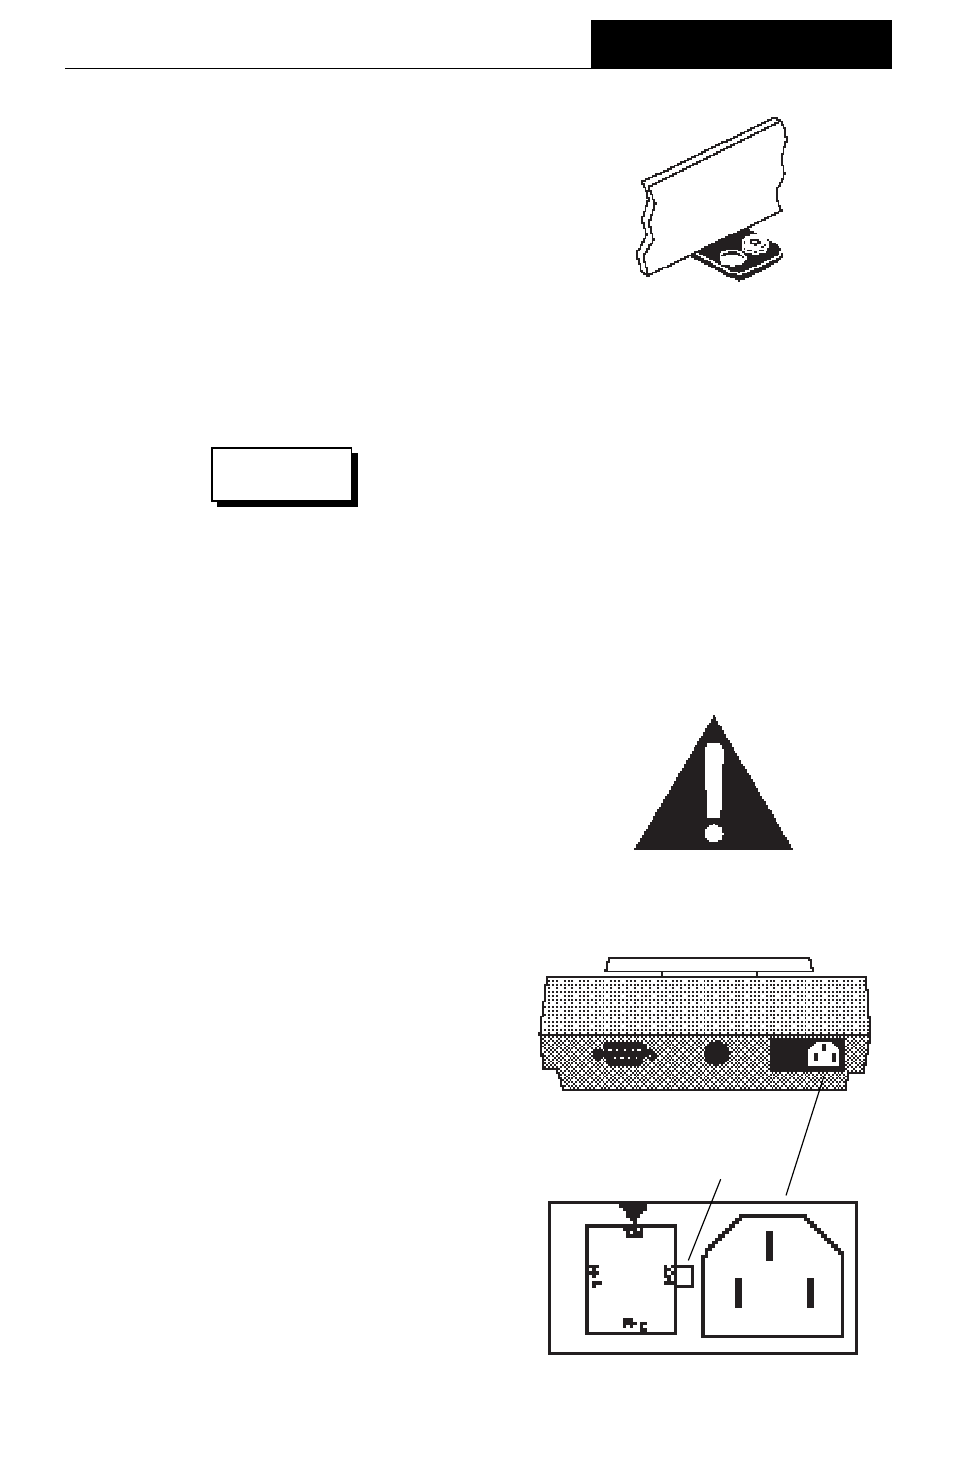
1.
Locate the fuse holder in the lower
right-hand corner of the balance
(when viewed from the rear).
2.
There is an arrow imprinted above
the fuse holder and the voltage (100,
120, 220 or 240) below the arrow
indicates the line voltage. See illus-
tration.