Menus – Ohaus GT Series Electronic Balance User Manual
Page 104
65
MENUS
Initialize (Cont.)
Initialize (Cont.)
Initialize (Cont.)
Initialize (Cont.)
Initialize (Cont.)
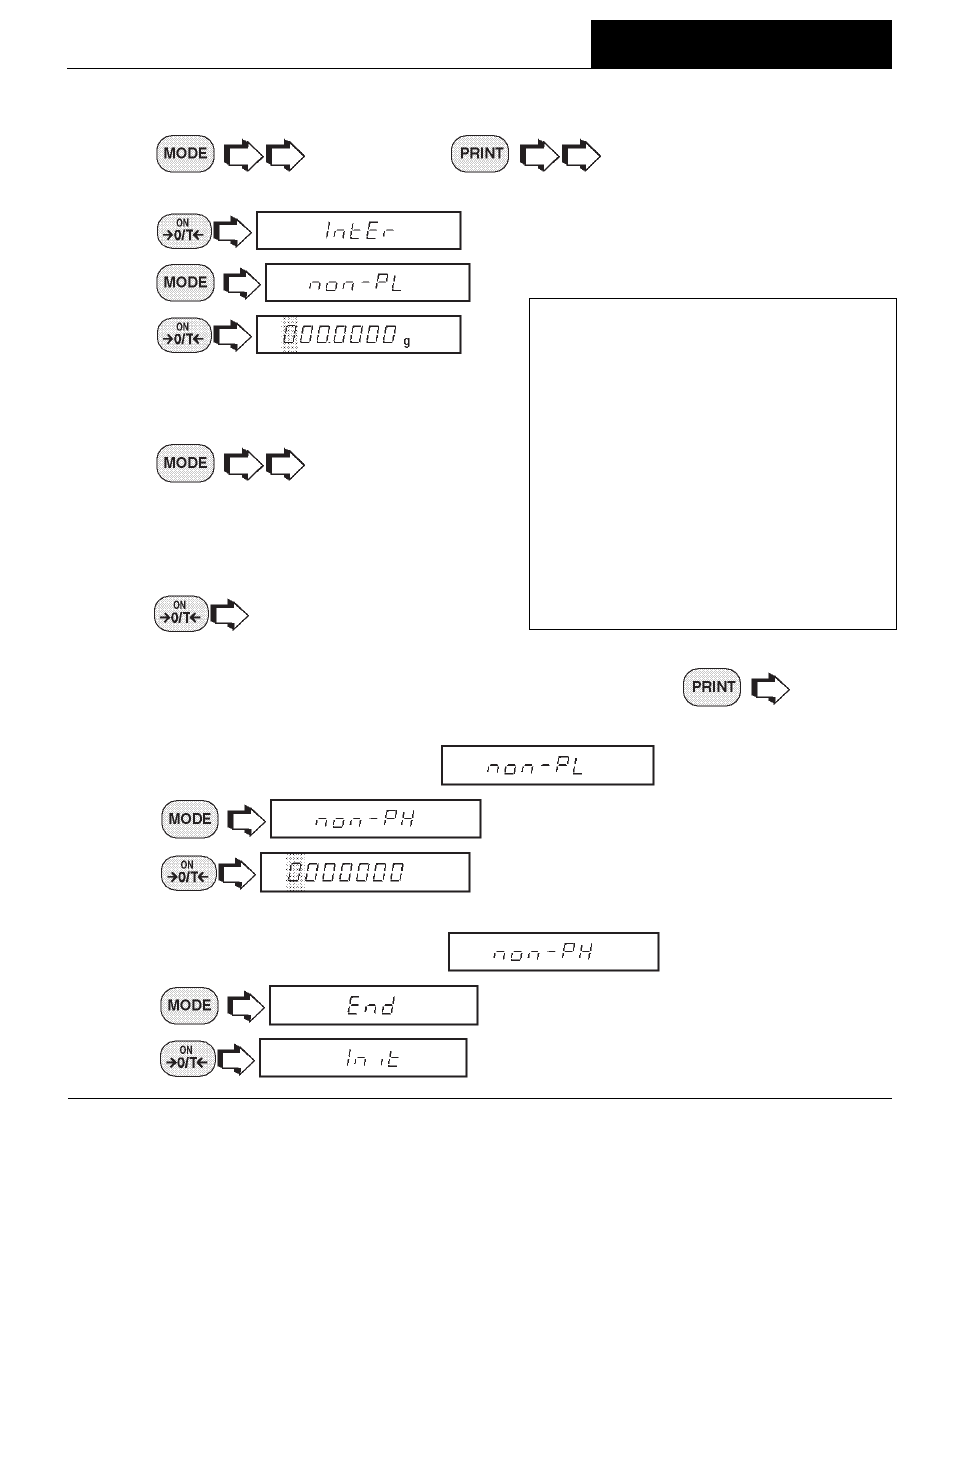
4.
to increase or
to decrease the interval num-
ber.
5.
.
6.
to enter a range of non printing values.
7.
, the
current value for the low end of the
range is displayed with the first digit
flashing.
8.
to change the num
ber, start with the first digit (flashing).
Change the value to any number from
-9 to +9. A minus sign will light to
indicate a negative value.
9.
to accept it and the next digit
will begin flashing.
10. Set all digits in the same manner. If an error is made,
to backup
to the desired digit and change it.
11. After the last digit is entered,
is displayed again.
12.
for the high limit.
13.
indicates current high end value.
14. Repeat steps 8 through 10 to change the numbers as required.
15. After the last digit is entered,
displayed again.
16.
.
17.
.
To exclude data
To exclude data
To exclude data
To exclude data
To exclude data
WITHIN SELECTED RANGE:
WITHIN SELECTED RANGE:
WITHIN SELECTED RANGE:
WITHIN SELECTED RANGE:
WITHIN SELECTED RANGE:
SET non-PL < non-PH
Example: non-PL=7g, non-PH=11g
Values <7 OR
OR
OR
OR
OR >11 will be output.
To exclude data
To exclude data
To exclude data
To exclude data
To exclude data
OUTSIDE SELECTED RANGE:
OUTSIDE SELECTED RANGE:
OUTSIDE SELECTED RANGE:
OUTSIDE SELECTED RANGE:
OUTSIDE SELECTED RANGE:
Set non-PL > non-PH
Example: non-PL=11g, non-PH=7g
Values >7 AND
AND
AND
AND
AND <11 will be output.