6 photo contacts, Creating a new photo contact – T-Mobile MDA III User Manual
Page 43
T-Mobile MDA III User Manual
42
T-Mobile MDA III User Manual
43
3.6 Photo Contacts
Photo Contacts
make your T-Mobile MDA III more fun and
practical. It allows you to assign still or animated photos to the
entries in your
Contacts
. When a person calls you (for whom
you have previously assigned a photo
in
Photo Contacts
),
that photo will appear on your T-Mobile MDA III’s incoming call
screen. Use the rich set of features to get the photos displayed
with the size, position, and animated
template you want.
Creating a new photo contact:
1. Tap
>
Programs >
Photo Contacts.
2. Select a contact from the list, or create a new one by tapping
Edit >
then
New.
Note:
Contacts
here fully mirror those in
Microsoft
Contacts
.
3. Tap
Edit >
then
Assign Photo...
4. Tap the field next to
Type
to select the type of files you want
listed, ie,
jpeg
,
bmp
,
gif
or all
>
Tap next to
Find in
: to select
the location of a file.
NOTE: You can use
JPEG
,
BMP
,
still GIF
, or
animated GIF
files for your
Photo Contacts
.
5. Tap a picture file, then
OK
, and
OK
again until you return to
the
Contacts
screen. You can see the photo at the bottom
of the screen.
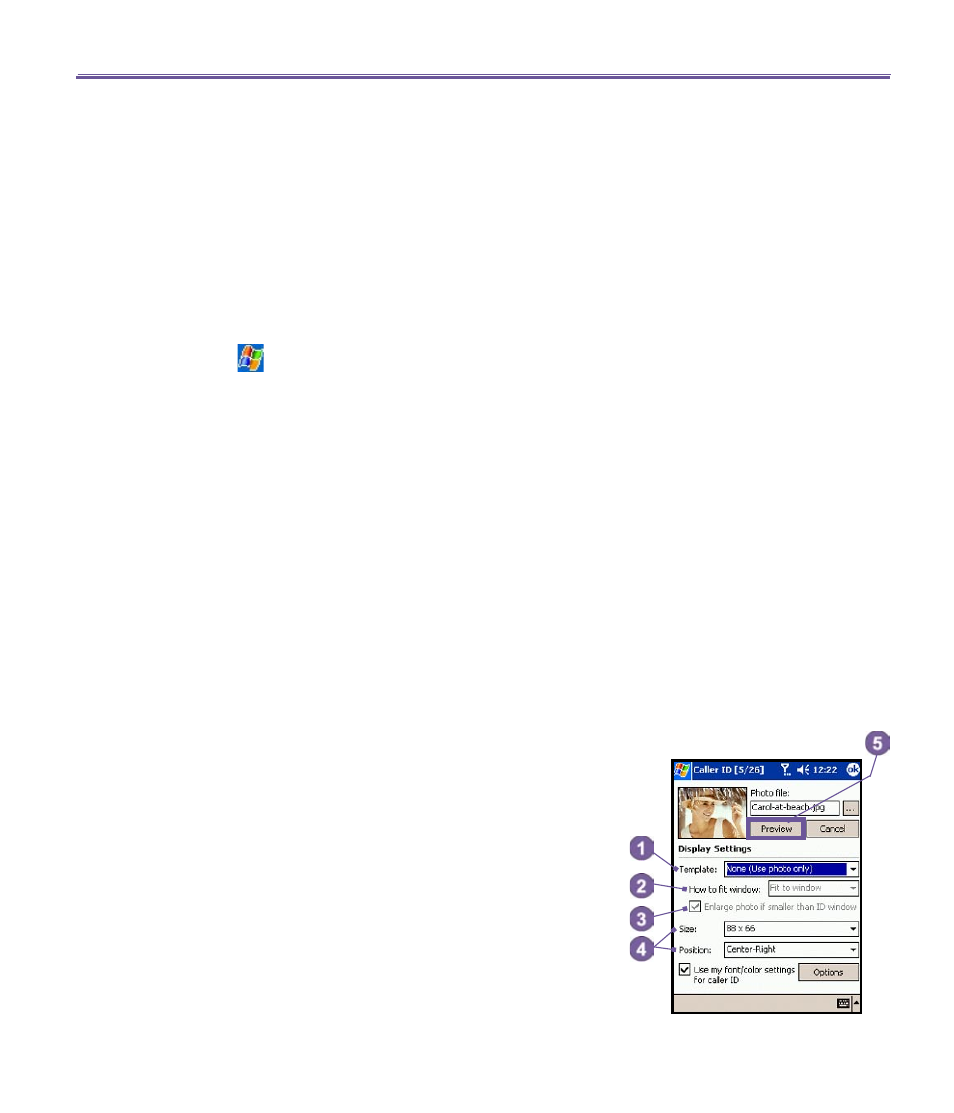
To preview and adjust settings:
In step 5 above, after you tap
OK
once you will arrive at the
preview and display settings screen. In
Display Settings
you can:
1.
Add extra style by assigning a
template
to the photo.
NOTE: A few sample
Photo Contacts
templates (animated
graphical templates that can frame your assigned photos)
are included in your T-Mobile MDA III
'
s local storage in the
\My Documents\Templates
folder.
2. Choose how you want the photo to fit to the window.
3. Enlarge the photo if it is smaller than the window.
4. Choose a size and position for the picture.
5. View all of these changes by tapping
Preview.