Alarm panel, Removing the alarm panel, Alarm panel -4 – Paradyne Jetstream CPX-1000 User Manual
Page 118: Removing the alarm panel -4, Step 1, Step 2, Step 3, Step 4
5. Repair Procedures
1000-A2-GN22-00
5-4
February 2003
Alarm Panel
The alarm panel is hot-swappable—you can remove it without
adversely affecting system functions or performance.
Removing the
Alarm Panel
To remove the alarm panel, see
and:
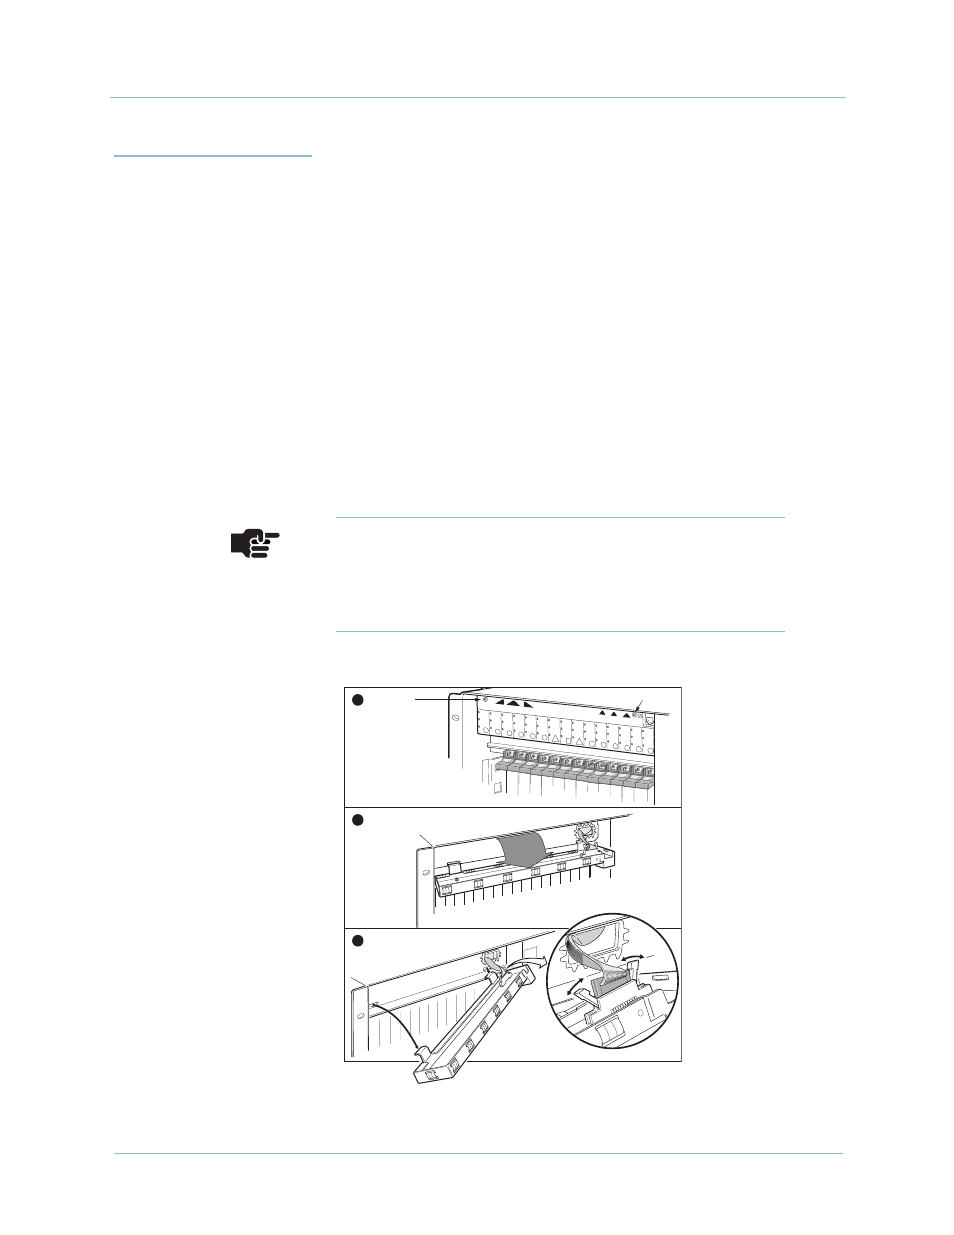
Step 1
Loosen the two captive screws at the top of the alarm panel.
Step 2
Pull the top of the alarm panel away from the chassis. You may
need to pull the two captive screws to assist you.
Step 3
Guide the tabs at the bottom of the alarm panel out of their slots.
Step 4
Remove the alarm cable by pushing the two retaining clips out to
force the connector off of the header.
Figure 5–2. Alarm Panel Removal
Note
If the alarm panel is connected to remote alarm
monitoring equipment, removing the system alarm
cable can result in a critical alarm report.
0075
1
2
3
4
5
6
7
8
9
10
11
12
13
14
15
DISABLED
UNLOCKED
DISABLED
UNLOCKED
DISABLED
ALERT A
ALERT B
MINOR
ALERT C
UNLOCKED
DISABLED
UNLOCKED
DISABLED
UNLOCKED
DISABLED
UNLOCKED
DISABLED
UNLOCKED
DISABLED
UNLOCKED
DISABLED
UNLOCKED
DISABLED
UNLOCKED
DISABLED
UNLOCKED
DISABLED
UNLOCKED
DISABLED
UNLOCKED
MAJOR CRITICAL
ALARM
Loosen two
captive screws
Flip Alarm Panel down
Disconnect cable
and remove panel
B
A
C
ACT
ACT
ACT
ACT
ACT
ACT
ACT
ACT
ACT
ACT
ACT
ACT
ACT
DISABLED
UNLOCKED
ACT
DISABLED
UNLOCKED
ACT