KORG Krome music workstasion 61key User Manual
Page 111
Editing a Drum Kit
107
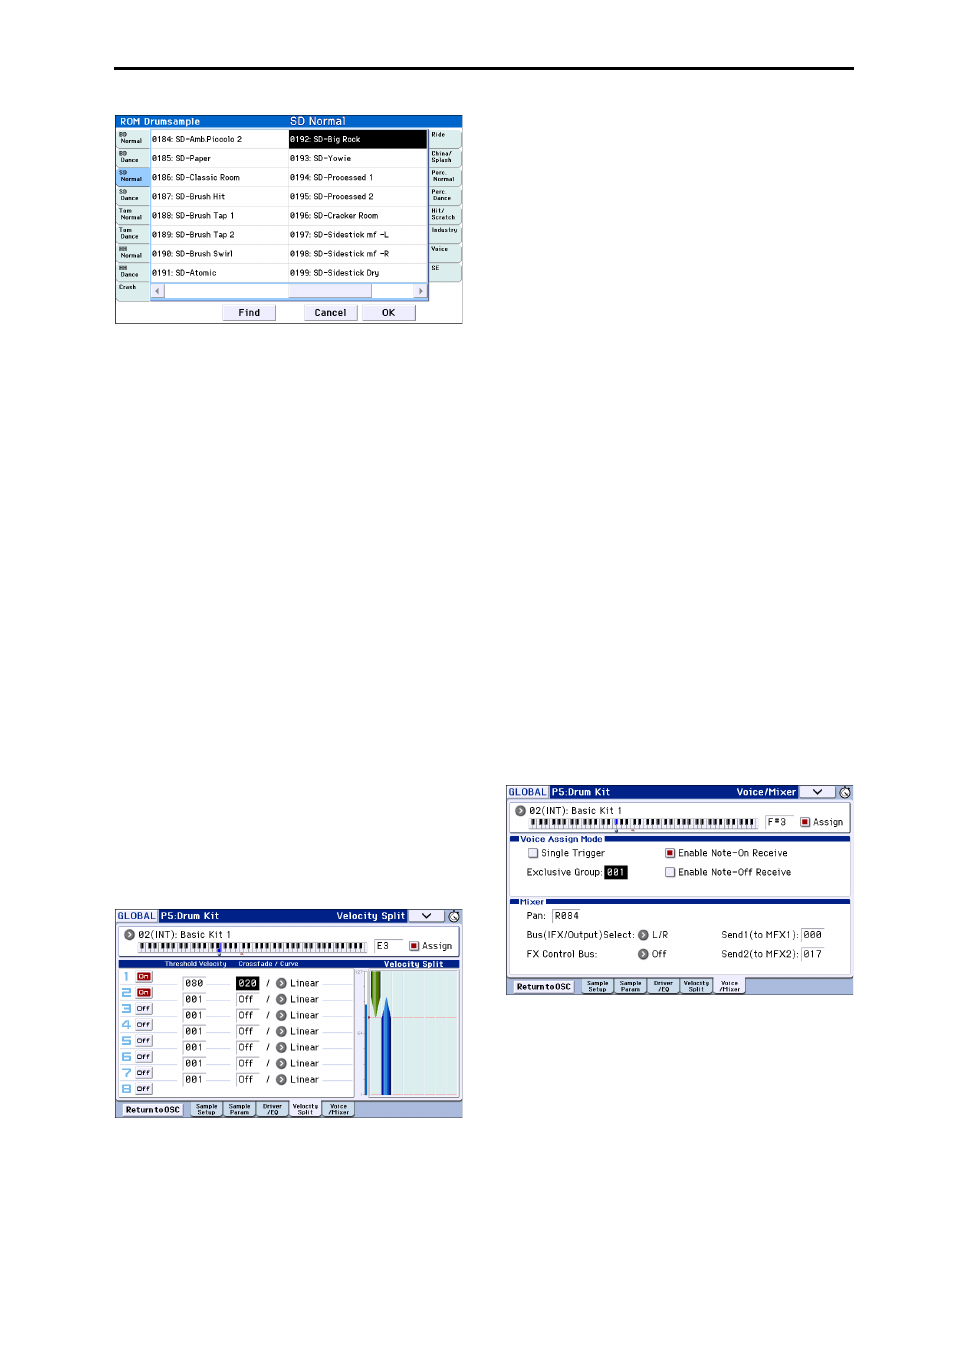
5. Select a Drumsample by touching its name in the
list.
6. Press the OK button to confirm your selection.
7. Switch the slot to 2, and make settings for
Drumsample 2 in the same way.
Now that you’ve assigned Drumsamples to
Drumsample1 and Drumsample2, let’s set up the
velocity ranges and crossfades.
8. Access the P5: Drum Kit– Velocity Split page.
9. Set Drumsample2’s Threshold Velocity to 1, and
its Crossfade to Off.
10. Set Drumsample1’s Threshold Velocity to 80.
You can edit the Threshold Velocity setting by
touching and dragging the graphic on the right
(see “* EG, Velocity Split” on page 6).
Now, Drumsample2 will sound when you play softly,
at velocities of 79 or less–and Drumsample1 will sound
when you play harder, with velocities of 80 or more.
The meter at the left side of the Velocity Split graphic
indicates the note‐on velocity value. This lets you
verify the drumsample that will be sounded by a given
velocity.
11. Next, set Drumsample1’s Crossfade to 20, and its
Curve to Linear.
Notice that the graphic now shows the two ranges
tapering into one another. Between 80 and 100,
Drumsample2 will fade out, and Drumsample1 will
fade in, creating a gradual velocity transition instead of
a hard split.
Fine-tuning the sound of each sample
1. If you like, adjust the Levels for the two
Drumsamples.
This can be very useful in creating a smooth velocity
split or crossfade.
2. As necessary, specify the tuning, EG parameters,
and filter.
Access the P5: Drum Kit– Sample Parameter page.
Adjust Tune, Attack (Amp EG Attack), Decay (Amp
EG Decay), Cutoff and Resonance for each
drumsample.
3. You can also edit the drive, boost, and EQ for each
drumsample.
Access the P5: Drum Kit– Drive/EQ page.
Adjust Drive, Low Boost, and 3 Band EQ Gain [dB]
for each drumsample.
4. Repeat “Basic Editing,” on page 106 to set up each
key of the Drum Kit.
5. You can also copy settings from one key to
another, using the Copy Key Setup menu
command.
Using Exclusive Groups
1. Access the P5: Drum Kit– Voice/Mixer page.
2. Use the Exclusive Groups to make one drum
sound cut off another drum sound ‐ such as closed
and open hi‐hats.
For example, let’s say that you’ve assigned an open hi‐
hat and a closed hi‐hat to the same exclusive group:
• Play the open hi‐hat sound.
• While it’s still ringing, play the closed hi‐hat.
• The open hi‐hat sound will be cut off–simulating
the action of a physical hi‐hat.