Figure 85 on, Kvm blade (standard version) kvm blade, Control panel of the kvm blade (standard version) – FUJITSU PRIMERGY BX600 S2 User Manual
Page 134: Primergy bx600 s2 basic unit, Figure 85: kvm blade
134
PRIMERGY BX600 S2 Basic Unit
KVM Blade (Standard Version)
KVM Blade
©
c
o
g
n
it
as
.
Ge
s
e
lls
c
h
ft
f
ü
r T
e
c
h
n
ik
-Do
k
u
m
e
nt
at
io
n
m
b
H
2
007
P
fad:
H:
\w
in
dows
\_p
roj
e
k
te\
B
x
z
\B
e
tr
ie
b
s
a
n
le
it
un
g\
V
e
rs
ion_
M
a
e
rz
-2
007
\A
rc
h
iv
\B
X
6
0
0
S
2
_
en\
bl
ad
e-u
s
.k
1
3
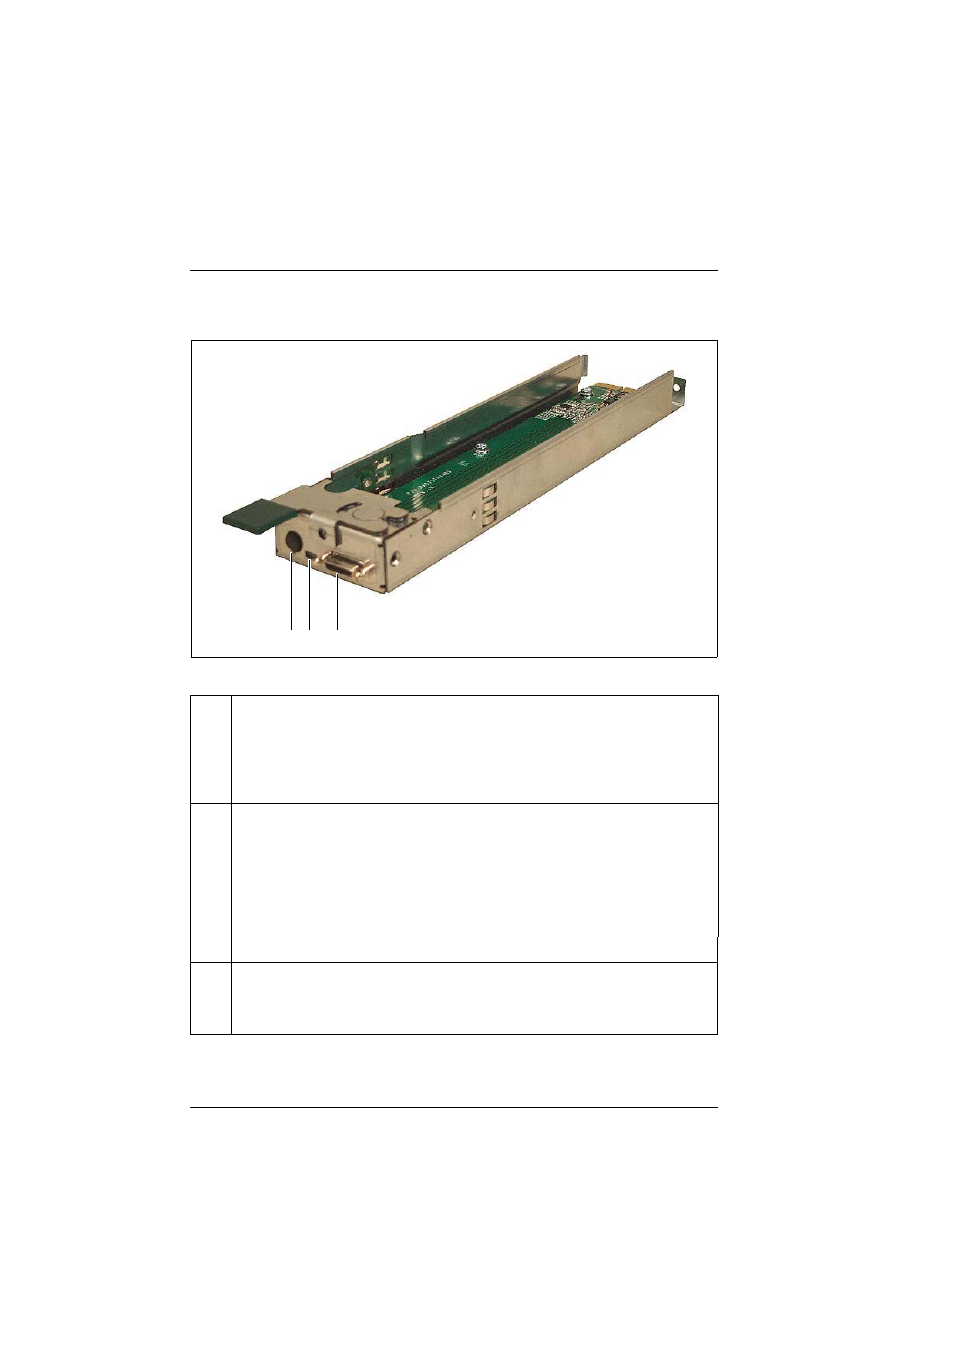
Control Panel of the KVM Blade (Standard Version)
Figure 85: KVM blade
1
Rear ID button
When you press the ID button, the ID LEDs on the control panel on the
front of the server blade and on the KVM blade are switched on or off.
The ID LEDs on the KVM blade and on the control panel of the blade
server are synchronized.
2
ID/error LED (green LED)
Glows green: The ID button on the KVM blade or the ID button on the
control panel at the front of the blade server was pressed
to identify the system.
Pressing one of the two ID buttons again deactivates the
ID LED.
Blinks green: Checksum error: System error.
3
KVM connector
Allows a VGA monitor, PS2 keyboard and PS2 mouse to be connected
via a special cable (see
1 2
3