Holiday schedules – Interlogix TruVision NVR 10 User Manual User Manual
Page 35
Chapter 5: Recording settings
TruVision NVR 10 User Manual
29
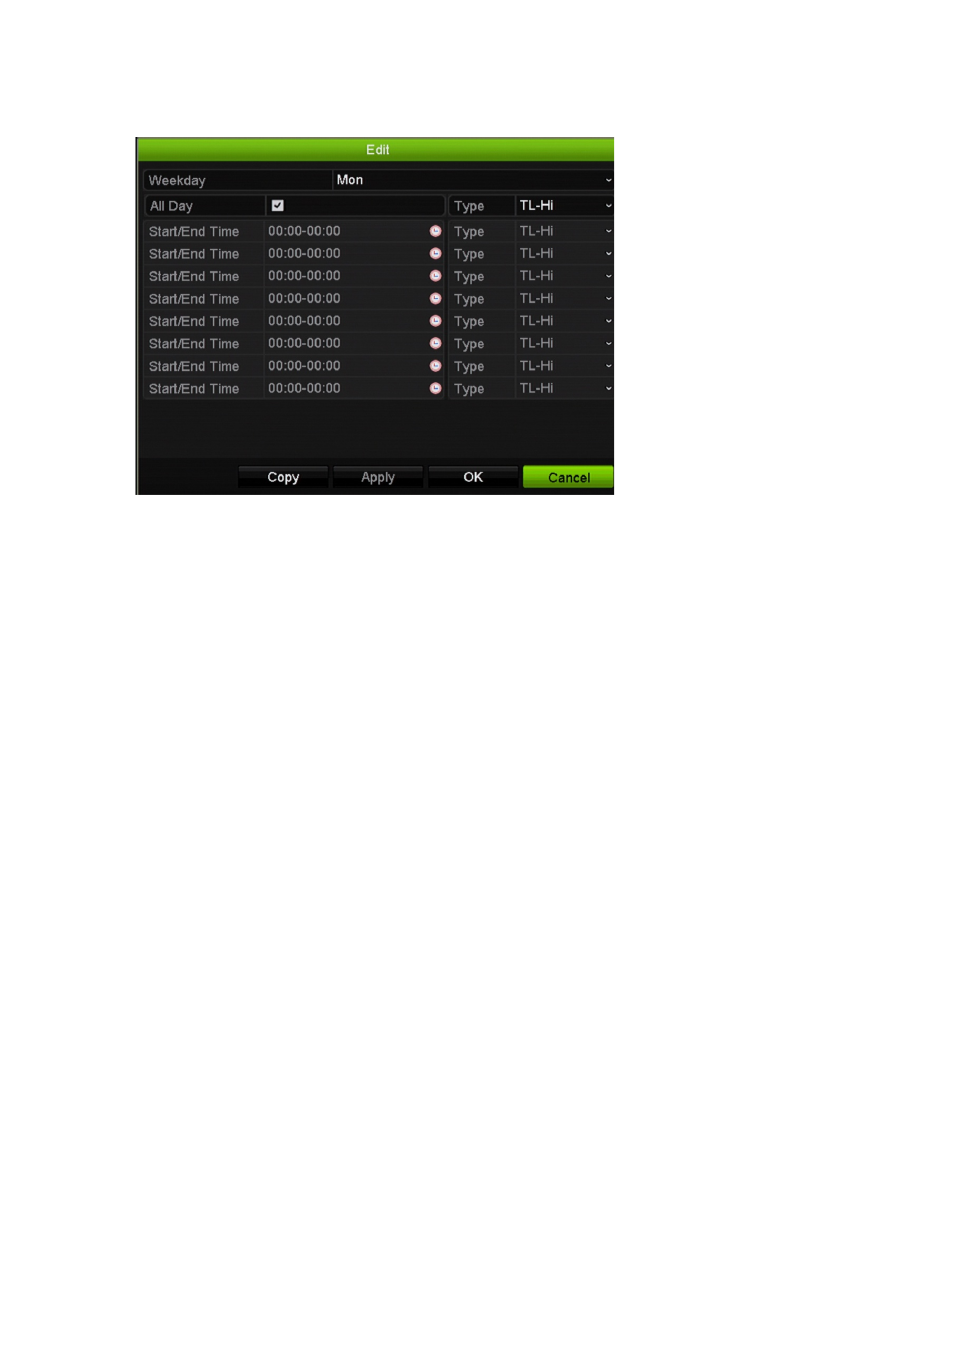
4. Click
Edit
. The following window is displayed:
5. Select the day of the week for which you want to set up the schedule.
You can define a schedule for each day of the week.
6. Set the start and end time for recording (by default,
All Day
is selected).
Define a time period by entering a start (left column) and end (right column) time.
You can schedule up to eight time periods. Click
All Day
to record all day.
Note
:
Time periods defined cannot overlap.
7. Select a recording type.
This setting instructs the NVR to begin recording. The recording type can be based
on time and triggered by motion detection and/or an alarm. If set to TimeLapse (TL-
Hi or TL-Lo), the NVR records continuously.
8. Click
Apply
to save settings.
9. Repeat steps 5 to 8 for other days of the week, or copy the schedule settings to
another day.
To copy the current schedule settings to another day of the week, click
Copy
.
Select the number of the day of the week to which to copy the schedule and click
OK
to save changes and return to the Edit window.
10. Repeat steps 2 to 9 for other cameras.
11. Click
Apply
to save the settings and then
OK
to return to the schedule window.
Holiday schedules
As well as being able to schedule when recordings occur during the week, you can also
schedule them for specific holidays in the year such as the first of January, or the
second Wednesday of every month. You can schedule up to 32 holiday periods.