NEC 40,000-Lumen 4K Laser Installation Projector User Manual
Page 27
10
1. Introduction
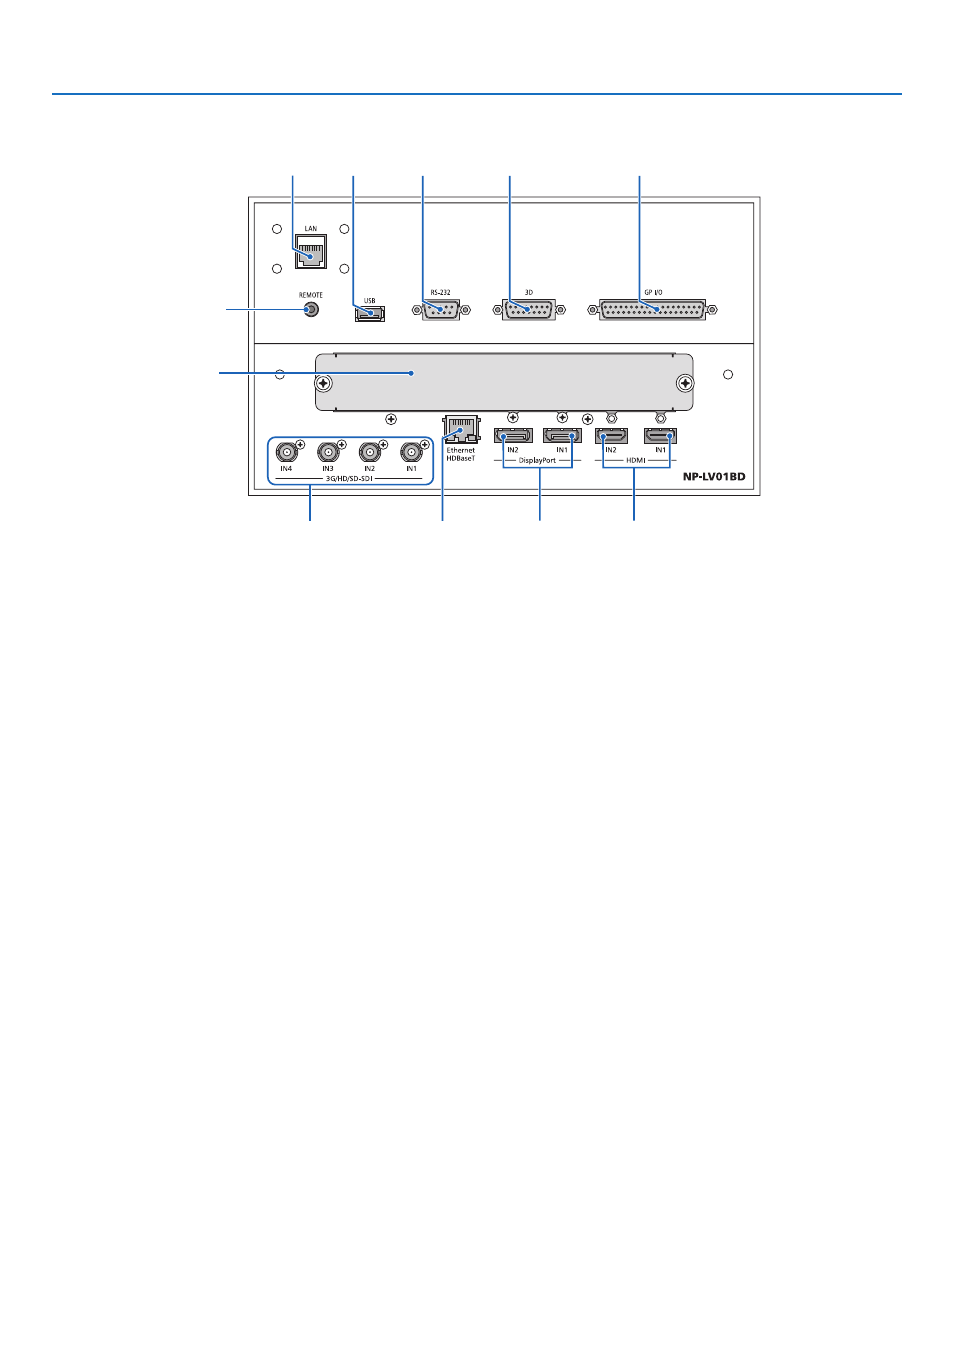
Connection terminals
4
1
11
10
9
8
7
5
6
2
3
1. REMOTE Terminal [REMOTE] (Stereo Mini)
Use this jack for wired remote control of the projector
using a commercially available remote cable with
⌀
3.5
stereo mini-plug (without resistance).
Connect the projector and the supplied remote control
using a commercially available wired remote control
cable.
(
→
page
2. LAN port [LAN] (RJ-45)
The port for controlling the projector from a PC via
a network. Connect the projector and the PC with
a commercially available shielded Ethernet cable
(10/100Base-T).
3. USB port [USB] (type A)
The port for the projector maintenance.
4. PC control terminal [RS-232] (D-sub 9P)
The terminal for operating the projector from a PC via
an RS-232C or for service personnel to set data for
the projector. Connect the projector and the PC with
a commercially available shielded RS-232C straight
cable.
5. 3D terminal [3D] (D-sub 15P)
The terminal for connecting a 3D image system to the
projector.
Use a shielded 15pin cable (sold commercially).
6. External control terminal [GP I/O] (D-sub 37P)
The terminal for externally controlling the projector.
(
→
page
Use a shielded 37pin cable (sold commercially).
7. HDMI1 IN/HDMI2 IN Terminal [HDMI IN1/IN2]
(Type A)
(
→
)
8. DisplayPort1 IN/DisplayPort2 IN Terminal
[DisplayPort IN1/IN2]
(
→
)
9. HDBaseT Port [Ethernet HDBaseT] (RJ-45)
(
→
)
10. SDI1/SDI2/SDI3/SDI4 IN Terminal [3G/HD/SD-SDI
IN1/IN2/IN3/IN4] (BNC)
(
→
)
11. SLOT
Expansion slots for installing optional boards sold
separately. A plate to plug up the opening is attached
when the unit is first shipped from the factory.