NEC 40,000-Lumen 4K Laser Installation Projector User Manual
Page 141
124
5. Using On-Screen Menu
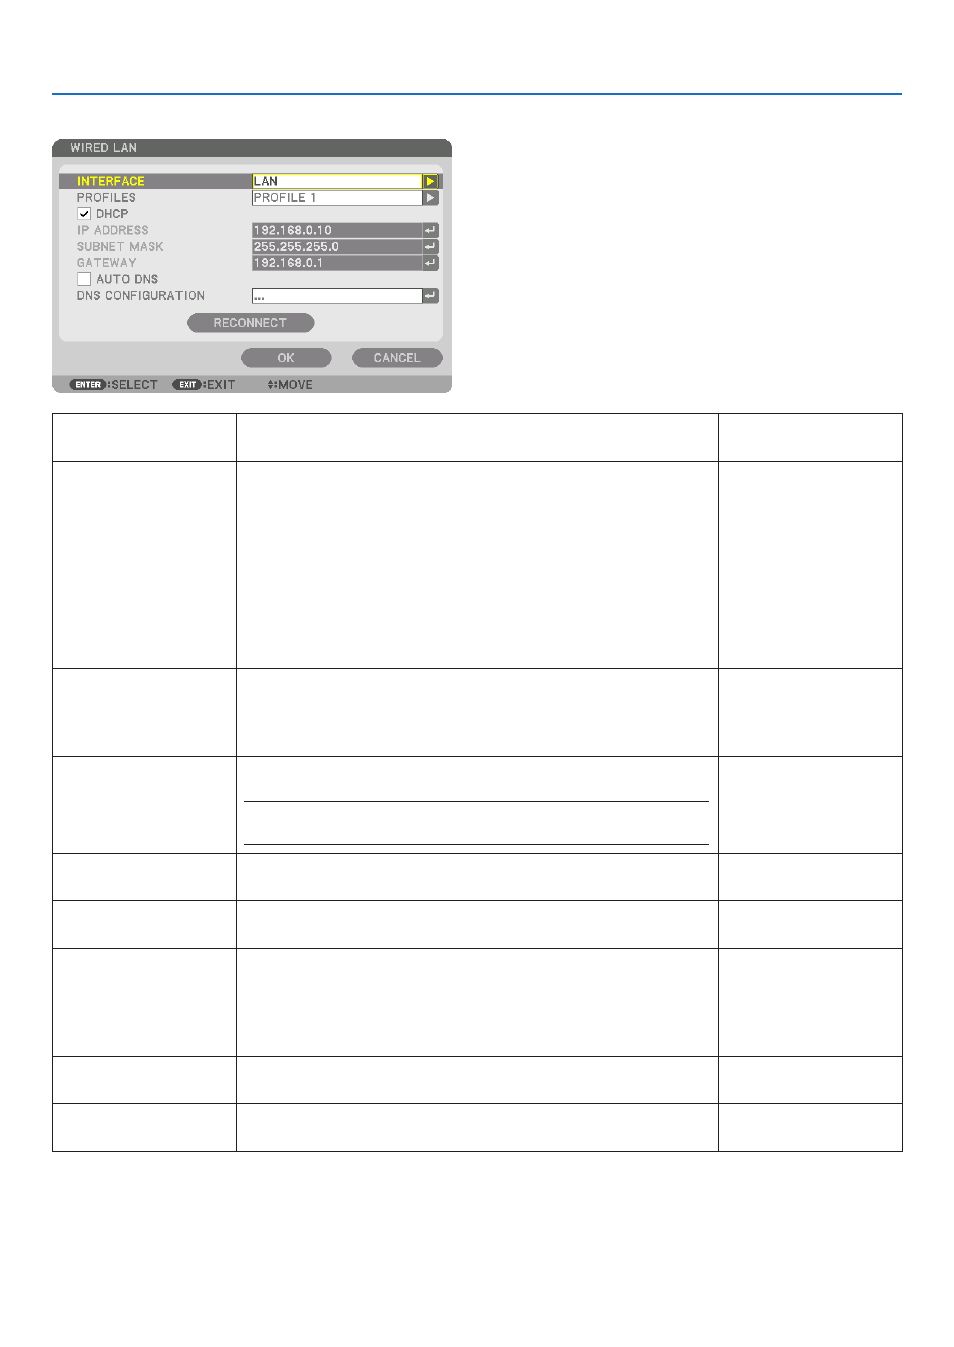
WIRED LAN
INTERFACE
To configure the LAN port, select [LAN].
To configure the HDBaseT port, select[HDBaseT].
—
PROFILES
• The settings for the wired LAN can be recorded in the projector
memory in two ways.
• Select [PROFILE 1] or [PROFILE 2] and then do settings for
[DHCP] and the other options.
After doing this, select [OK] and press the ENTER button. This
will store your settings in memory.
• To recall the settings from memory:
After selecting [PROFILE 1] or [PROFILE 2] from the [PRO-
FILES] list.
Select [OK] and press the ENTER button.
—
DHCP
Place a check mark to automatically assign an IP address to the
projector from your DHCP server.
Clear this check box to register the IP address or subnet mask
number obtained from your network administrator.
—
IP ADDRESS
Set your IP address of the network connected to the projector
when [DHCP] is turned off.
NOTE:
• System IP addresses such as 192.168.254.XXX cannot be set.
Up to 12 numeric
characters
SUBNET MASK
Set your subnet mask number of the network connected to the
projector when [DHCP] is turned off.
Up to 12 numeric
characters
GATEWAY
Set the default gateway of the network connected to the projector
when [DHCP] is turned off.
Up to 12 numeric
characters
AUTO DNS
Place a check mark to automatically assign the IP address of your
DNS server connected to the projector from your DHCP server.
Clear this check box to set the IP address of your DNS server
connected to the projector.
AUTO DNS can be set for the HDBaseT port only.
Up to 12 numeric
characters
DNS CONFIGURA-
TION
Set the IP address of your DNS server on the network connected
to the projector when [AUTO DNS] is cleared.
Up to 12 numeric
characters
RECONNECT
Retry to connect the projector to a network. Try this if you have
changed [PROFILES].
—