3) part names of the projector, Part names of the projector – NEC 40,000-Lumen 4K Laser Installation Projector User Manual
Page 23
6
1. Introduction
❸
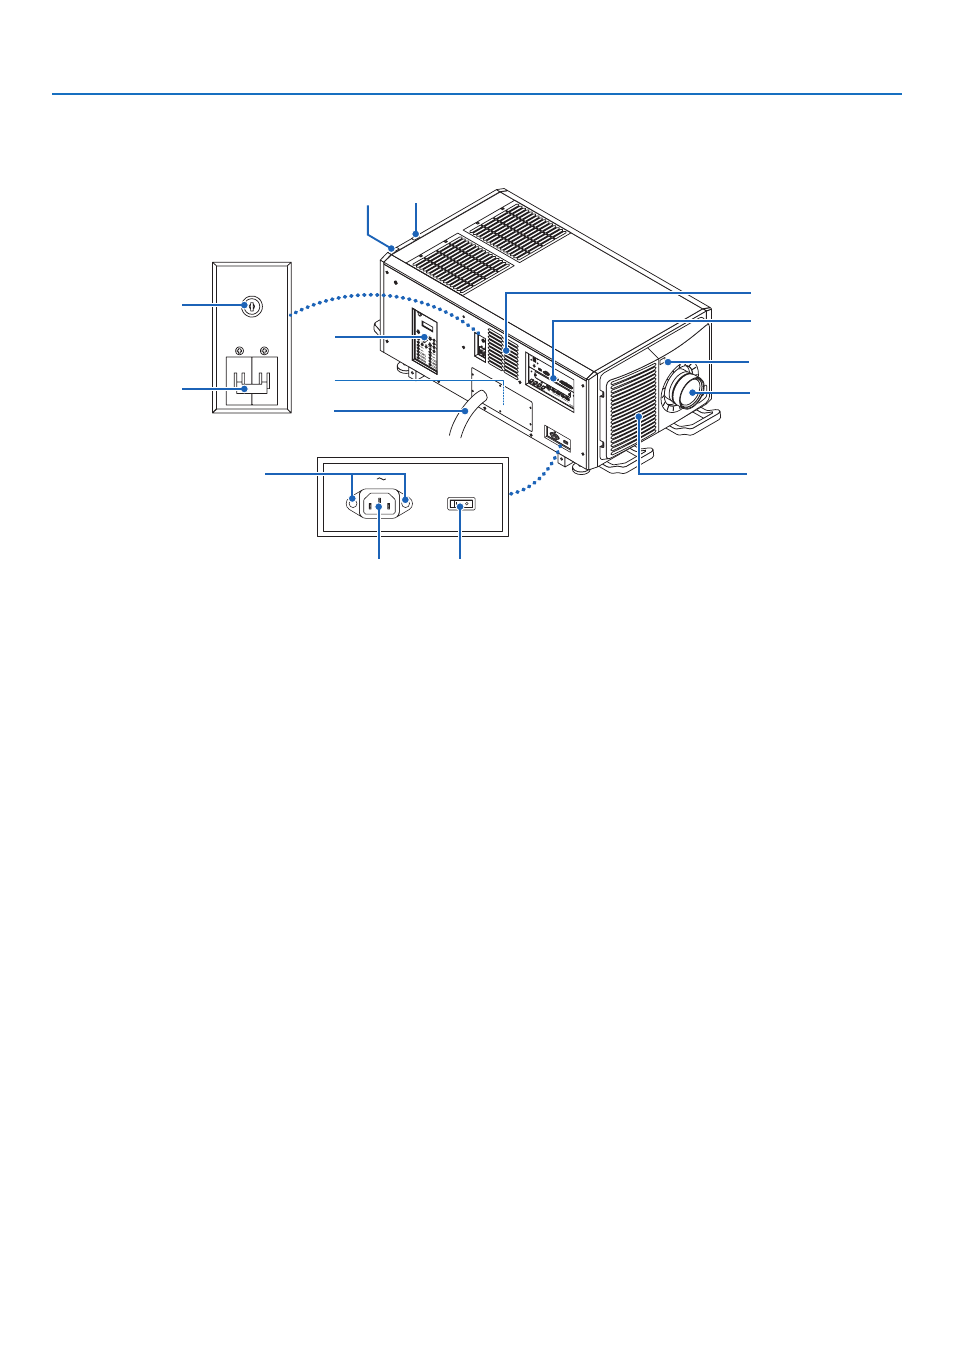
Part Names of the Projector
Front of the projector
11
4
5
1
2
3
9
7
6
10
12
13
14
15
8
1. Light status indicator
Displays the status of the light source. The indicators turn on when the light source is on and turn off when the light
source is off. (
→
)
2. System status indicator
Indicates the status of the projector. When the projector is operating normally, these light/blink in green or orange.
When an error occurs, they light/blink in red. When an error occurs, check the contents of the display on the LCD
screen. (
→
page
3. Controls/Indicator panel
• The power supply of the projector and the signal of the picture to project can be turned ON/OFF and switched
here.
• Indicates the status of the unit e.g. Power ON / Standby etc.
(
→
page
)
4. Administrator switch
The projector can be operated normally by inserting the administrator key vertically and turning it to the horizontal
direction.
At this time, the administrator key cannot be removed. The projector will not function unless the administrator key
is inserted.
5. Light power switch
While AC power is being supplied, set the projector power switch and light power switch to ON position, then your
projector will enter a standby state.
6. AC power cable
This is the cable that supplies AC power to the projector head. Contact your dealer/distributor for connecting the
power cable or AC power cable.
7. Air outlet
The air outlet to exhaust heat inside the projector. Do not cover.
8. Remote interlock connector (inside side of projector)
This port is for safely using this device. It is used to externally control the projector.
Consult with your dealer/distributor about using this.