ProSoft Technology MVI56-PDPMV1 User Manual
Page 75
MVI56-PDPMV1 ♦ ControlLogix Platform
Start Here
PROFIBUS DPV1 Master
User Manual
ProSoft Technology, Inc.
Page 75 of 255
March 22, 2011
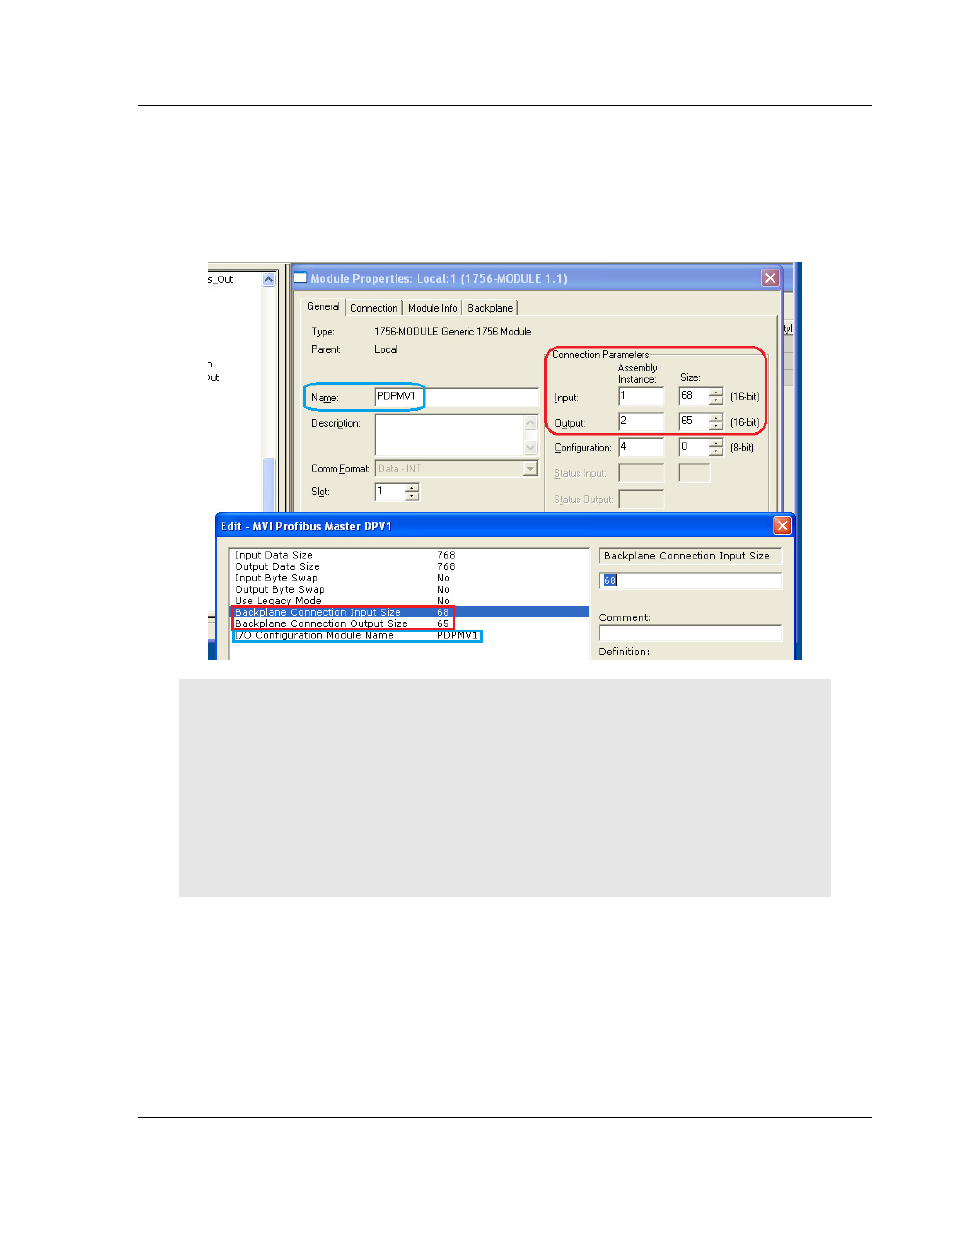
5 Go to the I/O Configuration folder. Locate the MVI56-PDPMV1 and right-click
on it to open a context menu, then left-click on P
ROPERTIES
to open the
Module Properties dialog box. Check and edit (if necessary) the
I
NPUT
and
O
UTPUT
Sizes in the Module Properties dialog box so that they match those
you configured for the module in the ProSoft Configuration Builder (PCB) MVI
Profibus Master DPV1 edit window.
REMEMBER: It is also critically important that the I/O Configuration Module Name on the PCB
Edit box be set to match the Name parameter in the RSLogix5000 Module Properties box. The
name you enter in PCB is used to create a communication path for the Status and Acyclic Data
MSG instructions. If the two names are not identical, the import may appear to have completed
successfully; but the module will not work correctly because the MSG instructions will not have the
correct module name in the MSG instruction Communication tab Path parameter.
If you receive any warning messages from RSLogix 5000, during or after the import, about
duplicate data types being overwritten or not imported, you may safely ignore these messages.
The module will function correctly. You can eliminate any such warning messages by deleting all
UDTs before importing the new ladder rung file.
6 At this point, you are ready to import your new ladder rung file with your
configurations changes. Please return to the previous section and follow the
procedure found in the topic, Exporting the Processor Files for PCB v2.2.0 or
later (page 107).