2 unpacking, 3 identification of inverter, 4 installation sequence – SMA MLX Series User Manual
Page 11
1.2 Unpacking
Contents:
•
Inverter
•
Mounting plate
•
Accessories bag, containing:
•
6 wall plugs 8 x 50 mm
•
6 mounting screws 6 x 60 mm
•
1 M25 cable gland with sealing
grummet for Ethernet cables
•
2 x conduit bracket (2 in)
•
1 equipment grounding bolt M6 x 12
mm
•
Installation guide, booklet format
•
Quick guide, poster format
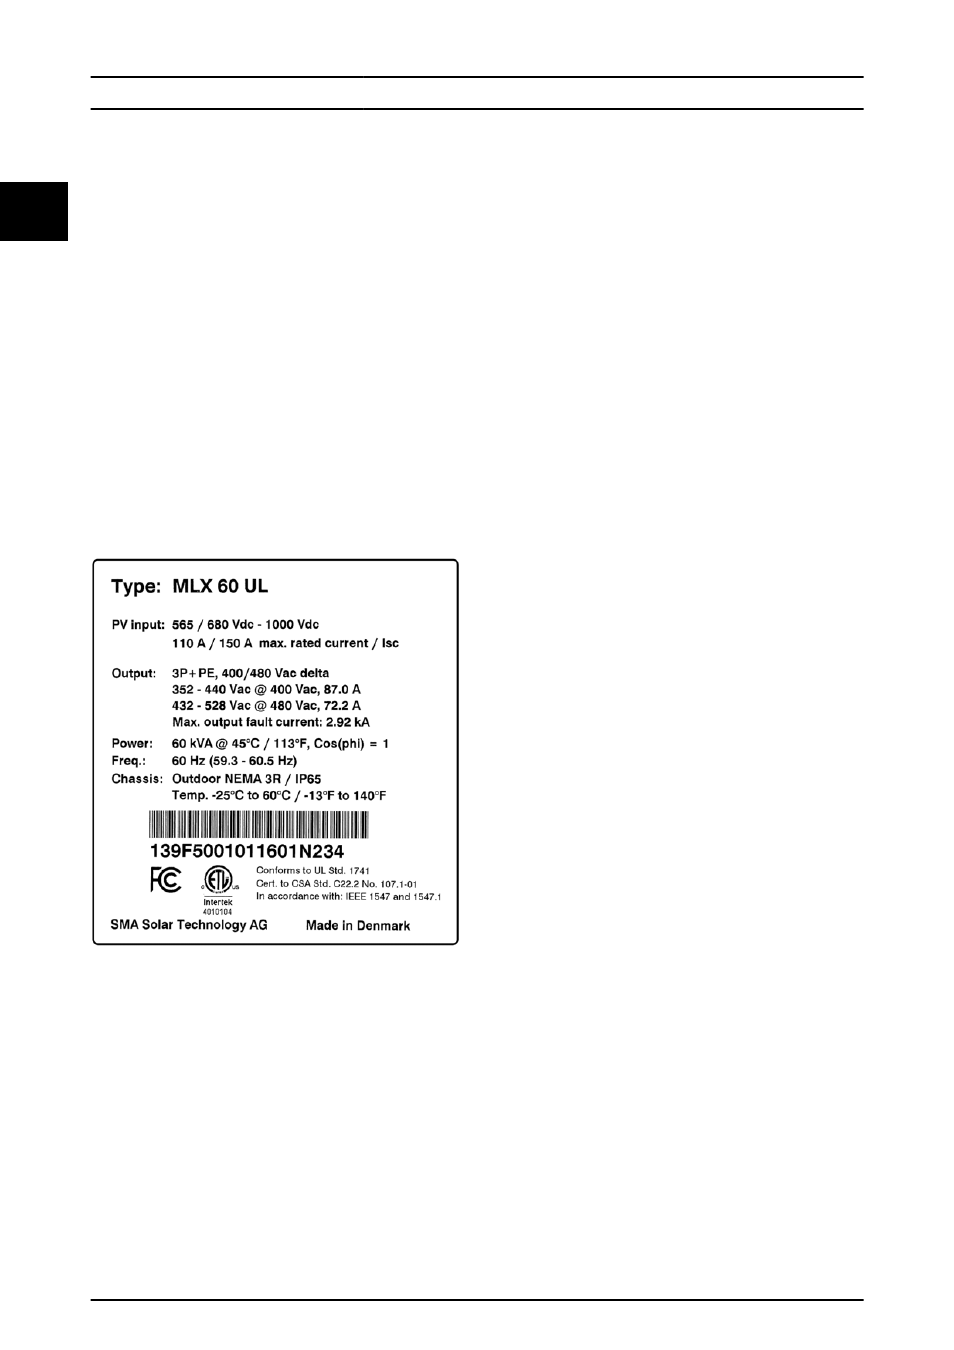
1.3 Identification of Inverter
Illustration 1.3 Product Label, Example
The product label on the side of the inverter shows:
•
Inverter type.
•
Important specifications.
•
Serial number, located under the bar code, for
inverter identification.
1.4 Installation
Sequence
1.
Pay special attention to the important safety
instructions at the beginning of this manual.
2.
Install the inverter according to 2.1 Environment
and Clearances, 2.2 Mounting the Mounting Plate,
and 2.3 Mounting the Inverter.
3.
Open the inverter according to 2.5 Access to the
Installation Area.
4.
Install AC according to 2.6 AC Grid Connection.
5.
Install Ethernet according to 2.8.1 Ethernet
Connections.
6.
Install PV according to 2.9 PV Connection.
7.
Close the inverter according to 2.5 Access to the
Installation Area.
8.
Turn on AC.
9.
Finalise commissioning by using the Local
Commissioning and Service Tool (LCS Tool). The
tool is available from the download area at
www.sma.de. The hardware requirements for the
LCS Tool are:
•
PC running Windows
TM
7 and onwards
•
150 Mb HDD
•
2 Gb RAM
For setup via the LCS Tool, refer to 3.3 LCS Tool.
10.
Turn on PV by turning on the PV load switch.
Refer to 2.9.2 Connection of PV.
11.
Verify the installation by:
•
Inverter display: LED ‘On’ is solid green.
•
LCS Tool: In inverter view status is ‘On
grid’.
12.
The inverter is now in operation.
Introduction
10
L00410644-01_2q / Rev. date: 2014-06-02
1
1