Figure 68: radio configuration – power level, Figure 69: 30 – software options – max radio power, Figure 70: network id – NavCom StarUtil Rev.G User Manual
Page 71: Figure 70)
StarUtil User Guide – Rev. G
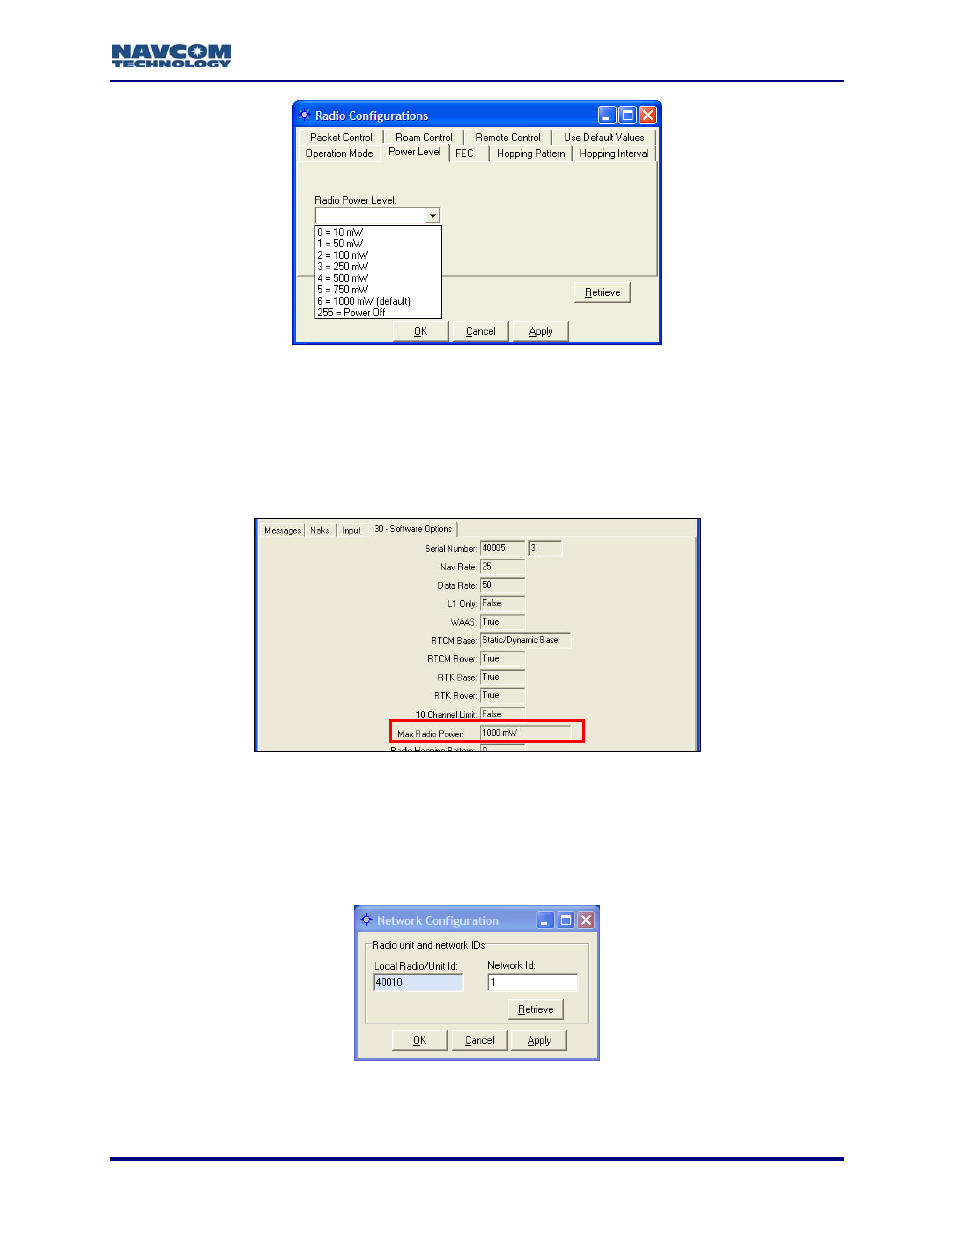
Figure 68: Radio Configuration – Power Level
9. Click
the
Apply button and then click the Retrieve button to confirm that the receiver accepts
the settings. (The other settings in the Radio Configuration window typically remain at
default.)
(see Figure 69).
10. Click the OK button to close the Radio Configurations window.
ing
Select View > 30 – Software Options to confirm the radio power sett
Figure 69: 30 – Software Options – Max Radio Power
Refer Figure 70 for the steps below:
I
ation to set the Network ID, if
e
11. Select Receiver > Setup > nternal Radio > Network Configur
twork ID option for models RT-3010 & RT-3020 only.
desired. The Network Configuration window opens.
StarUtil provides the N
Figure 70: Network ID
5-69