Rover cmr configuration, Figure 63: rover cmr configuration – NavCom StarUtil Rev.G User Manual
Page 67
StarUtil User Guide – Rev. G
11. Set the baud rate, as appropriate, for Port 1 (19200 default). Do not change the default
parity (None).
k the Retrieve button to confirm that the receiver accepts
the settings.
12. Set the CMR.in logical port to Port 1 (equivalent to Com1).
Models RT-3010 & RT-3020 only (with internal radio): Set the CMR.in logical port
to Port Radio.
13. Click the Apply button and then clic
14. Click the OK button to exit the window.
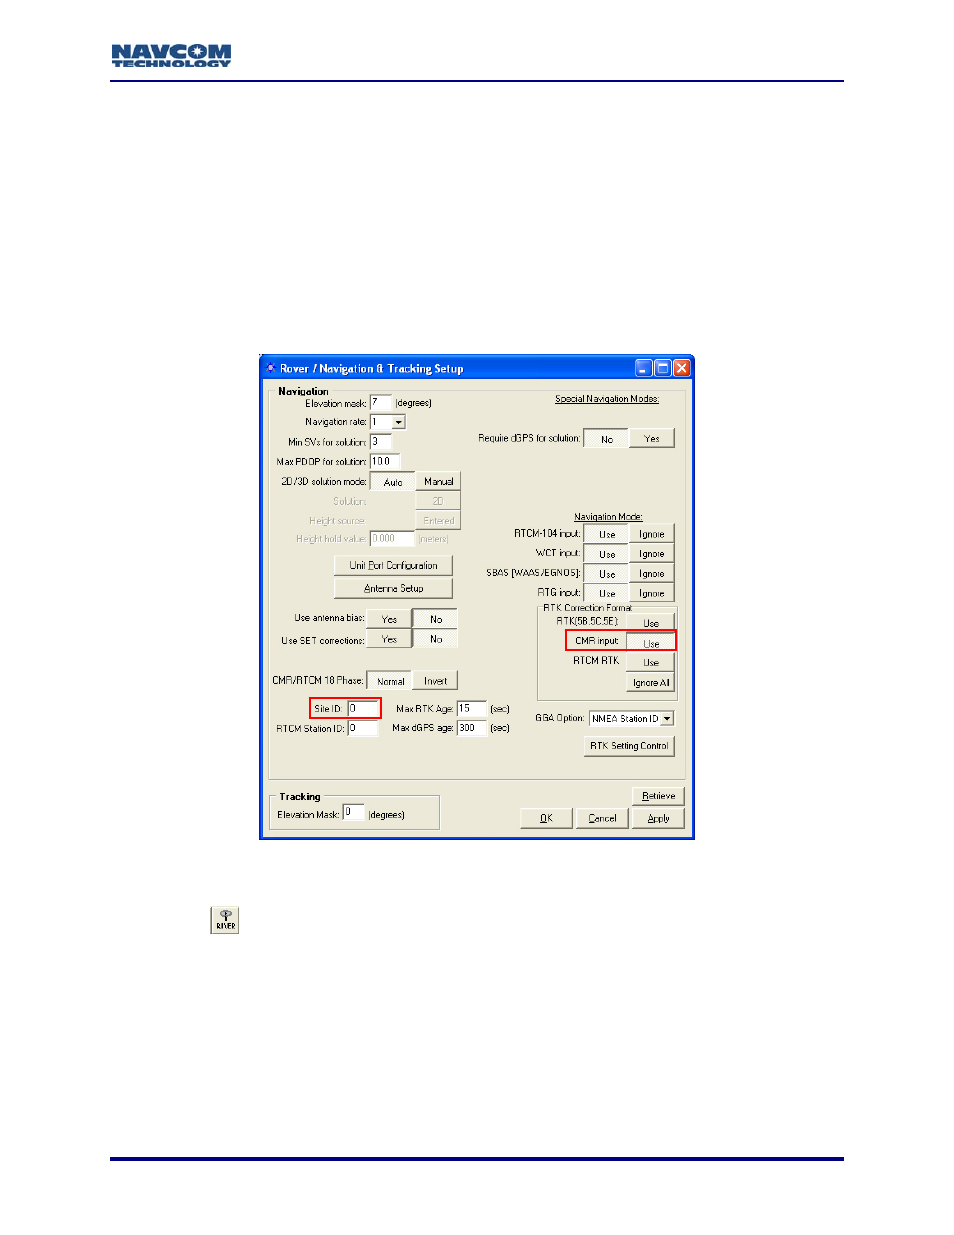
Rover CMR Configuration
Figure 63: Rover CMR Configuration
Refer to Figure 57 for the steps below:
15. Click the
icon on the toolbar to configure the rover. The Rover / Navigation & Tracking
Setup window opens.
to the navigation solution. This enables the input of
To disable the input of CMR or CMR+ corrections, the user may click the Ignore
All button or select Receiver > Commands > CMR (In) Off.
To open the window from the menu bar, select Receiver > Setup > Rover /
Tracking and Navigation.
ick the Use button to apply CMR input
16. Cl
CMR or CMR+ corrections.
5-65