Measurement Computing DaqView User Manual
Page 29
DaqView & View XL
User’s Guide
987691
The Main Window 4-5
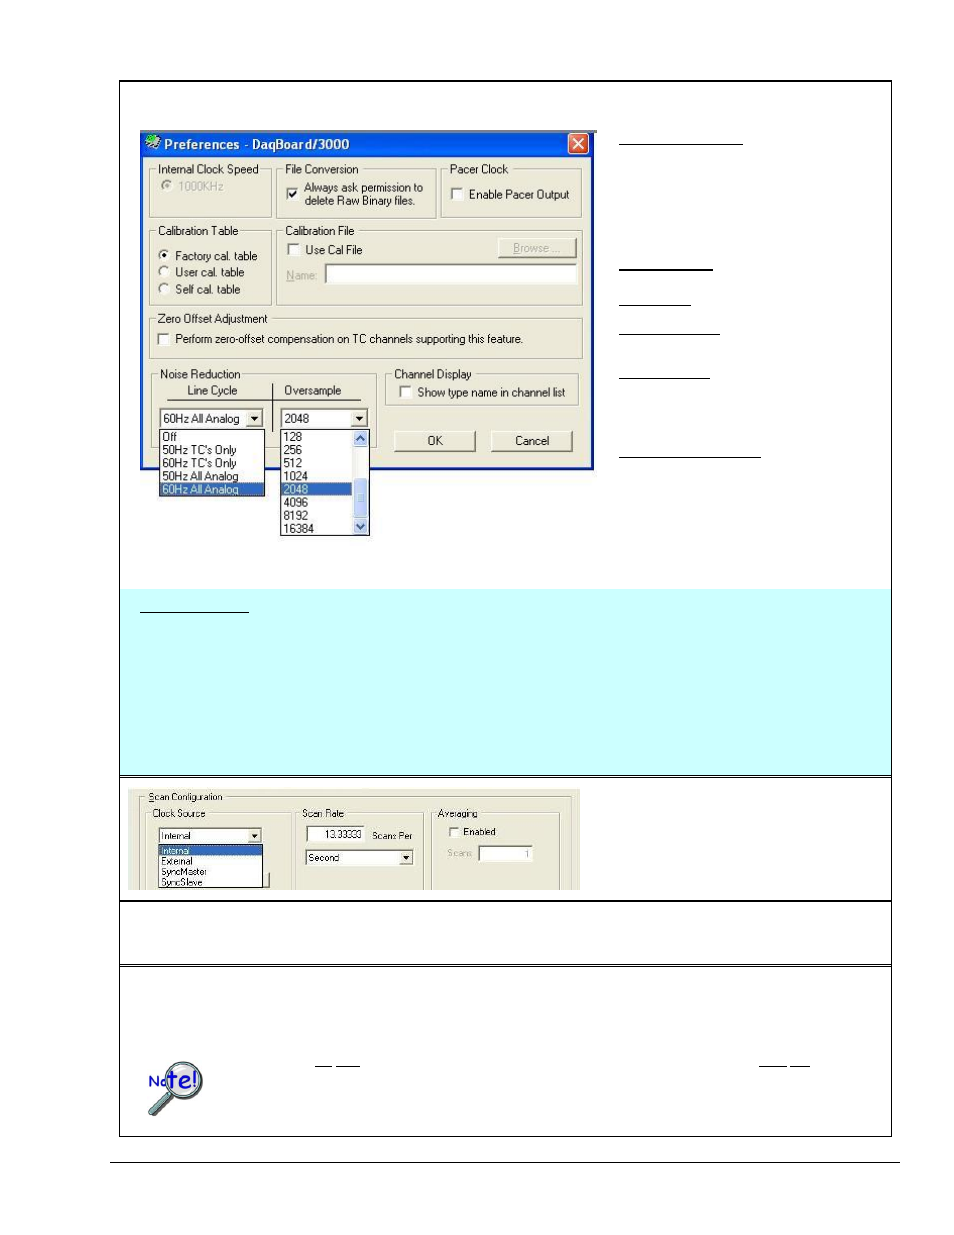
Clock Source
The
following options. The dialog box can also be accessed from the Window pull-down menu.
Internal Clock Speed
– Shows the speed of
the internal clock, for example, 1000 kHz for a
DaqBoard/3000 Series device. For some
hardware, the panel can be used to change the
internal clock speed; for example, from 200
kHz to 100 kHz. DaqView may prompt you to
change the internal clock speed setting when
using certain expansion DBKs.
File Conversion
– Enable or disable a “delete
Raw Binary files” notice.
Pacer Clock
– Enable or disable a pacer clock.
Calibration Table
– Select the Factory, User,
or Self-calibration table.
Calibration File
– Included on a separate
disk, the calibration file fine tunes the accuracy
of the device. Read the readme.txt file on the
disk for more information.
Zero Offset Adjustment
– When checked, this
feature protects against drift by performing a
zero-offset compensation for thermocouple
channels which support the corrective function.
For some devices, certain s
ections of the “Preferences” box may not apply.
Consult your hardware user
’s manual in regard to applicability.
Noise Reduction
– This panel includes a pull-down list for selecting one of several Line Cycle Rejection functions and a second list
for selecting the amount of oversampling to be performed.
Line Cycle
– Used to reject noise resulting from 50 Hz or 60 Hz source power. Selection can be made for all analog channels
or exclusively for thermocouple channels.
Oversample
– For /3000 Series devices an “oversampling” function can be selected via the associated checkbox. Available
values are:
2, 4, 8, 16, 32, … … up to 16384 (in multiples of 2). The selected number is the sample value to be used for the
averaging of data, before the data is delivered to the buffer. Refer to your hardware manual for detailed information. Note that
the oversampling panel will be grayed-out for devices which do not make use of the function. Oversampling is sent to the
scope. See “Note” below regarding “Averaged” data and “Oversampled” data.
Scan Rate
The scan frequency can be set in units of seconds, milliseconds, minutes, or hours via a pull-down box. Typing into the
numeric field changes the rate. The maximum scan frequency is dependent on the number of channels that are enabled
and whether or not averaging is enabled. Enabling more channels or averaging will lower the maximum scan frequency.
Averaging
The checkbox allows averaging of the analog input data to be enabled or disabled. Averaging can be used to increase
the effective accuracy of a noisy signal. Averaging will increase the actual scan frequency and number of scans, but the
perceived scan frequency and number of scans (which is set by DaqView) does not change. Averaged data is not sent
to the scope. See “Note” below.
Averaged Data is not sent
to the Scope. To see DaqView’s averaged data in a scope display you must use an Analog,
Averaged Time Scope
with DaqView’s settings.
Oversampled Data is sent to the Scope. Any of the scope display modes can be used to view oversampled data.
See Chapter 5 for information regarding the Scope Window.