Top Flite TOPA0130 User Manual
Page 46
❏
8. Due to the variety of engine configurations
and each modeler's
preferred method, no
throttle hookup materials are included with this
kit. Our 2-stroke and 4-stroke prototypes were
hooked up using 2-56 Threaded Ball Link
connectors (#GPMQ3850) at the throttle and
servo, and a Great Planes Accu-Glide Nylon
Pushrod (#GPMQ3710).
RETRACTS
❏ ❏
1. Hook up the air lines to the retracts and
route them to the center of the wing. Hint:
For a
more scale retract speed, insert air restrictors in
the four lines that connect to the retracts.
Position the restrictors at the retract end of the
line.
❏ ❏
2. Screw in the retracts, hook them up,
and test their operation.
COCKPIT FINISHING
(Basic cockpit)
❏
1. Sand the inside of the cockpit with 320 grit
sandpaper. True up any uneven edges in the
cockpit area.
❏
2. Assemble and paint your pilots. Our
Williams Brothers scale pilots required a 1/2"
block under them to adjust their height.
We also
modified the pilots to have ear phones and life
jackets. Test fit the pilots into the model.
❏
3. Paint the interior of the cockpit. An
alternative to paint is to cover the inside of the
cockpit with a fine grit black sandpaper for a
textured finish. If you use the sandpaper
technique, it is still advisable to first paint the
cockpit corners black
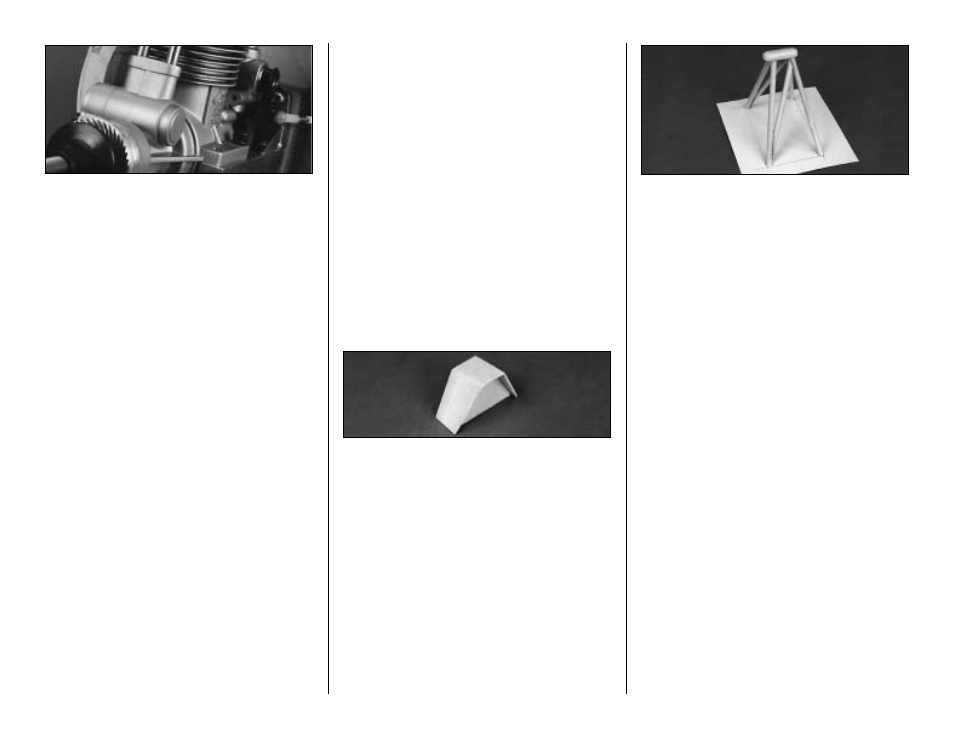
❏
4. Locate the die-cut rear instrument panel
parts. Refer to the photo above, then CA the two
sides to the ply instrument panel. Sand the top
edges flush. Glue on the top with the wide end
pointing toward the front of the fuse. Paint the
entire assembly black, or finish the outside with
fine black sandpaper like the cockpit floor.
❏
5. Install the Instrument Panel Decals. They
may be applied directly to the existing panel.
Hint: For best results, stick the decal to a scrap
piece of 1/64" to 1/16" plywood, trim it to shape,
then glue it in place.
❏
6. The Roll Cage is made from two 3/16" x
12" dowels and a scrap of 3/8" x 1/4" x 1-1/14"
balsa. Draw a 2" x 3-1/2" rectangle on a piece of
cardstock. Round off the edges of the balsa top
piece. Cut four legs from the dowels, 3-3/4"
long. Hold two of the legs to form an inverted
"V" with the bottom ends at the wide corners of
the rectangle. Using the old eyeball method,
sand angles on the bottom ends to sit flush with
the cardstock. Sand angles at the top ends to
blend with the top piece. Glue the legs to the
card stock and also to the top piece. Repeat for
the other two legs. Cut and fit two diagonal
braces that run from the bottom forward leg to
the top aft leg. Glue them in place. Fill any gaps
with balsa filler, then sand the assembly
smooth. Prime, then paint the assembly black.
Remove it from the cardstock before gluing it to
the cockpit floor.
46