Top Flite TOPA0130 User Manual
Page 23
Socket aligned with the center marks. Draw a
line on the pushrods at the end of each Brass
Coupler. Cut off the ends of the pushrod wires
1/4" towards the center from the marks. File off
any burrs and test fit the assembly.
TIPS FOR SILVER SOLDERING
Use this process when soldering metal to metal
such as brass tube to wire, or pushrod ends
to wire.
A. Thoroughly clean the items to be soldered
with alcohol or degreasing solvent. Pay special
attention to the inside of the Threaded
Brass Couplers.
B. Roughen the area to be soldered with fine
sandpaper, then clean again.
C. Assemble the items to be soldered.
D. Apply a small amount of soldering flux. Acid
based flux works best when one or more of the
items is steel.
E. Heat the metal with a soldering gun or iron,
and apply solder to the metal. The metal must
get hot enough to melt the solder and the solder
must flow freely into joint.
F. Do not move the par ts until the solder
has cooled.
G. Test the joint by pulling hard.
H. Clean off the excess flux with alcohol or
solvent. Coat the parts with a very fine film
of oil.
❏
22. Unscrew the Threaded Brass Couplers
from the Dual Aileron Coupler to prevent the
Nylon from melting, then silver solder them to
the pushrod wires. Unsnap the Clevises from
the Bellcranks and screw the Dual Aileron
Coupler back on the Threaded Brass Couplers.
Reconnect the Bellcranks to the pushrods and
make final adjustments to center the ball
socket and align the Aileron Pushrods at
the TE.
❏
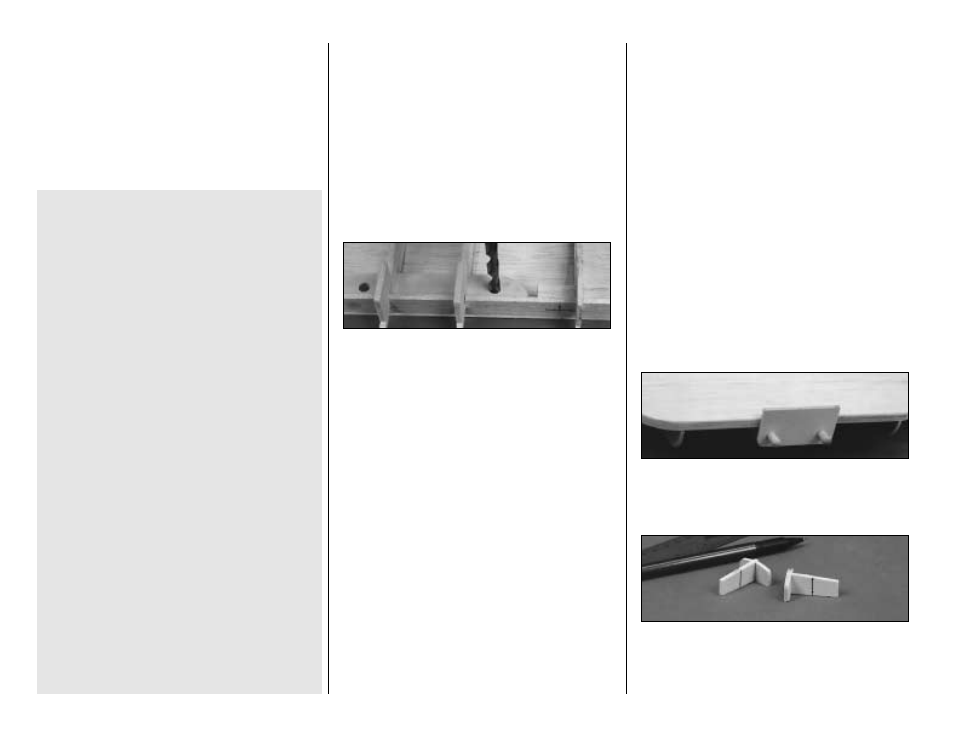
23. Use a sharpened piece of wire to bore
through the exposed side of the Wing Bolt plate
to mark the holes in the bottom wing skin for
the wing bolts. Mark these holes now as it will
be difficult to find the location after the top wing
skin is applied. Open up the holes on the bottom
side with a Dremel drum sander.
❏
24. If you are planning on using operational
flaps, you can simplify the job of "fishing" the
servo wires through the enclosed wing with a
little preparation. Tie one end of a 24" length of
string to a 5" long scrap balsa stick. Thread the
string through the wing rib holes between both
servo hatch openings and tie another stick to
the other end. Secure the excess string in the
aileron servo compar tment. When the time
comes to thread the servo wires, just tie them to
the string and pull them through to the center
compartment.
SHEET THE TOP OF THE WING
NOTE: This kit includes a special set of wing
jigs to hold the wing at the proper washout
angle (2 degrees washout at each tip) while you
apply the top skins. Twisted wings are a major
cause of bad flight characteristics. Polyhedral
angles can vary slightly, so if your tip jigs require
adjustment, just be sure that both tip jigs are
modified the same, and are therefore identical.
Be careful not to change the washout angle (the
negative angle of attack of the tip ribs) if you
adjust the jigs.
❏
1. Carefully remove the two 1/4" balsa wing
jigs from the wing. Trim off the jig tabs from W-1
through W-15. Blend away any inconsistencies
in the top wing surface with a T-bar and 220 grit
sandpaper. Check around each rib at the LE for
glue blobs and remove them with a hobby knife
or sandpaper.
❏
2. Slide the die-cut 1/8" plywood LE Jig over
the dowels, with the flat edge towards the
sheeted bottom side of the wing.
❏
3. Glue the die-cut 1/8" plywood TE Jigs
together. Draw a reference line through the two
punch marks as shown in the photo.
23