Top Flite TOPA0130 User Manual
Page 24
❏ ❏
4. Use the reference line you drew to
align the TE Jig with the TE at Flap Center. Tack
glue the TE Jigs to the bottom skin under the W-4
Ribs. If you are not using flaps, and the TE has
been sheeted, you can find the location of W-4
by using a pin or a sharpened wire to poke a
small hole through the skin from the top at
the correct spot.
❏ ❏
5. Place a die-cut 1/8" plywood Tip Jig
under each W-15 rib. You should tape or tack
glue the Jig to the wing.
❏ ❏
6. Check the fit of an outboard skin to the
wing structure. Make adjustments if required to
fit flush with the LE. Sand a slight bevel to the
edge of the skin that will contact the LE to allow
for a better gluing surface. Once a good fit is
obtained, mark and cut the inboard edge of the
skin so that it will fall on the joint between
W-5 and W-6.
❏ ❏
7. Hold the skin in place, butted firmly
against the LE, then wick Thin CA into the joint.
Wipe off any excess glue before it dries.
❏ ❏
8. Gently lift the skin and apply a bead of
Thick CA (CA-) to each rib. Apply glue to the
Main Spar and the TE at the Flaps and Aileron
last. Roll the skin into position and smooth it into
contact with the underlying structure. Add
weights to the entire top of the wing while the
glue dries. A small stack of magazines are ideal
for this purpose as they will match the contour of
the wing.
9. Repeat steps 6,7, and 8 for the other panel.
❏
10. Measure and cut a 1/16" balsa sheet to
fit the openings at the aft end of the wing skins.
When satisfied with the fit, glue them in place.
❏
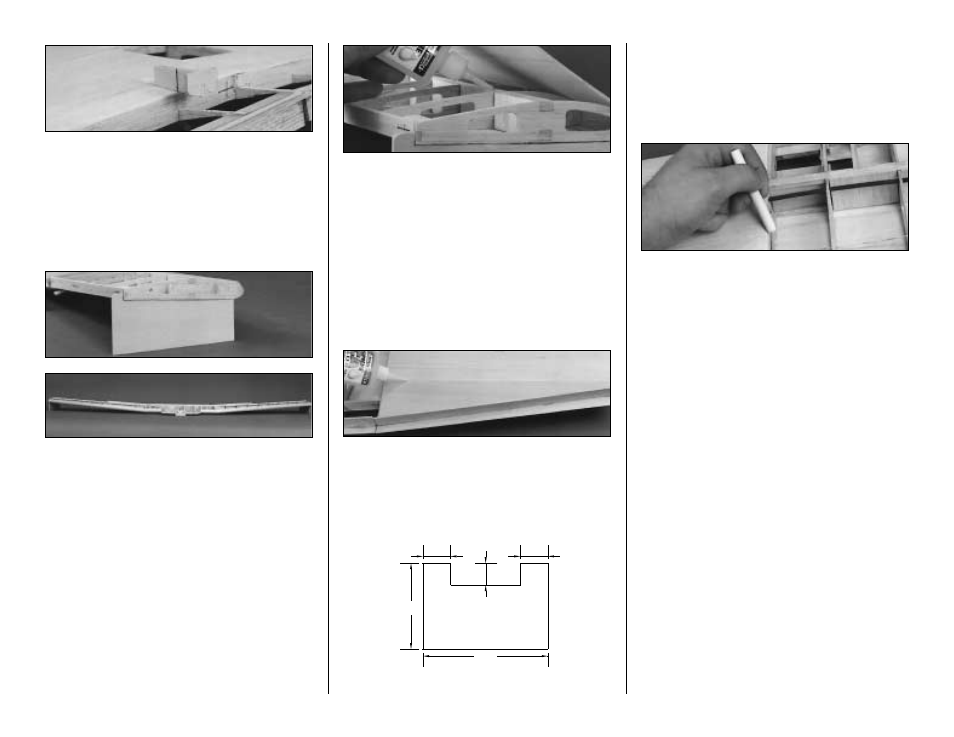
11. Cut the top center panel skin to the
dimensions shown in the sketch. When cut,
t h e s k i n w i l l b e s l i g h t ly l a rg e r t h a n t h e
opening to allow for the edges to be trimmed
to the exact size.
❏
12. Lightly rub some chalk along the top
edge of the outboard panel skin. Tape the aft
edge of the center skin in position along the ply
(or tapered balsa) TE. By pressing the center
skin down over the chalked edges, and rubbing
your finger over the seam, you will transfer an
exact outline in chalk to the center skin. Trim
away the excess balsa with a hobby knife, then
sand with 220 grit for a precise fit. Fit the LE of
the sheet by trimming a little at a time. Do not
glue it in place yet. Tape the center skin in
position for the time being.
❏
13. Remove the excess plastic from around
the perimeter of the Wing Center Fairing. (See
photo at step 16) Score the plastic with a hobby
knife then flex the plastic until it breaks off. Trim
the Fairing to the embossed outline that can be
found on the inside of the part. Try to make nice
straight edges as you will cut the balsa skin to
match the Fairing.
❏
14. Drill two 5/16" holes in the Fairing to allow
the wing dowels to poke through. The Center
Fairing has been marked with the proper location
for the holes, but building variations may require
that you enlarge the holes for a good fit.
3-3/4"
3-3/4"
3"
17"
11-3/4"
24