Top Flite TOPA0130 User Manual
Page 34
❏ ❏
14. Once the epoxy has cured, apply
more masking tape about 1/4" out from the joint,
then use model filler to create a neat fillet along
the length of the joint. Once again, remove the
tape before the filler dries and feather the edges
with your finger to avoid excessive sanding.
This
is also a good time to fill in the opening around
the rudder pushrod tube with filler.
❏
15. Repeat steps 13 and 14 for the top of
the Stab.
❏
16. Note: Protect the stab and fin skins
with masking tape around where you will be
sanding to avoid the possibility of
dangerously thinning the skins. Lightly sand
the first layer of filler around the Stab and the
Top Deck, then apply a second coat. This time
start building it up around the LE of the fin so
that the fin will blend smoothly with the Fuse.
When the filler is dry use different thickness
dowels wrapped with 220 grit sandpaper to
shape the fillet.
Take your time to blend all
contours with the Fuse.
This will finish the top half of the fuse, except for
final sanding and covering. Take a breather to
admire you work, then turn the assembly over
and add glue fillets to the inside, wherever you
see a need. You might even want to take a
minute to trim the canopy to size and check the
fit. Looking good!
FRAME THE FUSE BOTTOM
From here on you will need a cradle to support
the Fuse. As mentioned earlier, you can use a
ready-made stand or a Styrofoam ice chest can
be shaped to do the job.
❏
1. Locate the right and left die-cut 1/8" ply
Wing Saddles. If you hold them together you
will notice that one is longer than the other.
The
longer one fits the left side of the fuse
(or to your right when the fuse is upside down).
Check the fit of both parts with the notches in
the forward crutch, then mark the insides of
both parts.
❏
2. Use 6-minute epoxy to glue the die-cut
1/8" ply Wing Block Doublers to the inside
surface of the Wing Saddles. Be sure that the
aft edge is flush with the notched portion of the
saddle and that the bottom edge is flush with
the bottom of the saddle as shown in the photo.
❏
3. Use 6-minute epoxy to glue the two die-cut
1/8" ply Wing Dowel Formers together.
❏
4. Test the Wing Saddles with the forward
Crutch. Test fit the Wing Dowel Former with the
Wing Saddle. When satisfied with the fit, glue all
components together with medium CA. Apply a
fillet of CA along the joint between the Wing
Dowel Former and the Saddle. Note: Use a
triangle to square up the Saddles with the Fuse.
❏
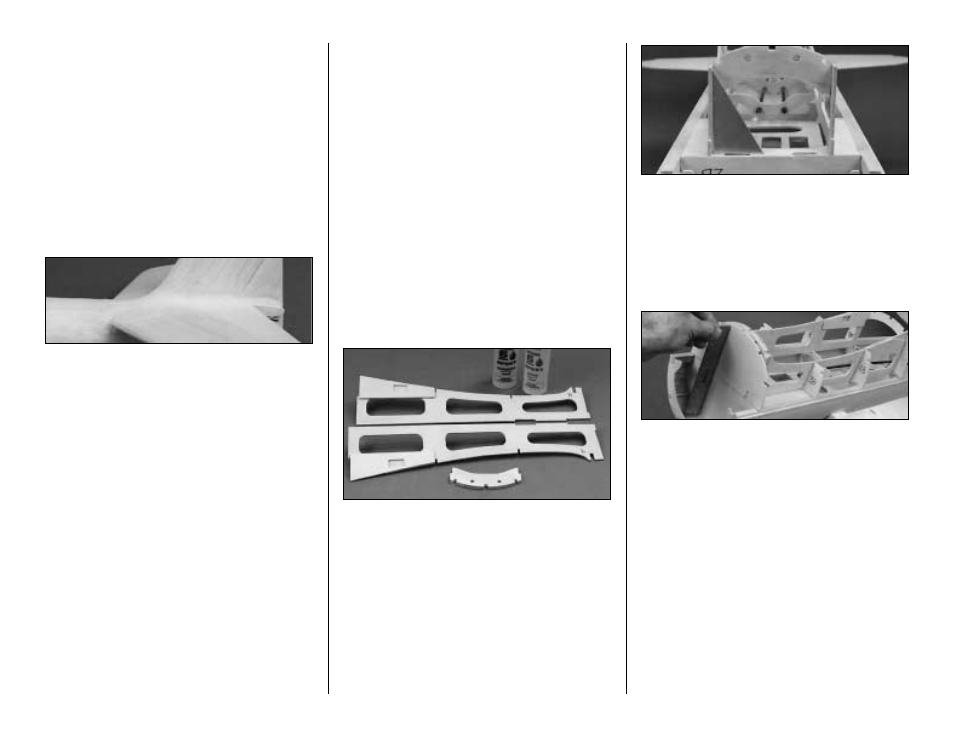
5. Glue the die-cut 1/8" ply F-2C, F-3B, F-
4B, and F-5B to the Wing Saddle and top
Formers as shown in the photo. Make sure that
the die stamped numbers face forward and that
all parts fit their respective notches. Check that
F-2C is even with F-2B by holding a shor t
straightedge across the joint.
❏
6. Glue F-6B, F-7B, and F-8B in position as
shown on the plans. Use a straightedge to
maintain vertical alignment between top and
bottom Formers. Hint:
For better bonding with
the sheeting, lightly sand the formers' edges so
that they are slightly beveled to match the angle
of the fuse.
34