Top Flite TOPA0130 User Manual
Page 33
❏ ❏
2. From a 3/32" x 3" x 15" balsa sheet, cut
a piece 12-5/8" long to use to sheet the upper
portion of the aft fuselage, from approximately
1-1/2" forward of F-6 to F-8. Carefully cut out the
opening for the stab, testing the fit frequently.
Trim the top edge of the sheet to extend only
slightly above the top Stringer. Bevel the top half
of the notch to allow the balsa to fit flush on top
of the stab when bent to contact with the surface
of the Stab.
❏ ❏
3. Dampen the outside of the balsa sheet
with water (to help with bending) then glue it to
the top edge of the Fuse Side. Apply medium
CA to the formers and top stringer, then roll the
sheet into contact. Hold it in position until cured.
❏ ❏
4. Repeat steps 2 and 3 for the other side
of the Fuse.
❏ ❏
5. While waiting for the sheeting to dry
out, locate the 3/8" x 30" tapered balsa cockpit
Side Rail. Cut the Side Rails to fit flush with
the edges of the fore and aft cockpit sheeting.
Optional:
If you prefer, the Side Rails may be
cut to fit the length of the cockpit, from the
instrument panel to F-6. Notch out the portions
of the Side Rails that will fit behind the
sheeting to allow the Side Rails to be flush with
the cockpit edge.
❏
6. Use a sanding block or T-bar with sharp
#220 grit to sand the top edge of the sheeting
and stringers flat. Sand everything until flush
with the tops of the formers.
❏
7. Hold the 3/8" x 2-3/8" x 12" balsa Top
Deck Block on top of the Stringers as shown on
the plans. Trace around the underside with a
pencil to establish the outline, then trim it to
approximate size and shape. The aft bottom
edge must be tapered to fit flush with the Stab
top. When satisfied with the fit, glue it to the fuse
with Medium CA.
❏
8. Use a razor plane and a hobby knife with
a long blade to finish carving the Top Deck to
shape. Refer to the plans often to obtain the
correct shape. Finish off the job with a sanding
block.
❏
9. Fill the cavity on the Stab, just ahead of
the Fin, with a piece of scrap balsa.
❏
10. Use model filler (Hobbico
HobbyLite balsa
colored filler recommended) to start blending the
Top Deck with the Stab. Notice we said
start.
Model filler should be applied in layers, allowing
each to dry between applications.
❏ ❏
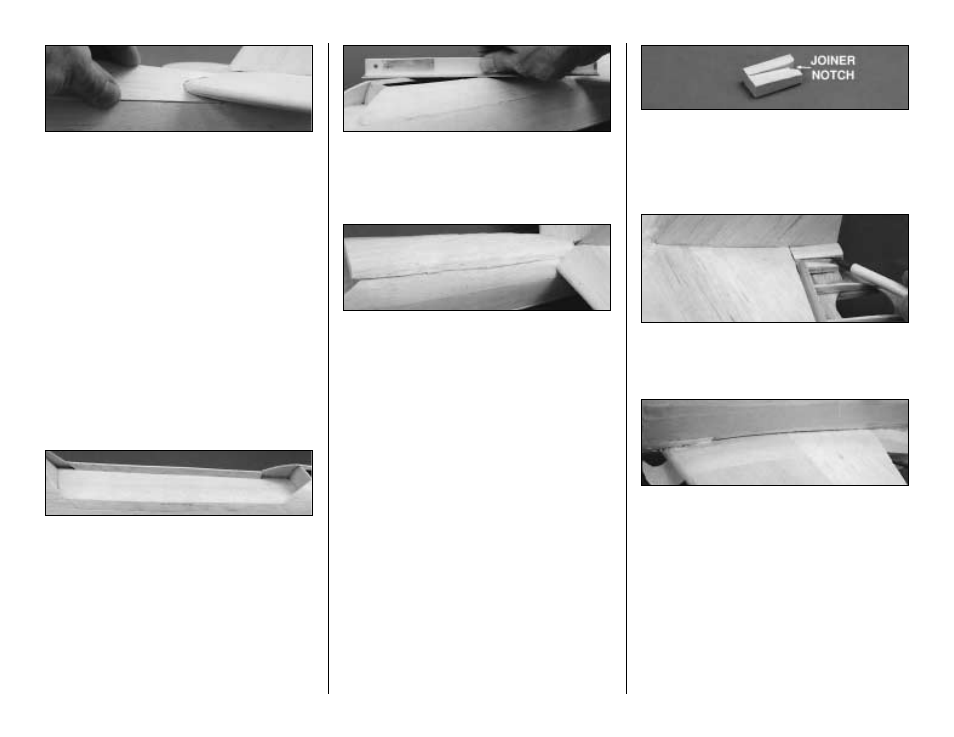
11. Cut two Rear Fairings from the 1/2" x
3/4" x 3-1/8" balsa block to fit from the Stab TE
to the Fin TE. Notch out the blocks as shown in
the photos to fit around the Elevator Joiner wire
and the lip on the Fuse Sides.
❏ ❏
12. Tape an Elevator in position, then
mark the airfoil shape on the fairing. Trim and
sand the Fairing to match the Elevator.
❏ ❏
13. Turn the Fuse over and support the
a f t e n d o f f t h e wo r k s u r fa c e. H i n t :
A n
inexpensive Robart Super Stand works well for
t h i s p u r p o s e, a n d b e c a u s e i t ' s m a d e o f
Styrofoam, can be modified to conform to the
Fuse shape. Stick masking tape to the bottom
of the Stab and also the Fuse Side about
3/16" of an inch on either side of the joint. Mix
some 30 minute epoxy, then squeeze it into
the Stab/Fuse joint. Remove the tape before
the epoxy cures and feather out the excess
with your finger.
33