Build the wing, Preparation – Top Flite TOPA0130 User Manual
Page 13
❏
8. Glue two 5/8" shaped balsa Rudder
Bottoms flush with the bottom edge of both
sides of the Rudder Base.
❏
9. Glue a 1/2" x 5/8" x 1-13/16" balsa Rudder
Horn and Tail Wheel Block to both sides of the
rudder at the location shown on the plans.
❏
10. Cut "ribs" from the 3/32" x 5/8" x 36"
balsa sticks and glue them to both sides of the
rudder at the locations you previously marked.
❏
12. Refer to the photos and the cross
sections on the plans to obtain the shape of the
rudder. Use a razor plane and sanding block to
"rough in" the shape of the r udder. Final
shaping, fitting, and beveling should be done
after the fin is glued onto the fuselage, but you
may wish to tape the rudder to the fin at this
point to blend the upper ends of both.
BUILD THE WING
NOTE: The wing panels are built
"UPSIDE-DOWN" on the plans. The
jig tabs are attached to what is, in
t h e e n d , t h e TO P s u r f a c e o f t h e
w i n g . S i n c e i t i s t h e s t a n d a rd
convention to show the Top View of
the wing, and the wing panels are
built upside-down, the LEFT wing
panel is built over the RIGHT Wing
Top View and vice-versa. This does
not present any problems; just be
sure to build a left and a right wing.
PREPARATION
❏
1. Locate the four 1/4" x 3/8" x 30" hard balsa
Wing Spars, then cut them to 25-1/2" each.
Save the cut-off ends for the flap servo mounts.
❏
2. Punch out all the die-cut 3/32" balsa wing
Ribs and 1/8" ply Doublers. Smooth out any
imperfections with sandpaper. Be sure to keep
the jig tabs attached to the ribs.
❏
3. Ribs W-2 through W-9 have punch
marks just aft of the spar. Drill a 3/16" hole at
each of these marks for future installation of
the aileron pushrods.
❏
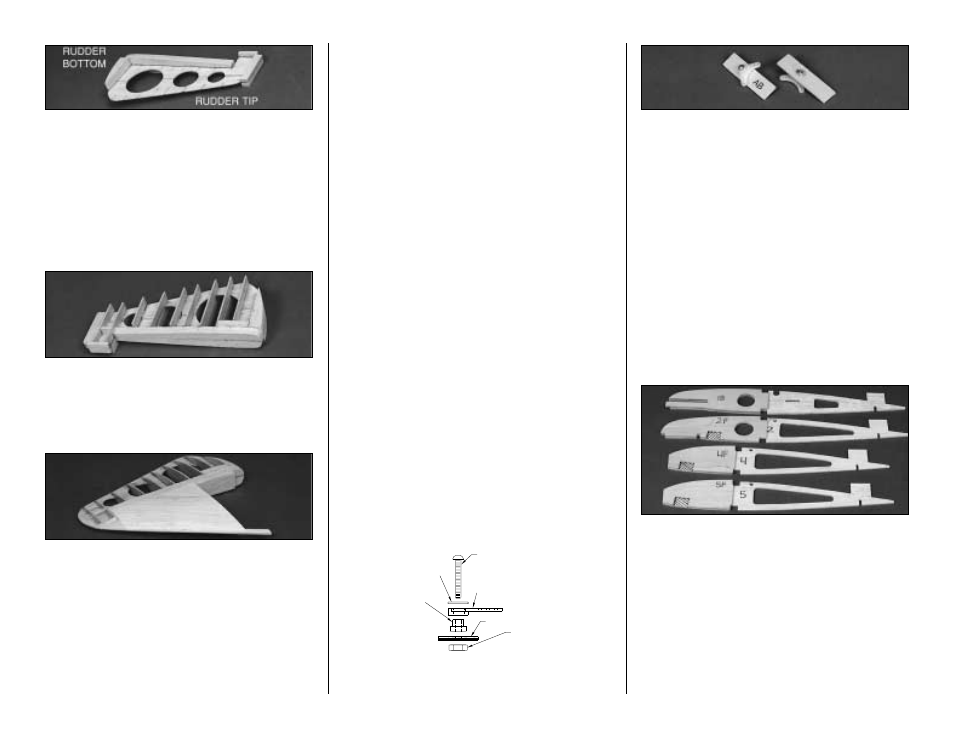
4. Drill 1/8" holes through the punch marks in
the two die-cut 1/8" plywood Aileron Bellcrank
Plates (AB). Assemble the bellcrank parts as
shown in the sketch. Be sure to put a drop of 6-
minute epoxy on the 4-40 nut and threads to
prevent the bellcrank from vibrating loose.
NOTE: If you haven't already done
so, now is the time to decide which
type of landing gear configuration
you will be using. Fixed or
Retractable?
❏
5. (Skip this step if installing retracts) If you
chose to build your AT-6 with fixed gear, locate
wing ribs W-1, W-2, W-4, W-5, and plywood
doublers 1B, 2F, 4F, 5F. Refer to the left half of
the center section plans for the proper location of
each doubler, then use CA+ to glue the ribs and
doublers together. Be sure to make a LEFT and
a RIGHT of each rib assembly. Remove the
shaded area with a hobby knife or razor saw to
allow for the gear rails.
4-40 x 3/4" BOLT
NYLON BELLCRANK
BRASS
#4 WASHER
4-40 NUT
BUSHING
PLYWOOD
13