Top Flite TOPA0130 User Manual
Page 14
❏
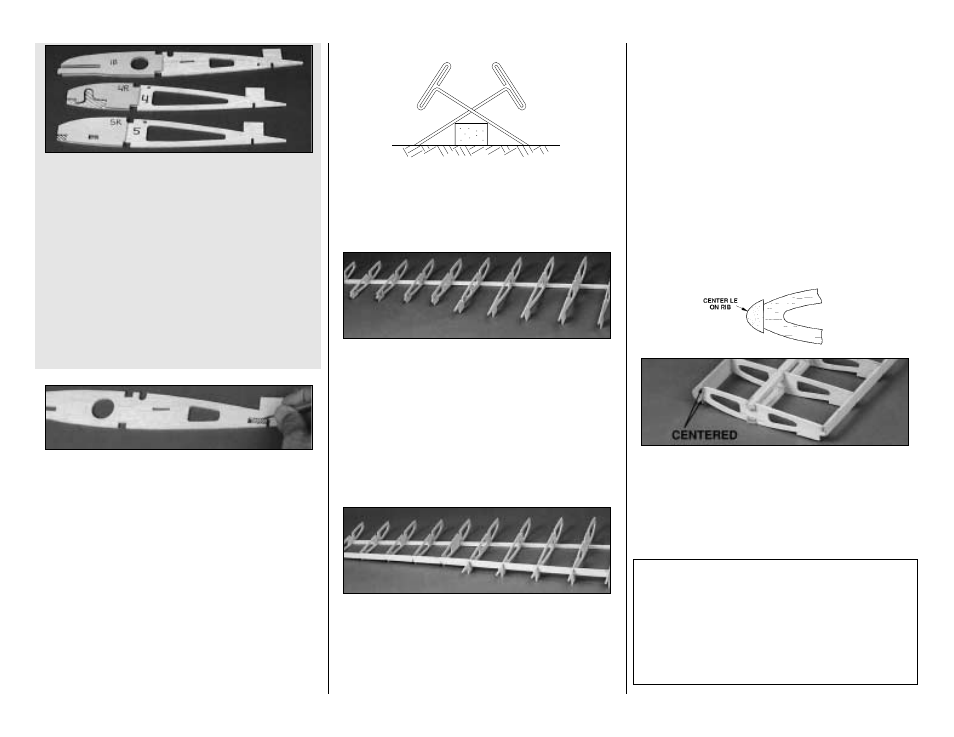
6. (Skip this step if installing fixed gear) If you
chose to build your AT-6 with retractable gear,
locate wing ribs W-1, W-4, W-5, and plywood
doublers 1B, 4R, 5R. Refer to the right half of
the center section plans for the proper location
of each doubler, then use CA+ to glue the ribs
and doublers together. Be sure to make a left
and a right of each rib assembly. Remove the
shaded area with a hobby knife or razor saw to
allow for the gear rails.
NOTE: For retracts, rib W-2 does not
require a doubler.
❏
7. Finish cutting the slot in the aft portion of
both W-1 ribs to allow for later insertion of the
Wing Bolt Plate.
Okay, the prep work is behind you, so now that
the dull stuff is done, let's build the outer wing
panels so you'll have something to show when
your friends drop in to check on your progress!
BUILD OUTER WING PANELS
❏
1. Place a wing panel plan on your building
board and cover it with waxed paper.
Cutting the
wing panel sections apart makes handling easier.
❏ ❏
2. Pin a Spar to the building board at
three or four locations using the cross-pinning
technique shown in the sketch.
❏ ❏
3. Position the die-cut 3/32" balsa ribs
W-6 through W-15 on the spar. These should be
ver tical and aligned over their appropriate
locations as indicated on the plans.
The jig tabs
located near the aft end of the ribs should all
contact the work surface. Glue W-7 through W-
15 to the spar. Pin W-6 in place for the time being.
❏ ❏
4. Test fit the die-cut 1/8" balsa OUTER
TE AT FLAP and TE AT AILERON to the aft
edges of ribs W-6 through W-10 and W-11
through W-15 respectively. The upward facing
edges of the ribs and the top surface of the
trailing edges should be even, and all of the jig
tabs should touch the work surface. NOTE: Both
Trailing Edges taper slightly from one end to the
other. The narrow ends should be located at W-
10 and W-15.
❏ ❏
5. Sight down the TE of the wing from the
root end; make sure all the ribs are aligned. Use
paper to shim under the jig tabs of any ribs that are
low. When everything looks level, glue the TE's in
place. Once again, don't glue the W-6 rib.
❏ ❏
6. Press the Spar into the wing notches
and check for a flush fit at each rib. When
satisfied, glue ribs W-7 through W-15 in place.
❏ ❏
7. Cut a 4" length from each of the two
shaped balsa Leading Edges.
These short
pieces will be used when building the center
wing panel. Center one of the long LE's
vertically on the front edge of the ribs. Glue it to
ribs W-7 through W-15.
NOTE: Do steps 8 and 9 for a wing
without
operational flaps. Skip the next two steps if
you are building a wing with operating flaps.
❏ ❏
8. Cut one of the tapered 1/2" x 24" balsa
Flap TE in half, to make two 12" lengths. Note:
This Flap TE is not used if you build operating flaps.
14