Top Flite TOPA0130 User Manual
Page 37
❏
4. Apply medium CA to the ply Saddle only,
then align the sheeting strip flush with the inside
edge of the ply Saddle and glue it in place.
Repeat this operation for the other side.
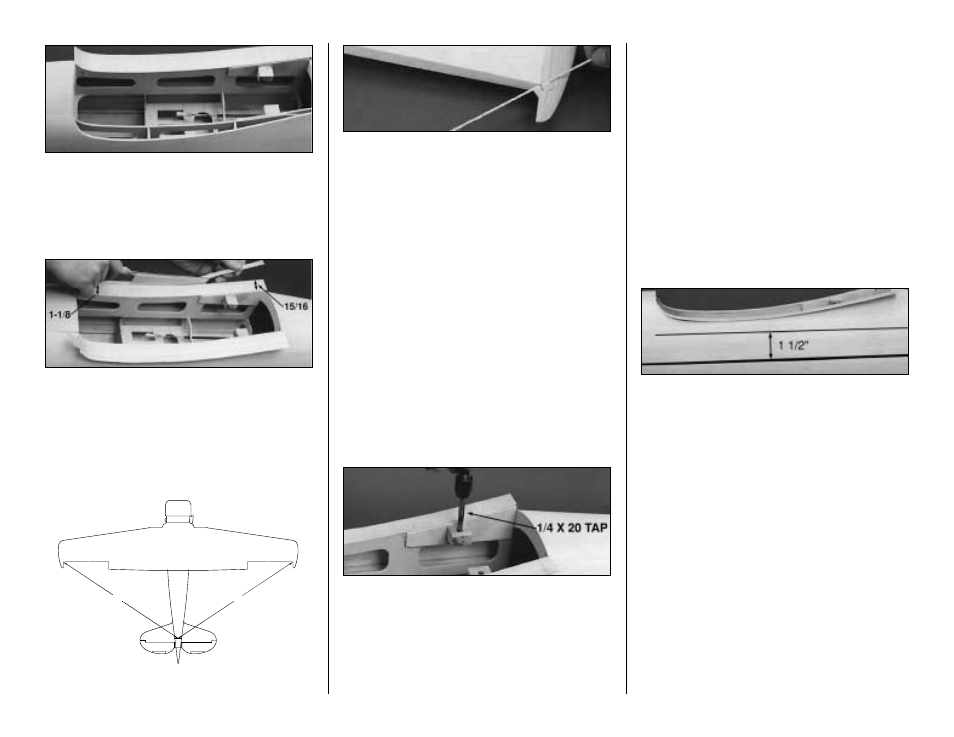
❏
5. Measure and mark 1-1/8 " from the inside
edge of the ply Saddle 1-1/4" aft of the dowel
Former. Measure and mark 15/16" from the
inside edge of the ply Saddle at F-5B. Connect
these two marks with a strip of masking tape.
Trim and sand the sheeting to this line.
❏
6. Install the wing and check the fit. Make
adjustments as necessary. Hold a string (with
one end attached to a pin centered at the tail)
up to a wing tip. Put a piece of tape on the string
to mark the intersection of the string and the
wing tip. Swing the string over to the other wing
tip and check to see if the distances are the
same (see diagram). Adjust the position of the
trailing edge of the wing until the wing is
properly aligned.
NOTE: Make sure the wing is held
securely and cannot shift while you
are drilling the mounting holes.
❏
7. With the wing aligned and taped in place,
lightly mark the center of the wing mount holes
on the mount blocks with a 1/4" drill.
❏
8. Remove the wing and finish drilling the
holes with a #10 (or 13/64") drill bit through the
wing mount blocks. Tap the holes with a 1/4"-20
tap. Add a couple drops of thin CA to the holes
to harden the threads, then re-tap the holes
after the CA has fully hardened.
BUILD THE WING FILLET
NOTE: There are many techniques
to build a wing fillet. Some modelers
prefer to carve the entire fillet from
balsa. Others use a mixture of epoxy
and micro balloons to finish the fillet.
If you have a favorite technique, feel
free to use it. The technique
described below works fine for
MonoKote-covered aircraft.
❏
1. Draw (or tape) a reference line along the
upper & lower Fuse joint. Measure 1-1/2"
towards the Saddle, then draw a line parallel to
the reference line.
❏
2. Cover the center section of the wing with
waxed paper or plastic wrap, then bolt the wing
in position.
❏
3. Press the 1/16" balsa saddle sheeting into
contact with the wing, then run a bead of thick
CA along the seam between the balsa saddle
and the balsa saddle sheeting. This technique
will take care of any unevenness on the wing's
surface. The wing may be removed after the CA
has cured.
A
A=A
A
37