Top Flite TOPA0130 User Manual
Page 35
❏
7. Stand the Fuse up on its nose on a sheet
of waxed paper. Add a weight to the inside of
the F-2 Formers. While the Fuse is in this
position, glue F-1B into the notches of F-1. Glue
three forward 3/16" x 3/16" stringers from F-1B
to the Wing Dowel Former to maintain alignment
of F-1B. When the glue has dried, put the fuse
back into the cradle.
❏
8. Glue 3/16" Stringers between F-1B and
the center of F-5B. Glue five 3/16" Stringers
between F-5B and F-8B. When everything is
dry, lightly sand all joints and even up the
stringer ends with the Formers.
❏
9. Use a liberal amount of 30-minute epoxy
to glue the 1/2" x 7/8" x 7/8" Maple Wing Mount
Blocks into the recessed locations in the Wing
Block Doublers. Use small clamps to hold them in
position while the epoxy cures. For additional
strength you may add a couple of scraps of 3/16"
balsa to the underside (toward the cockpit floor) of
the blocks before the epoxy hardens.
SHEET THE FUSE BOTTOM
❏
1. Cut two Lower Fuse Sheets from 3/32" x
4" x 42" balsa to match the pattern on the plans.
The cut sheets will be slightly oversize to allow
for final fitting and sanding.
❏
2. Position a side sheet on the Main Stringer
ledge with the vertical portion (at the wing TE)
flush with the forward edge of F-5B. Press the
sheet against the Main Stringer at F-5B and
wick thin CA into the joint, from the inside.
Star ting at F-5, work forward and aft, tack
gluing the sheet in place as you proceed. When
the length of the sheet has been tacked in
place, go back and wick thin CA along the entire
inside edge.
❏
3. Trim the length of the aft section of
sheeting to fall on the centerline of the 3/16"
Stringer. Hint:
Use masking tape to hold the
sheeting in position along the Stringer, then use
a metal straightedge an a hobby knife to cut off
the excess from F-5B to the Fin Post.
❏
4. Bend the sheet into contact with the aft
Stringer, then wick thin CA into the joint.
Again work forward and aft from F-5B outward.
If the balsa sheet feels stiff, use water on a
paper towel to moisten it. Finish attaching the
sheet by wicking CA into all former joints along
the length of the sheet. Wipe any excess CA
from exposed edges before it cures.
❏
5. Repeat the previous three steps for the
opposite side.
❏
6. Locate the two 3/32" x 4" x 24" balsa
Bottom Sheets. Cut a 4" x 2-5/8" piece from
one of the sheets. Trim this small sheet to fit the
bottom of the forward Fuse. CA the sheet in
position when it fits.
❏
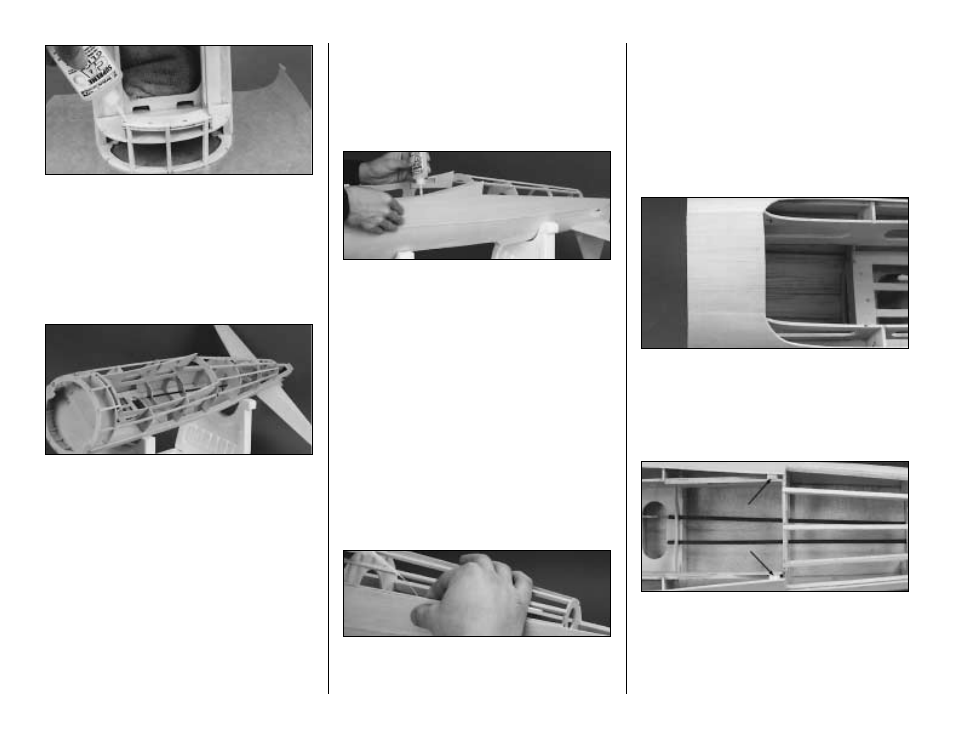
7. Cut two scraps of 3/32" balsa to fit
between the ply Wing Saddle and the Lower
Sheet at F-5B. Glue them in place as shown in
the photo. These pieces will hold the sheeting in
alignment and provide support for the aft edge.
35