Physical installation, Open the cpu chassis – Welch Allyn Connex CS Central Station & Server - User Manual User Manual
Page 138
132
Installing Video Cards
Welch Allyn
Physical Installation
Confirm that all preparation steps, including BIOS updates, have been completed prior to
physical installation of any video cards.
Open the CPU Chassis
1.
Carefully remove all cables from the back of the CPU and remove it from the central
station.
2.
Place the CPU on a flat working surface, with the vented cover panel facing up.
3.
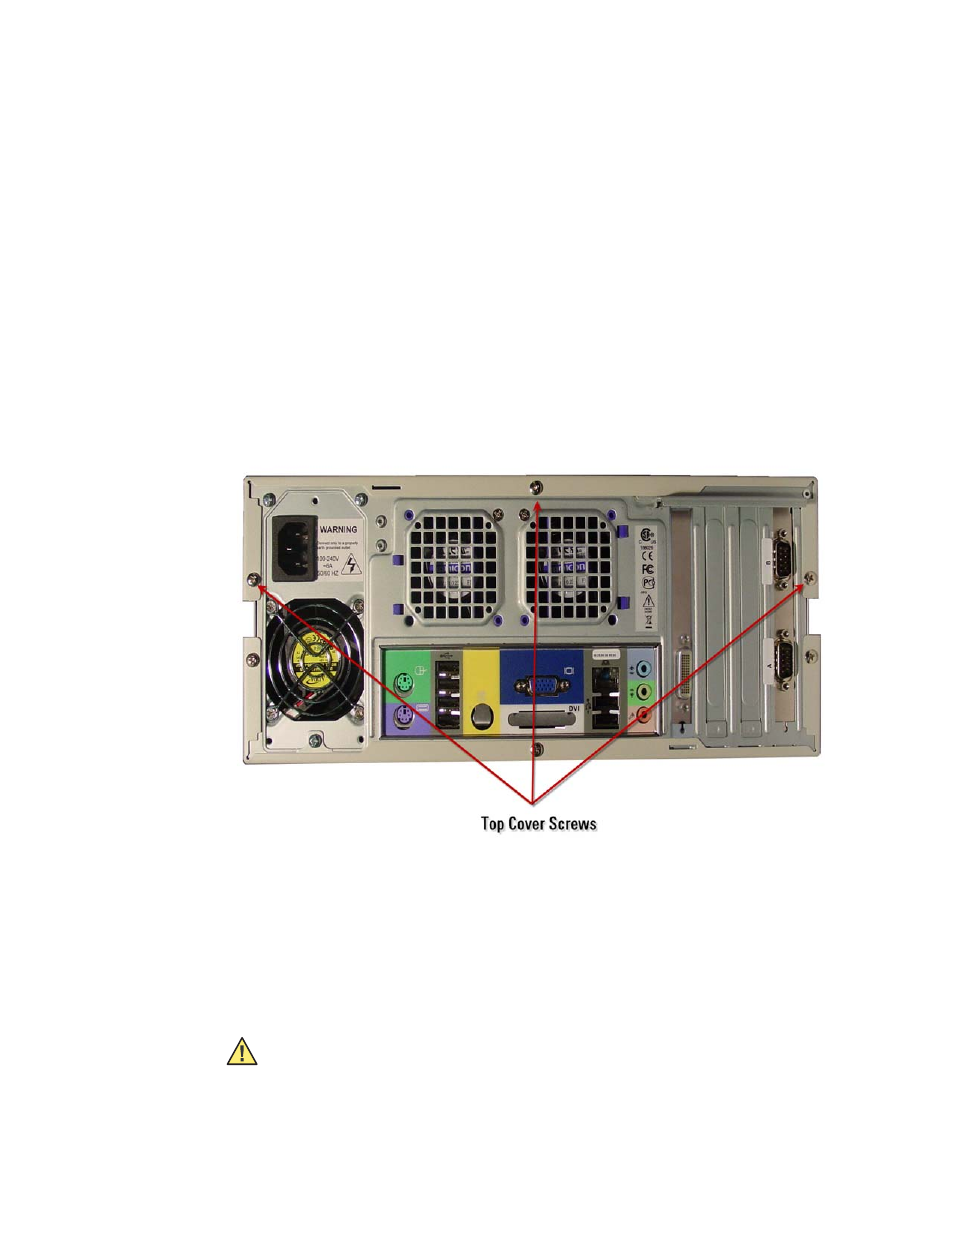
Facing the rear of the CPU with the video connections in view, use a #2 Phillips
screwdriver to remove the three screws securing the top vented cover to the chassis.
Refer to
“Figure C-2: Remove the Top Cover Screws”
Figure C-2: Remove the Top Cover Screws
4.
Place a hand on each corner of the top cover. While putting pressure on your fingers,
use your thumb to push the chassis forward. This will cause the cover to separate
from the chassis base. Refer to
“Figure C-3: Slide Top Cover Towards Rear of CPU”
5.
Slide the top cover backwards about 1 inch (2.5 cm) to clear the front edge of the
chassis. Lift the top cover upwards away from the chassis. Place the cover to the side
where it will not get scratched or damaged.
Caution Use care when sliding the top cover backwards so as not to damage
the attached internal foam block, present on updated units. The foam block helps
support the video cards in place so as not to become dislodged. Do not remove
the foam block. See
“Figure C-4: Foam Block Location, Mounted to Inside of Top
on page 133 for an example of the location of this foam block.