Replacing 80mm cpu fans, Replacing 60mm pci fans – Kontron NSN2U IP Network Server User Manual
Page 58
57
Replacing 80mm CPU Fans
The four 80mm fan assemblies are located behind the SAS/SATA backplane board and HDD
bay enclosure. (See Figure 2, “K”)These fans are in front of the T5520UR server board
and provide cooling for the CPUs and memory DIMMs
1. Remove the front chassis cover. For instructions see “Removing the Front Cover” in
2. Determine which fan has failed by finding the LED that is amber. (The LED is next
to the blue grommet on the top of each fan assembly.)
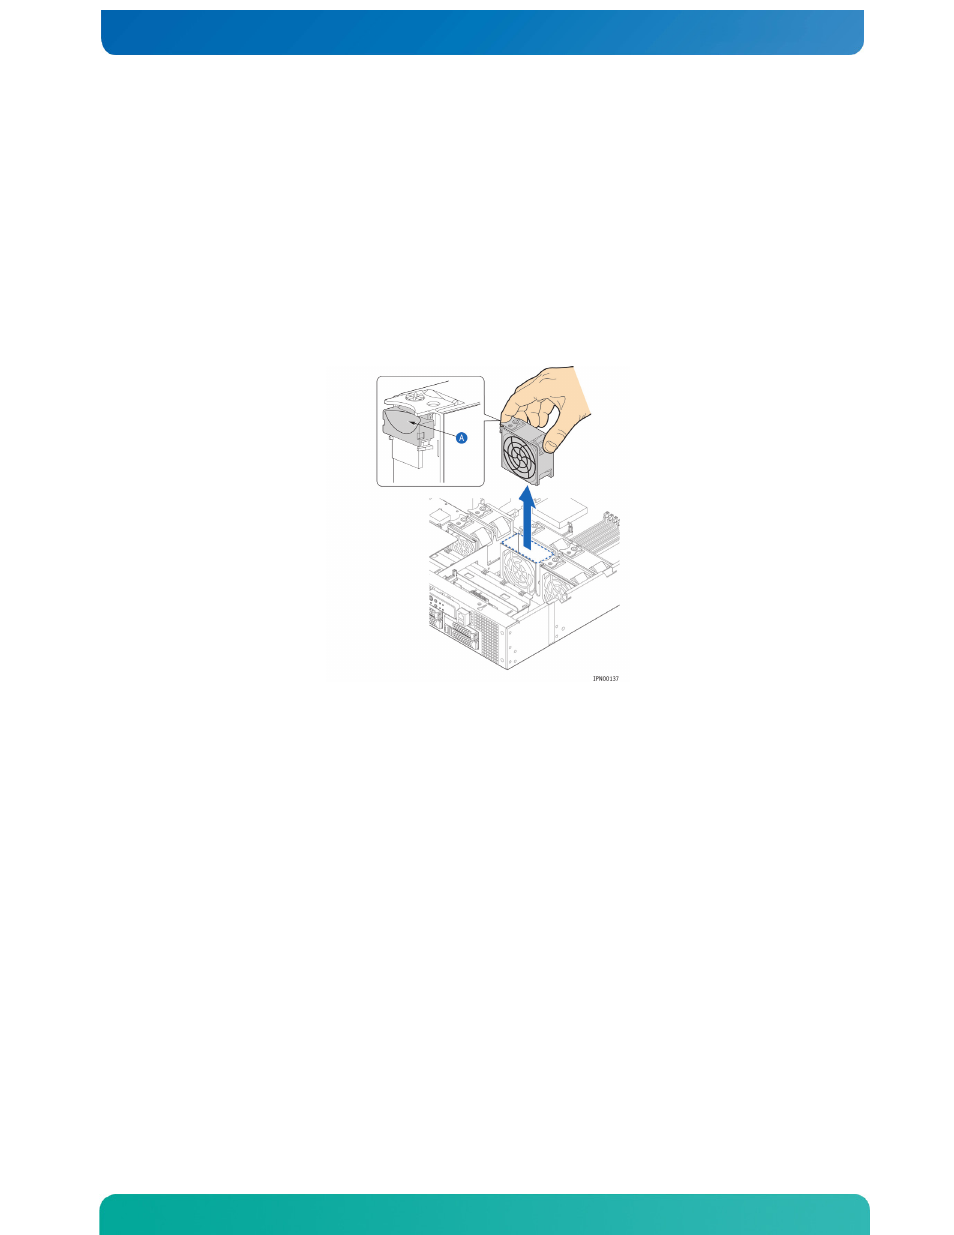
3. Remove the failing fan by grasping both sides of the fan assembly, using the
plastic finger guard on the left side and pulling the fan out of the metal
enclosure that houses the fans and the power cables. (Figure 47, “A”)
Figure 47. Removing a Fan from the Chassis
4. Replace the fan by inserting it into the same slot. Use the edges of the metal
enclosure to align the fan assembly properly and to make sure the power connector
is seated properly in the header on the side of the metal enclosure.
5. If this is the last task you are performing, close the front chassis cover.
Replacing 60mm PCI Fans
The two 60mm fan assemblies are located behind the SAS/SATA backplane board and HDD
bay enclosure. (See Figure 2, “K”)These fans are in front of the riser card assembly
and provide cooling for the PCI cards in this assembly.
1. Remove the front chassis cover. For instructions see “Removing the Front Cover” in
2. Determine which fan has failed by finding the LED that is amber. (The LED is next
to the blue grommet on the top of each fan assembly.)
3. Remove the failing fan by grasping both sides of the fan assembly, using the
plastic finger guard on the left side and pulling the fan out of the metal
enclosure that houses the fans and the power cables. (Figure 47)
4. Replace the fan by inserting it into the same slot. Use t he edges of the metal
enclosure to align the fan assembly properly and to make sure the power connector
is seated properly in the header on the side of the metal enclosure.
5. If this is the last task you are performing, close the front chassis cover.