8 installing pci add-in cards – Kontron NSN2U IP Network Server User Manual
Page 48
47
4. Fasten the riser card to the bracket with the two 6/32 screws. (“B” and “C”)
Torque screws to 8lbf*in.
At this point the riser card is ready for you to install add-in cards.
4.8 Installing PCI Add-in Cards
The three riser card options support different combinations of PCI-X and/or PCIe add-
in cards. See Figure 8 for the possible configurations. The figures in this section
use the 2U PCI-X/PCIe “butterfly” riser card and add-in card options as the example.
CAUTION: When handling a PCI add-in card, observe the normal safety and ESD
precautions. See Appendix A: Safety Information for more information.
To install a PCI add-in card, you must first remove the riser card assembly from the
server chassis. See “Removing the Riser Card Assembly“ in Section 3.2 for more
information.
1. Turn the riser card assembly upside down so it is resting on the top of the sheet
metal cage.
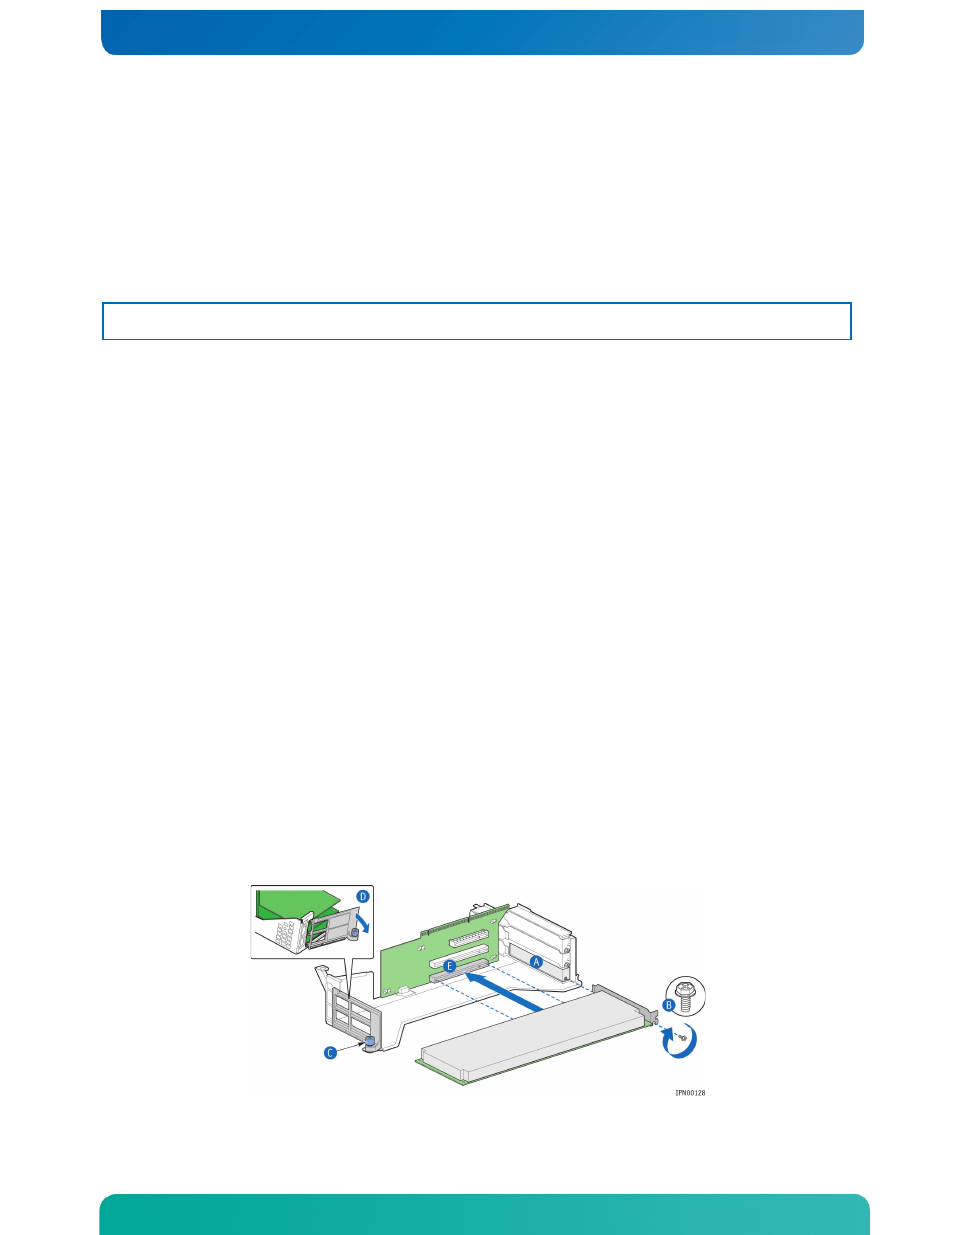
If the add-in card slot you want to use is currently empty, remove the filler
panel from the rear panel of the chassis. (
Save the screw to use with the new add-in card.
3. If you are replacing a PCI card in a slot, remove the rear retention screw that
fastens the add-in card to the riser card. (“B”) and remove the card from the riser
card socket.
4. For a full-height add-in card, remove the front retention clip by loosening the
blue captive screw (“C”), rotating the clip outward, and disengaging the plastic
tabs from the metal sidewall. (“D”)
5. Attach the add-in card to the appropriate riser card connector. (“E”)
Be sure that the add-in card edge connector is seated in the riser card connector
correctly.
6. Fasten the add-in card to the riser card assembly bracket using the rear retention
screw. (“B”)
for full-height cards, also replace the front retention clip and tighten the blue
captive thumb screw. (“C”)
7. If this is the last task you are performing, replace the processor air duct, the
riser card assembly, and the back chassis cover.
Reconnect all the external devices and plug in the power cord(s)
Figure 37. Installing a PCI-X/PCIe Card in the Riser Card Assembly