Building the framework – page composition – DgFlick CalendarXpress User Manual
Page 49
User Manual-5.0
Page 49 of 65
Select individual, multiple or all photos or deselect selected photos with this ‘Select’ button
.
Send the edited photos to the Facebook account or any hard disk folder from ‘Send to’ option
.
Select the required photos; the selected ones have the
green tick mark on the top left corner of the photo.
After selecting the photos and setting its arrangement click on ‘Next’ button
to go to ‘Design Calendar’ window,
where you can view the Calendar ready with the selected parameters and can also make any changes if required with
the help of various tabs available.
Note: Functions marked with * marks are only for PRO version users.
Building the Framework – Page Composition
In previous section we learnt how to create Calendar in different ways. In this section we will learn how to align and
decorate Calendar.
Basic Page and Photos
While you are designing the Calendar, you need flexibility in operations to help you manipulate the photos to achieve
the desired layout. Calendar Xpress gives you this flexibility and more. This section deals with the additional features
in the software that helps you in page composition.
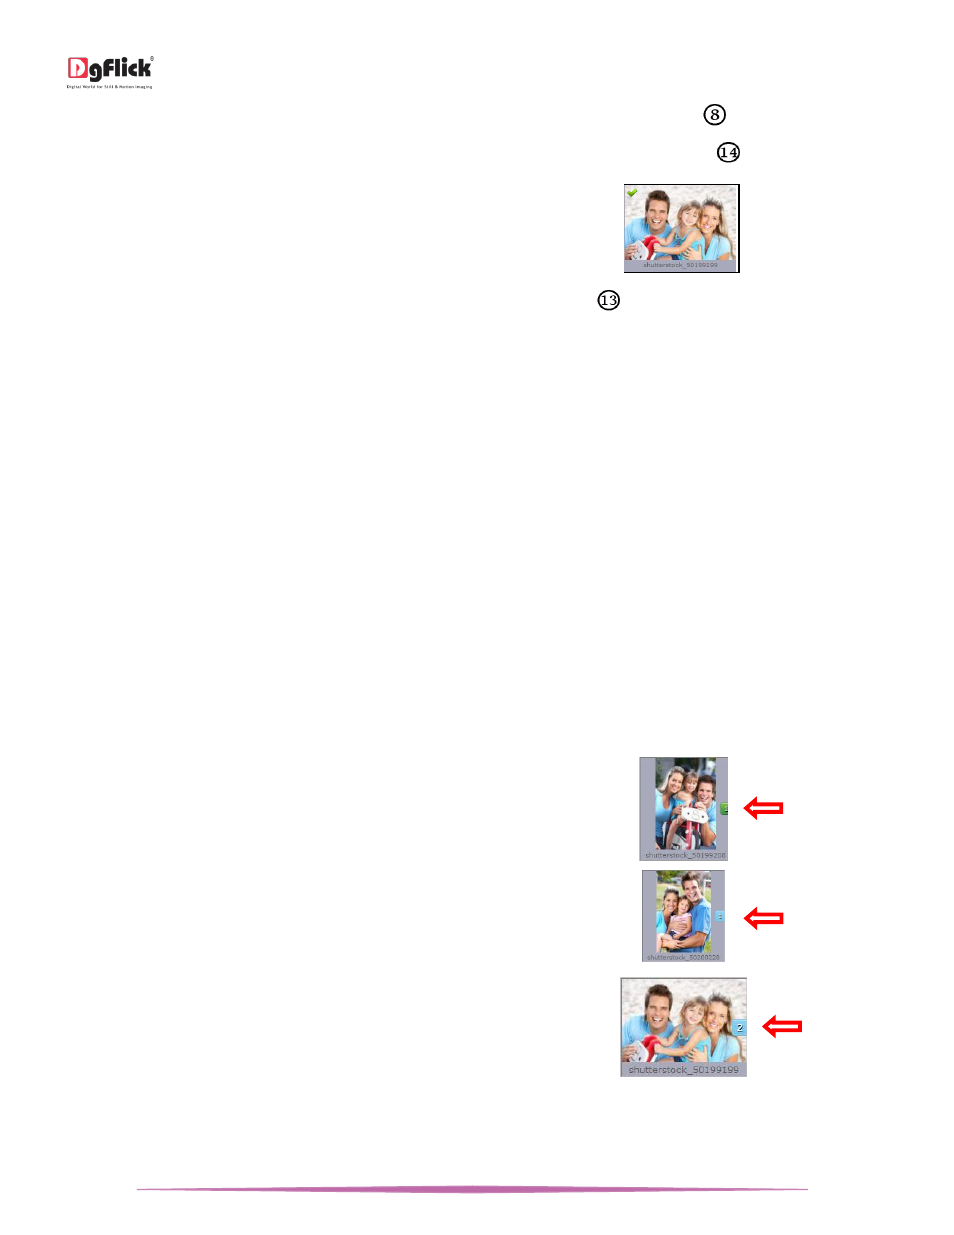
Used Photo Indicator
While designing Calendar you may be dealing with a large number of photos and managing them might turn out to be
a cumbersome task. Calendar Xpress helps you sort the photos and manage them better by indicating the photos that
have been used and the number of times they have been used in the Calendar. This helps you plan the Calendar with
the remaining photos and also avoid using the same photos multiple times without being aware that you are doing
so.
Green tab on the photo: This indicates the photos
used in Calendar on other page.
Blue tab on the photo: This indicates the photos used
in Calendar on current page.
Number on the tab: This indicates the number of
times the photo has been used in the Calendar.
Besides these options, photos can be sorted as ‘used’
and ‘unused’ by selecting the ‘Used’ button on the
‘Sort By’ button.