Manage the photos – DgFlick CalendarXpress User Manual
Page 45
User Manual-5.0
Page 45 of 65
The friends who have not specified their birthdays or kept the visibility of the birthday limited to friends will be
shown as unassigned birthdays.
The list of unassigned birthdays will be displayed at the bottom of the events in every monh.
You can specify the birthdates of unassigned people by editing the event.
‘Select Events’ window …. Birthdates imported
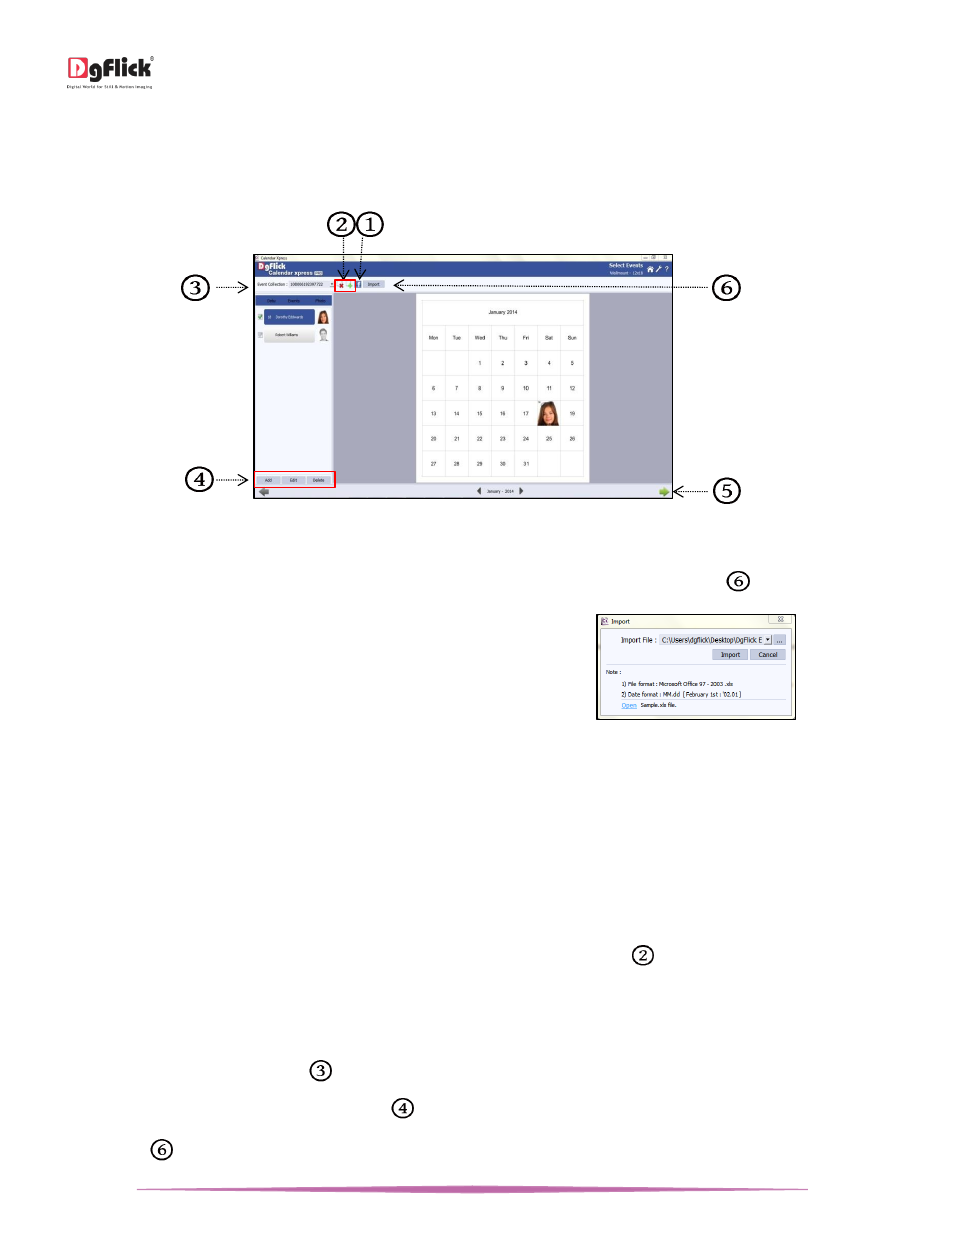
Calendar Xpress always allows you to add events as per your comfort.
You can also assign an excel sheet and can add events in the calendar from the ‘Import’ button
.
Click on ‘Import’ button. In a window that appears on
the screen, give the path of the excel sheet from
‘Browse’ button. You can see a sample excel sheet by
clicking on ‘Sample’ button.
Once you give the path, click on ‘Import’ button.
You will see that the events are added into the calendar and you can view them month wise.
In this way you can add events to the Calendar.
Manage the Photos
In this section we will learn how to manage our photos.
After selecting Category, Size and theme, we are redirected to ‘Select Photos’ window. On the ‘Select Photos’ window
select the photos of which you want to create the Calendar.
On the ‘Select Photos’ window, you have the option of selecting the photos from
the
Hard disk
CD/DVD
USB
Bluetooth
Select any of the media where the photos have been saved.
Go forward or backward from here
.
View your folders in list or icon style from here
.
This button
on the top right corner of the Window to zoom in/out the photos.