DgFlick CalendarXpress User Manual
Page 20
User Manual-5.0
Page 20 of 65
Select the day of the week to start from ‘Week Starts From’ drop down menu.
Select the weekly holiday for the Calendar from ‘Weekly Holiday’ drop down menus. You can specify upto two weekly
holidays from here.
Select all the desired fields and click on ‘Next’ button
to go to ‘Select Events’ window.
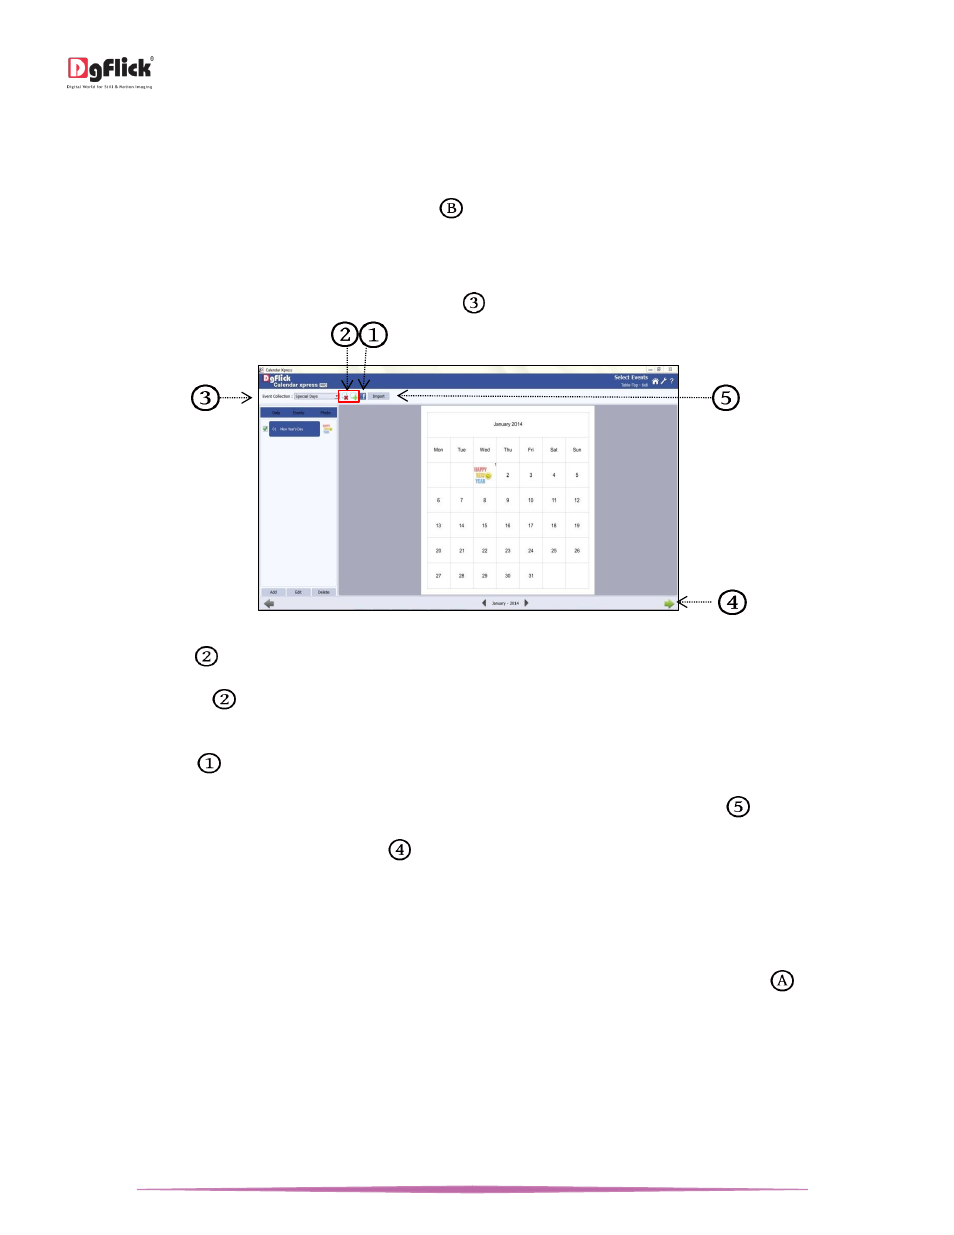
Select Events
Select the events to be added from Events Collection tab
.
‘Select Events’ window
Click on ‘Add’ icon
to create your own event collection. (for Details refer section Add Events to the Calendar)
Click on ‘Delete’ icon
to delete the event collection.
You can add birthdays of your Facebook Friends to the Calendar as a event. To add Birthdays to your calender, click
on ‘Facebook’ icon
. (for Details refer section Add Events to the Calendar)
You can also assign an excel sheet and can add events in the calendar from the ‘Import’ button
.
After setting the events, click on ‘Next’ button
to go to ‘Select Theme’ window.
Select Theme
On the ‘Select Theme’ window, you can see the various templates for the Calendar.
You can filter the parameters for the template selection as per your choice. Shown in the ‘Option bar’
at the
bottom of the page.
o Orientation: The default orientation for the Calendar size will be show in the box. However, you could change this
by clicking on ‘Orientation’ drop down menu.
o Number of photos: Decide the number of photos to be used in the Calendar by clicking on ‘No. of Photos’ drop
down menu.
o Theme: The theme for the Calendar can be chosen by clicking on ‘Themes’ drop down menu.