DgFlick CalendarXpress User Manual
Page 22
User Manual-5.0
Page 22 of 65
‘Selected Photos’
shows the number of photos selected.
You can see no of photos required for the Calendar from ‘Required Photos’
.
Once you select the required number of photos, click on ‘Next’ button
to go to the ‘Design Calendar’ window.
Design Calendar
The Calendar is now ready with the selected photos and can be viewed in the ‘Design Calendar’ window.
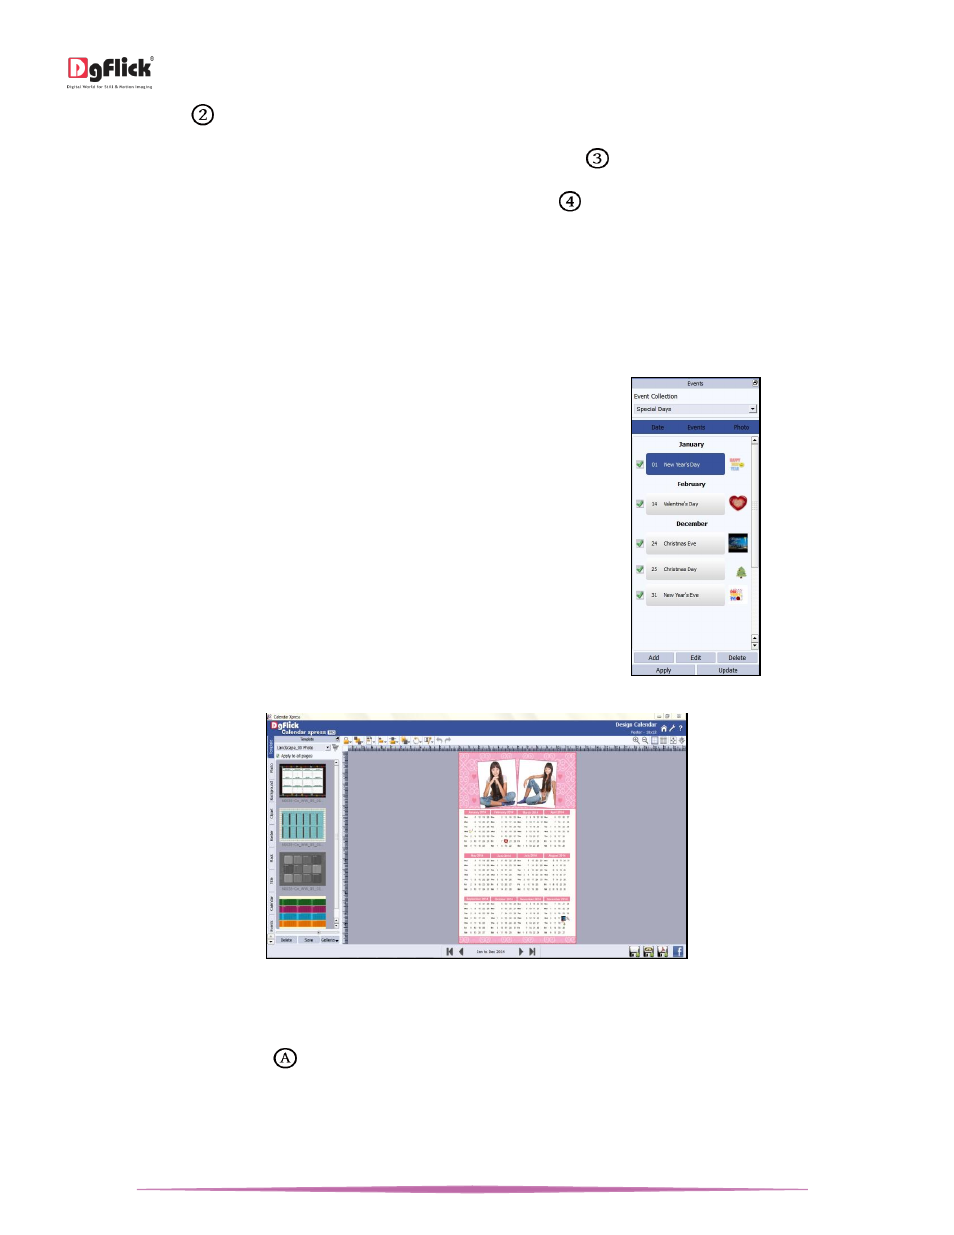
Event
Click on ‘Events’ tab on the left panel to insert events
to the Calendar.
Select the desired event collection from ‘Event
Collection’ drop down menu.
Select the event collection and click on ‘Apply’ button
to overwrite the existing events.
Select another event collection and click on ‘Update’
button to add one more event to the Calendar.
You can add, edit and delete event from ‘Add’, ‘Edit’
and ‘Delete’ button. (Refer section Add Events to the
Calendar)
Events tab
The ‘Design Calendar’ window
Background
Click on the ‘Background’ tab
on the option bar to select the background for the Calendar.
Besides the in-built backgrounds, you could access and select backgrounds that you have saved elsewhere by clicking
on the ‘Browse’ button. The last 15 paths used can be viewed.
To use a background, double click on it or drag and drop it on the canvas from the option bar.