Kpm iii monitor operation – Kinze 3200 Wing-Fold Planter Rev. 7/14 User Manual
Page 118
M0241-01
Model 3200
6-28
Rev. 7/12
TM
KPM III Monitor Operation
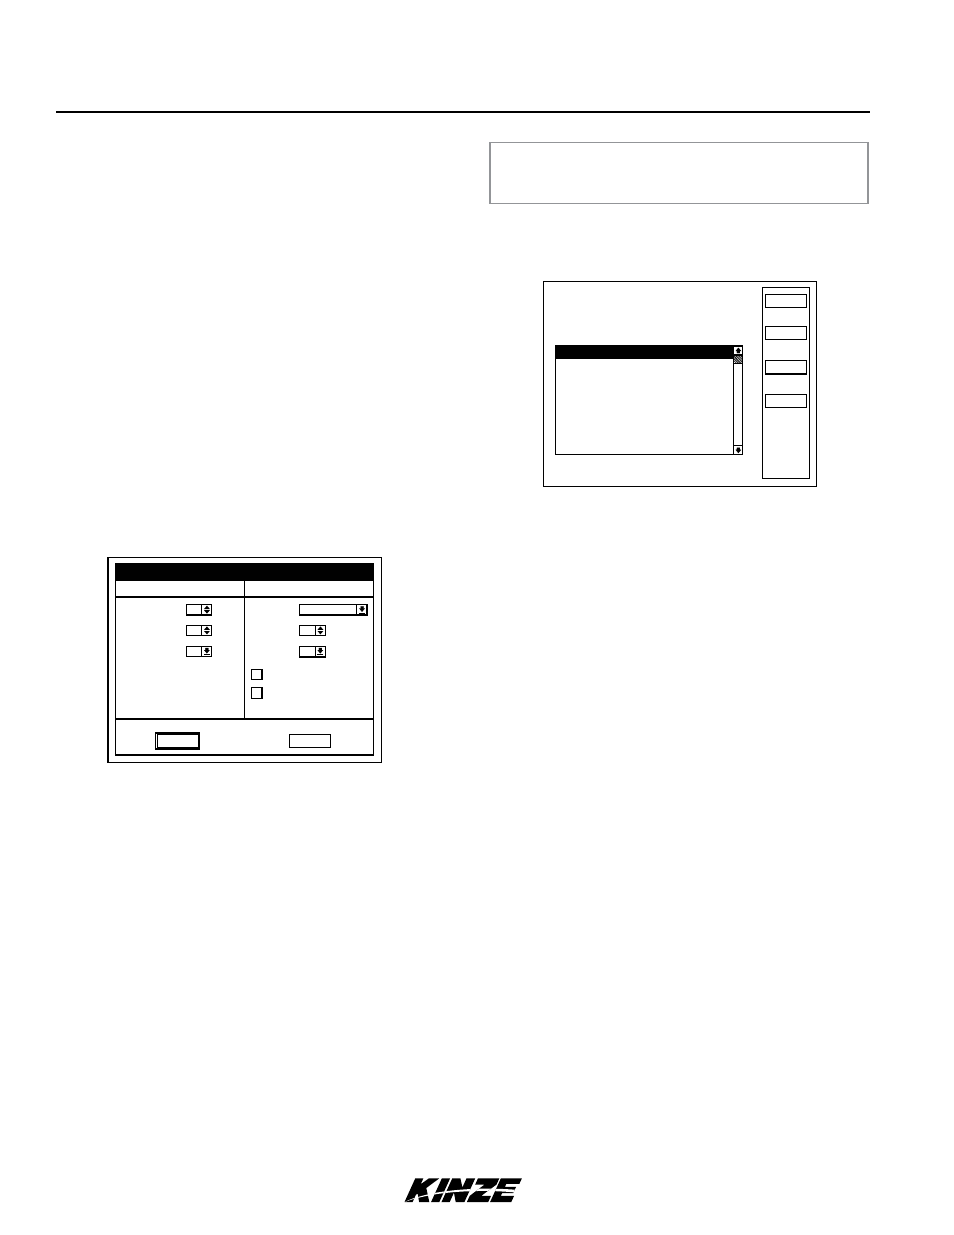
STEP 8
If applicable, turn knob or use arrow keys to advance
to “Vacuum”. Press knob or Enter key and a drop
down menu will appear. Select correct number of
vacuum sensors by turning knob or using arrow
keys. Confirm selection by pressing knob or Enter
key.
STEP 9
If applicable, turn knob or use arrow keys to
advance to “SDS” (Seed Delivery System), Press
knob or Enter key. A drop down menu will appear.
Select correct number of SDS Sensors by turning
knob or using arrow keys. Press knob or Enter key
to confirm selection.
STEP 10
If applicable, turn knob or use arrow keys to advance
to “Hydraulic Level/Temp”. Press knob or Enter key
to select or deselect. When selected, a check mark
will appear in the box.
STEP 11
If applicable, turn knob or use arrow keys to advance
to “Downpressure Level”. Press knob or Enter key to
select or deselect. When selected, a check mark will
appear in the box.
STEP 12
Advance to “OK” by using knob or arrow keys. Press
knob or the Enter key to save information.
NOTE: To prevent configuration from being saved select
“Cancel” and press rotary encoder knob or Enter key.
Display will return to “Setup Mode” screen without saving
any changes.
NOTE: When OK is selected monitor automatically advances
to Sensor Setup screen. Sensor Setup can also be selected
from Setup Mode screen. Go to page 6-13 (PROGRAMMING/
CONNECTING SEED TUbES, SHAFT ROTATION SENSORS
AND/OR RADAR/MAGNETIC DISTANCE SENSORS)
SDS = Seed Delivery System
There should be one sensor
for each Row and each Shaft.
Cancel
Kinze Planter Configuration
Planter Type
Sensors Installed
Front Rows
11
OK
Rear Rows
12
Shafts
2
Speed
Radar
Vacuum
0
SDS
Hydraulic Level/Temp
0
Downpressure Level
GENERAL SETTINGS
(PROGRAMMING INTERPLANT CONDITION, ROW SPACING
AND UNITS) (METRIC OR ENGLISH)
STEP 1
Turn knob or use arrow keys to highlight “1. General
Settings”. Press knob or Enter key to display highlighted
item.
NOTE: When English is selected inches are displayed, if Metric
is selected centimeters are displayed.
STEP 2
Press knob or Enter key to enter correct value for “Row
Spacing”. A drop down number pad will appear. Turn
knob or use arrow keys to highlight first digit of desired
number and press knob. The number will appear
in “Row Spacing” line. Turn knob or arrow keys to
highlight next digit of number and press knob. Number
will appear in “Row Spacing” line. When correct
number is displayed in “Row Spacing” line, press Enter
key to return to “General Settings” screen.
NOTE: Enter narrowest row spacing planter is equipped to plant
for “Row Spacing”. Example: 12 Row 30 with Interplant, row
spacing would be set to 15.
STEP 3
Turn knob or use arrow keys to highlight “Units of
Measure” field. Select “Units of Measure” field by
pressing knob or Enter key, a drop down menu will
appear. Highlight “English” or “Metric” by turning knob
or using arrow keys. When correct entry is highlighted,
press knob or Enter key to accept unit of measure
entry and return to “General Settings” screen.
STEP 4
Turn knob or use arrow keys to highlight “Area Counters”
field. Select “Area Counters” field by pressing knob or
Enter key, a drop down menu will appear. Turn knob
or use arrow keys to highlight “Confirm each enable/
disable”, “Don’t confirm again today”, or “Don’t confirm
enable/disable”. When desired selection is highlighted,
press knob or Enter key to accept selection and return
to “General Settings” screen.
STEP 5
Once correct values are inputed into “General Settings”
screen “OK” button can be selected to save changes,
or “Cancel” button can be selected to discard changes.
Turn knob or use arrow keys to highlight either “OK”
or “Cancel” and press knob or Enter key to return to
“Setup Mode” screen.
Status
Plant
About
Setup Mode
Configuration:
Effective row spacing: 15.0
Front / Rear
1. General Settings
2. Seed Meter Settings
3. Row Unit Alarm Levels
4. Setup Data Logging
5. Configure Planter Monitor
6. Add New Muxbus Sensors
7. Add Single Interplant Row
8. Select Speed Sensor
9. Sensor Setup
10.Calibrate Speed Sensor
Logdata