Field operation -15, Replacing a faulty sensor -15, 15 kpm ii monitor operation – Kinze 3200 Wing-Fold Planter Rev. 7/14 User Manual
Page 105
TM
Model 3200
M0241-01
6/11
6-15
KPM II Monitor Operation
REPLACING A FAULTy SENSOR
NOTE: Stack-Mode Seed Sensors are identified by a blue 3-pin connector. Replace Stack-Mode Seed Sensors with like components
only.
To replace a faulty sensor; (a) disconnect the faulty sensor and check the monitor to be sure the correct sensor was disconnected, (b) turn
the monitor off, (c) after a few seconds, turn the monitor back on and (d) plug in the replacement sensor. The monitor will chirp twice to
acknowledge the new sensor was learned and saved.
To replace more than one faulty sensor, proceed as stated above for rear/front or left/right configurations beginning with the lowest numbered
row in the rear or left section and continue to replace sensors in ascending order. Then move on to the front or right section and continue
in ascending order. For four section configurations, begin with rear/left and continue to rear/right, then front/left and ending with front/right.
If the monitor detects a faulty distance sensor, the lower LCD will immediately move to the speed display, show the word “PICKUP” or
“RADAR” depending on the distance sensor installed, and the alarm will sound.
NOTE: If the monitor is not turned off and then on, the replacement sensor(s) will be ignored until the next power on, at which point
the sensors will be randomly learned by the monitor.
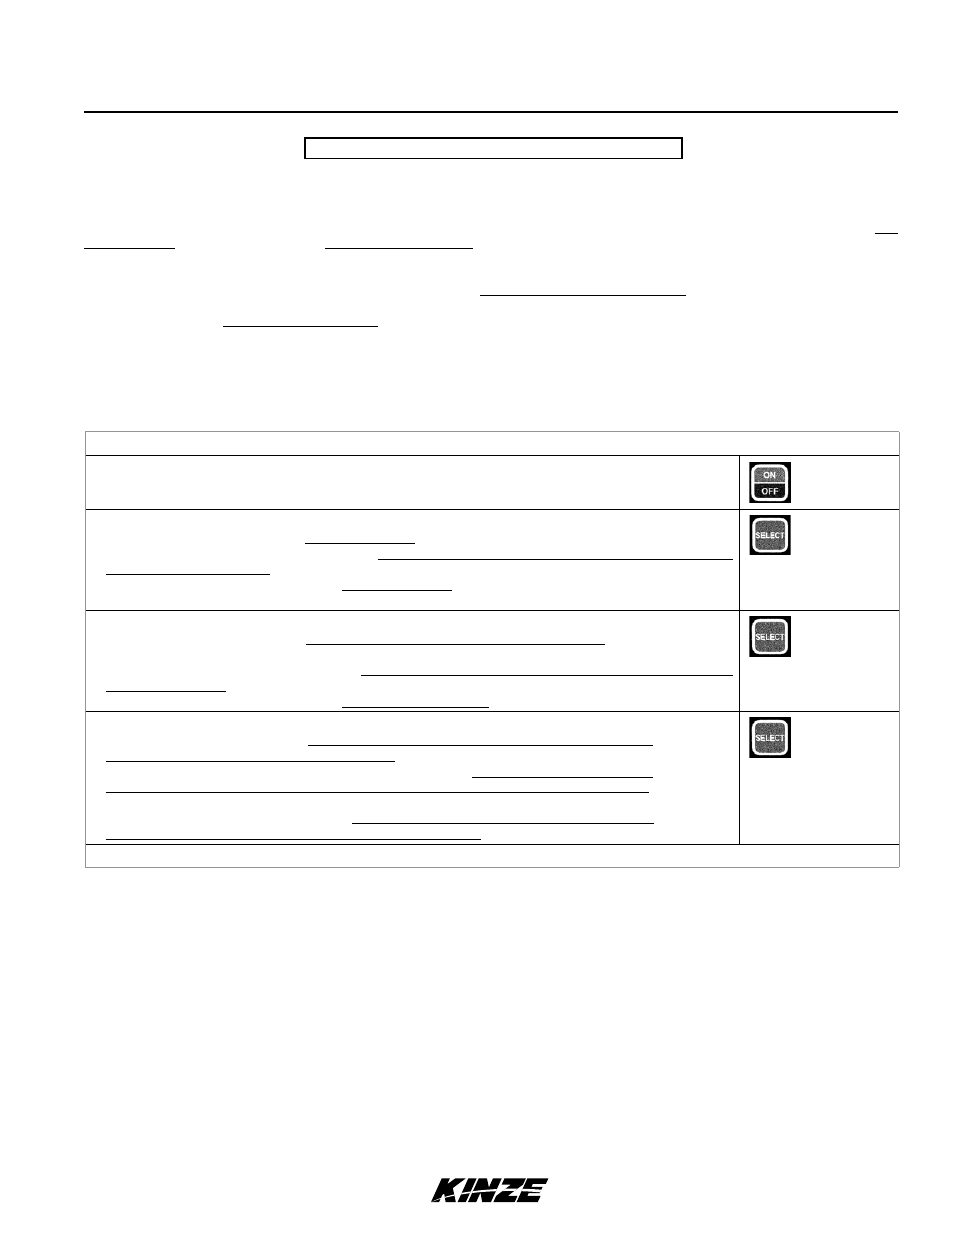
FIELD OPERATION
Press ON/OFF key to turn monitor on.
Information regarding each section is displayed alternately every 5 seconds.
REAR/FRONT CONFIGURATION (Without SMM Console Installed)
• Press SELECT key once to show REAR section only. (Monitor sets correct row spacing.)
• Press SELECT key a second time to return to each section being displayed alternately every 5 seconds on
KPM II Stack-Mode console. (Monitor sets correct row spacing.)
• Press SELECT key a third time to show REAR section only.
REAR/FRONT CONFIGURATION (With SMM Console Installed)
• Press SELECT key once to show REAR section only on KPM II Stack-Mode console. (Monitor sets correct
row spacing.)
• Press SELECT key a second time to show FRONT section on SMM console and REAR section on KPM II
Stack-Mode console. (Monitor sets correct row spacing.)
• Press SELECT key a third time to show REAR section only again.
FOUR SECTION CONFIGURATION (With SMM Console Installed)
• Press SELECT key once to show REAR and LEFT sections on KPM II Stack-Mode console
and REAR and RIGHT sections on SMM console. (Monitor sets correct row spacing.)
• Press SELECT key a second time to return to all four sections, alternating right front and right
rear on SMM console and alternating left front and left rear on KPM II Stack-Mode console.
(Monitor sets correct row spacing.)
• Press SELECT key a third time to show REAR and LEFT sections on KPM II Stack-Mode
console and REAR and RIGHT sections on SMM console again.
NOTE: SELECT key has no function when a single section is used.