Kpm ii monitor operation – Kinze 3200 Wing-Fold Planter Rev. 7/14 User Manual
Page 110
M0241-01
Model 3200
6-20
6/11
TM
KPM II Monitor Operation
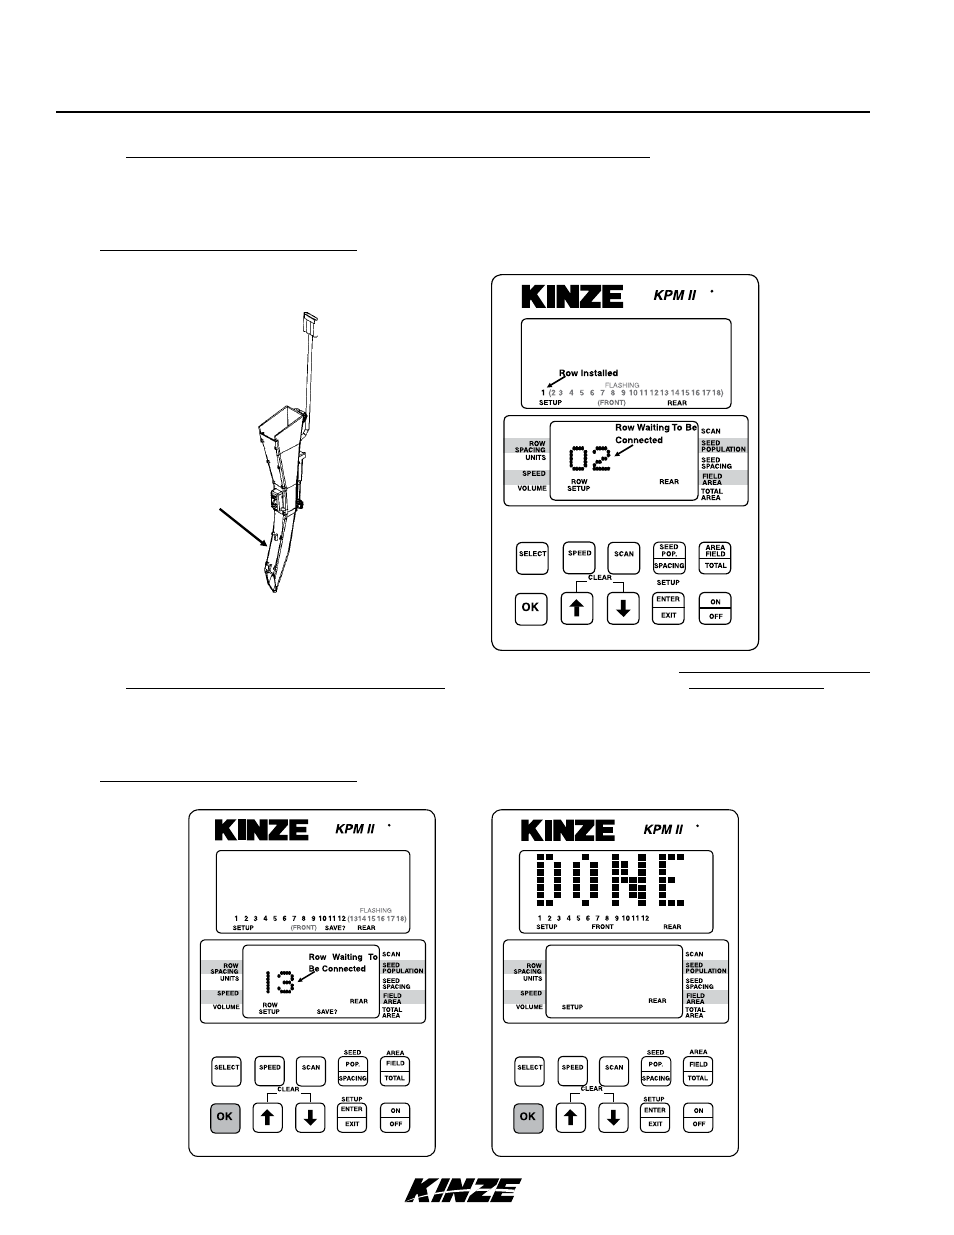
STEP 7 Determine which row you want as number one and plug seed tube w/sensor into harness.
Continue plugging in sensors along with shaft rotation sensors if so equipped. Row 1 first, row 2 second and so on up to 18 rows.
When a sensor is plugged in, the corresponding row number on upper LCD display will stay solid, monitor will chirp twice and a red
LED (Light Emitting Diode) on the seed tube sensor will turn on for approximately 30 seconds to show connection is made.
NOTE: Illustrated using rear/front configuration. The KPM II Stack-Mode console shows LEFT in the left/right configuration, REAR
in the rear/front configuration and REAR LEFT/FRONT LEFT in the four sections configuration.
Red LED
®
STEP 8 When all seed tubes for the current section (rear/front, left/right or four section) are installed, check to be sure the upper LCD
on KPM II Stack-Mode console displays solid numbers for the number of seed tubes connected. Press and hold OK key to save
current section setup. The SAVE? icon will display followed by continuous short beeps indicating the monitor is preparing to save.
The installer has 5 seconds to decide to save the current configuration. During this time, four short beeps will sound followed by
a long beep and the SAVE? icon will turn off and the word “DONE” shows on the screen. The monitor will continue to the second
section installation (If Applicable).
NOTE: Illustrated using rear/front configuration. The KPM II Stack-Mode console shows LEFT in the left/right configuration, REAR
in the rear/front configuration and FRONT LEFT/REAR LEFT in the four sections configuration.
®
®