Removing hot swap hard drives – HP Netserver L Server series User Manual
Page 27
Chapter 3
Installing Mass Storage Devices
21
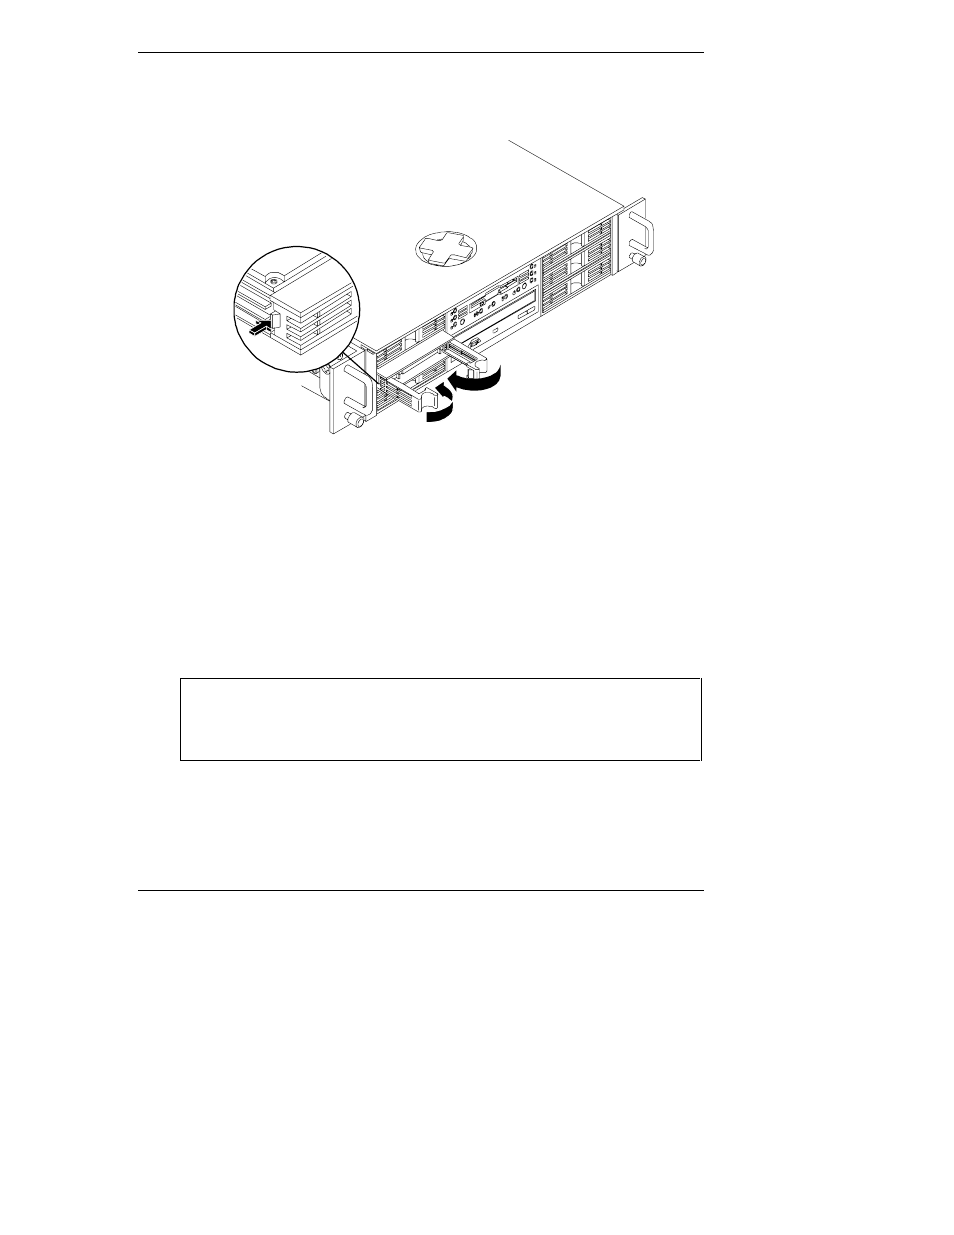
4. Make sure the drive is pushed in completely. Close the ejector arms and
press them in until the latch clicks into place. See Figure 3-4.
Figure 3-4. Closing Drive Ejector Arms
5. Verify that the drive is flush with the other drives. If
the drive is not flush,
it is not seated properly in the drive slot. Open the ejector arms and repeat
Step 3 and 4.
Make sure that you open the ejector arms wide before inserting the drive in
the slot. Push the drive in completely before attempting to close the ejector
arms.
Removing Hot Swap Hard Drives
CAUTION
Remove the drive slowly. Wait for the drive heads to park
before completely removing the drive. Follow the instructions
carefully to prevent damage to the drive head and head
actuator.
1. To unlock the drive, insert your thumb into the opening at the center of
the drive and pull the ejector arms outward until they click into the
open position. See Figure 3-5.
- xt1500 (58 pages)
- LaserJet 4700 (68 pages)
- ProLiant DL388p Gen8 Server (128 pages)
- ProLiant BL460c Gen8 Server Blade (67 pages)
- ProLiant DL360 Server (16 pages)
- ProLiant BL460c Gen8 Server Blade (65 pages)
- ProLiant BL465c Server Blade (87 pages)
- ProLiant DL388p Gen8 Server (47 pages)
- ProLiant BL40p Server series (73 pages)
- ProLiant ML115 Server (63 pages)
- ProLiant DL140 G2 Server (81 pages)
- Servidor HP ProLiant ML370 G4 (20 pages)
- Servidor HP ProLiant ML370 G4 (30 pages)
- Servidor HP ProLiant DL160 G5p (84 pages)
- Servidor HP ProLiant DL980 G7 (143 pages)
- Servidor HP ProLiant DL380 G5 (137 pages)
- Integrity rx2620 Servers (55 pages)
- 9000 rp3440 Servers (36 pages)
- Integrity rx2620 Servers (42 pages)
- Integrity rx2620 Servers (48 pages)
- Integrity rx2620 Servers (53 pages)
- Integrity rx2620 Servers (24 pages)
- Integrity rx2620 Servers (33 pages)
- Integrity rx2620 Servers (100 pages)
- Integrity rx2620 Servers (37 pages)
- Integrity Superdome sx1000 Server (53 pages)
- Integrity rx2620 Servers (37 pages)
- Integrity rx2620 Servers (58 pages)
- Integrity rx2620 Servers (77 pages)
- Integrity rx2620 Servers (107 pages)
- Servidor HP ProLiant DL360p Gen8 (129 pages)
- Servidor HP ProLiant DL120 G6 (133 pages)
- ProLiant MicroServer Gen8 (95 pages)
- ProLiant DL580 Gen8 Server (91 pages)
- ProLiant MicroServer (94 pages)
- ProLiant BL685c G5 Server Blade (99 pages)
- ProLiant Firmware Maintenance CD (87 pages)
- ProLiant BL40p Server series (30 pages)
- ProLiant BL10e Server Blade (232 pages)
- Serveur lame HP ProLiant BL680c G5 (90 pages)
- Serveur lame HP ProLiant BL465c Gen8 (578 pages)
- ProLiant DL320e Gen8 Server (96 pages)
- ProLiant ML110 G7 Server (113 pages)
- Integrity Superdome sx1000 Server (19 pages)
- 9000 rp8420 Servers (38 pages)