2 adjusting the stainless sheet tension – IAI America LSA-S10SS User Manual
Page 57
6. Maintenance and Inspection
51
6.6.2 Adjusting the Stainless Sheet Tension
1) First, affix the stainless sheet uniformly on the right and left in a manner free from meandering.
(The stainless steel sheet is gripped on with the magnets. Detach the sheet in a manner of
peeling it once from one edge. Also adjust the stainless sheet from the slider center toward
both ends.)
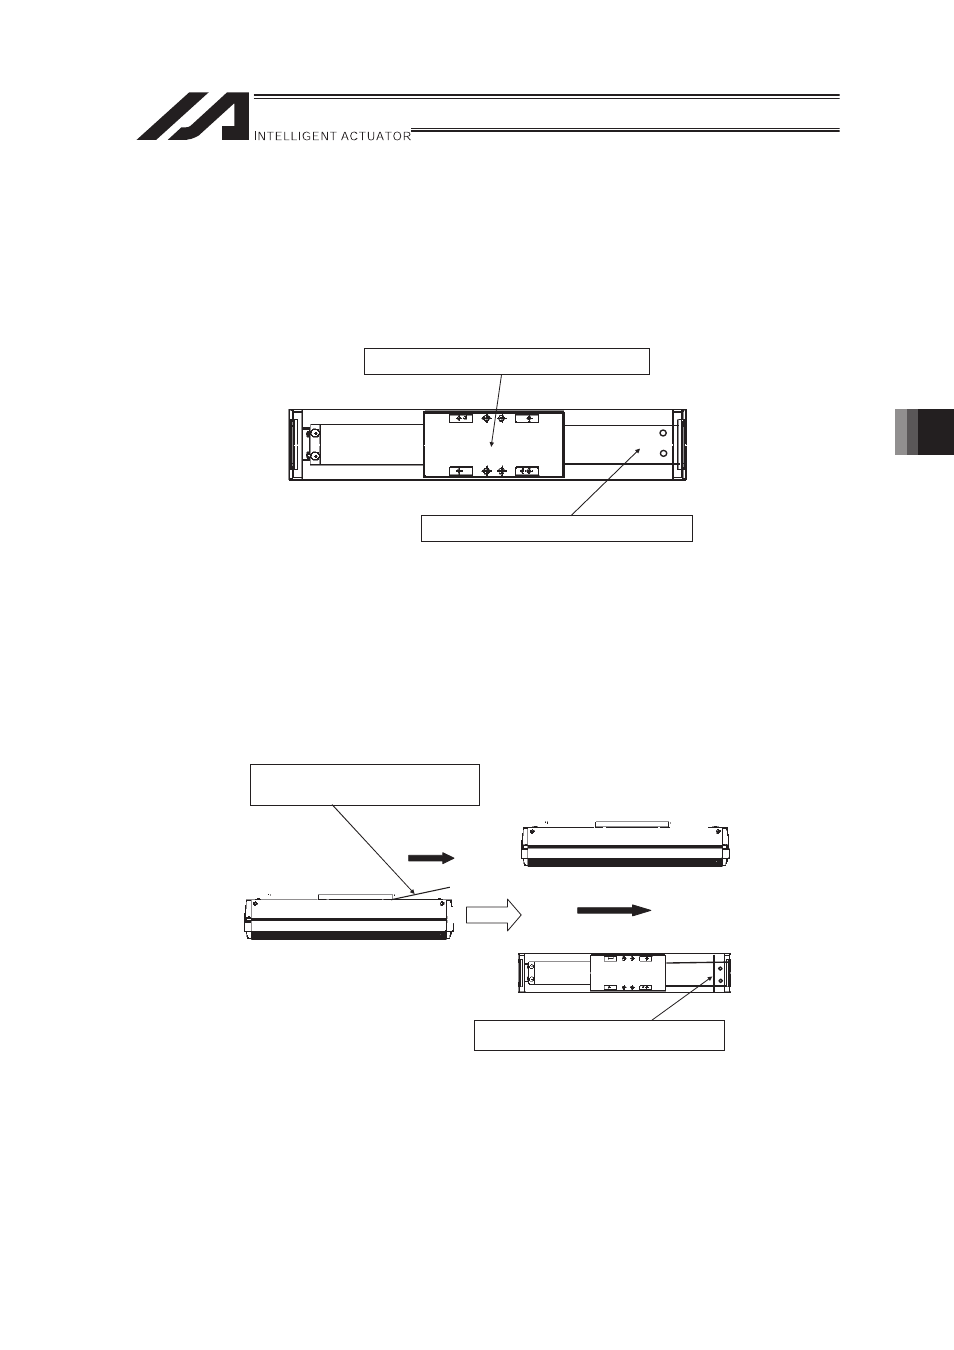
2) Move the slider to a position near the stroke center, and unscrew the screws holding the
stainless steel sheet with a 2.5mm-sized hex wrench on one side and remove the retainer
plate.
Move the slider to a position near the stroke center.
Remove the front stainless-sheet affixing screws.
3) Prepare for tension adjustment of the stainless sheet.
• As shown below, raise the stainless sheet by 1 to 2cm at the end where the screws were
removed in step 2), and then by using a tension gauge, pull the sheet in the direction of the
free end with a force of 2kg. (Use a tension gauge having two forked hooks at its tips and
hook the gauge at two locations on the stainless sheet.)
• With the stainless sheet tensioned by a force of 2kg, allow the stainless sheet to be attracted
to the magnets from the slider end toward the other end, and then remove the tension gauge.
(Once attracted to the magnets, the stainless sheet will not move.)
• Use an oil-based marker and ruler to draw a straight check line that crosses over the side
covers and stainless sheet. [Refer to the figure below.]
Raise the stainless sheet and pull (to a
height of 1 to 2 cm at the end).
(Use a tension gauge.)
2kgf
2kgf
Draw a check line using an oil-based marker.