3 attachment of transported object – IAI America LSA-S10SS User Manual
Page 42
2. Installation
36
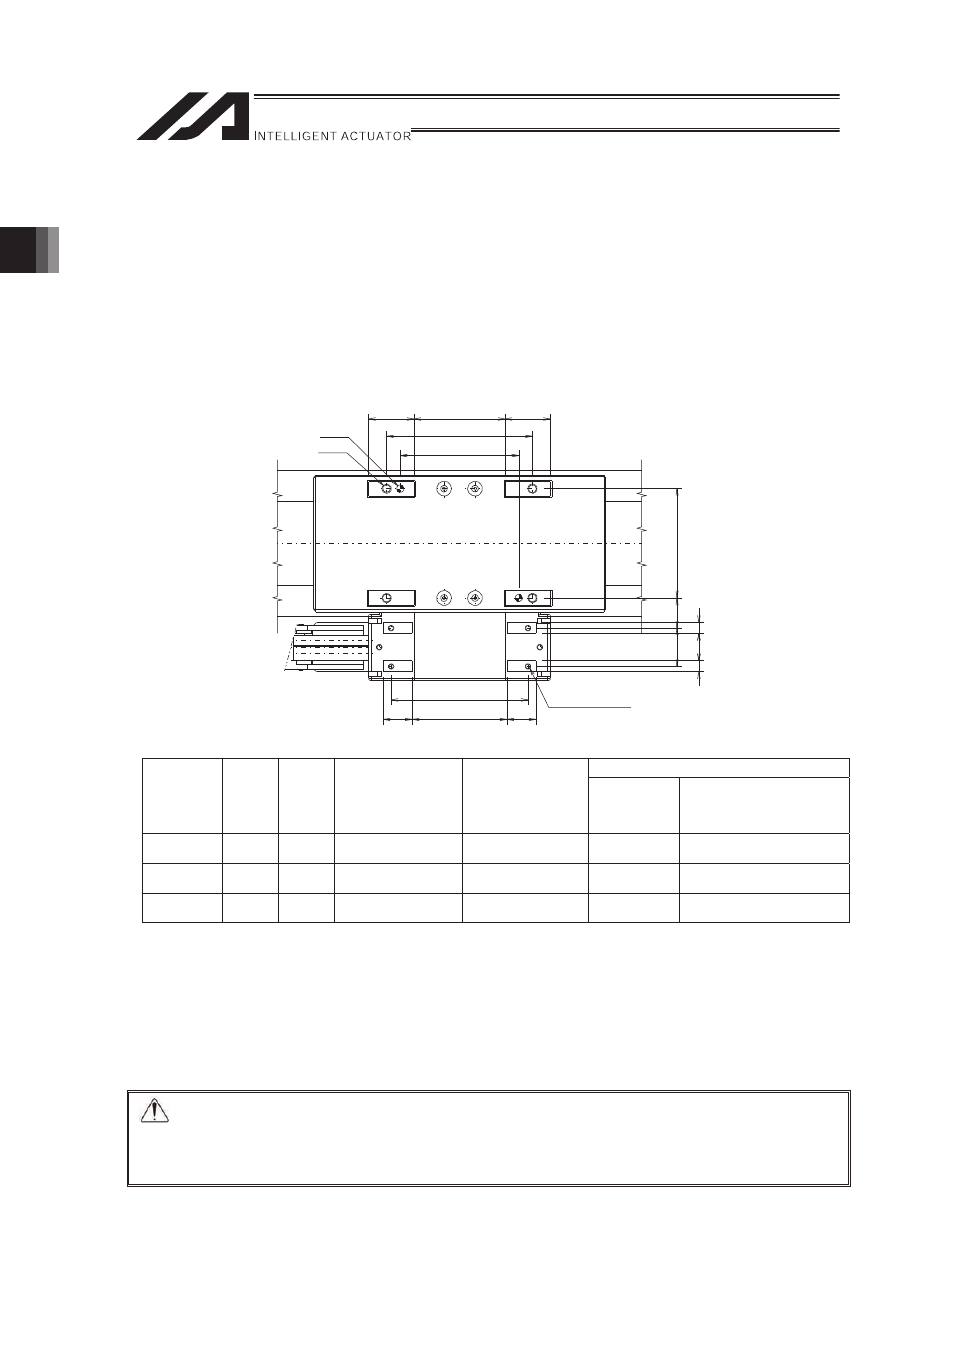
2.3.3 Attachment of Transported Object
• There are tapped holes on the top surface of the slider. Affix the work part (transported object)
here.
• The procedure to affix a load on the slider shall conform to the actuator installation procedure.
• There are two reamed holes on the top surface of the slider. Use these reamed holes if
repeatability of attaching and detaching is required. Also, if small tuning such as perpendicularity
is required, use one of the reamed holes for the tuning.
• Refer to the following table for the screwed depth and reamed depth. Screwing further than
indicated in the table may destroy the tapped hole or lower the reinforcement of the attachment of
the work part, result in the drop of the accuracy or an unexpected accident.
2-C
4-D
25
25
50
80
65 ±0.02
75
52
16
16
4-M3, depth 5
A
(Reamer pitch: ±0.02)
21
B
15
6
6
About Tightening Screws
•
Use a hex socket head cap bolt for the attachment to the base.
• It is recommended to use high-tensile bolts with ISO-10.9 or more.
• Make sure to have the effective length of bolt engagement described below or more for the
tightening of a bolt and a female screw.
When female screw is on steel � Thread length same as nominal diameter
When female screw is on aluminum � Thread length 1.8 times longer them nominal diameter
Caution: Pay special attention when selecting the bolt length. In case that an inappropriate
length of a bolt is applied, it may cause damage on the tapped holes or insufficiency
in attachment strength, which may result in a drop in the operation accuracy or an
unexpected accident.
Mounting Bolt
Model
Name
A
B
C
D
Nominal
Bolt
Diameter
Tightening Torque
S6
45
14
�
4H7, depth 8
M4, depth 10
M4
1.76N·m (0.18kgf·m)
S8
60
16.5
�
4H7, depth 8
M5, depth 10
M5
3.42N·m (0.35kgf·m)
S10
80
16.5 �6H7, depth 10
M6, depth 10
M6
5.36N·m (0.55kgf·m)